Makes sense, looks like you may have to resort to stripping Neilozbilt wrote:Actually that is the worst side to do. You get "ghosting" on the outside panel as the heat is restricted to the areas of the outer panel that is seen from underneath. Panels such as hoods (bonnets) trunks (boot lids) & complete door shells should be dipped (if anything) & not blasted at all.scott66stang wrote: I have also been told that if i do take that route to only sandblast one side of the panel, normally the underneath of the bonnet or boot as it has all the bracing and is harder to do by hand.
Black Beauty!
Moderator: Moderators
-
scott66stang
- Mustang King

- Posts: 4716
- Joined: Wed Jul 28, 2010 6:15 am
Re: Black Beauty!
Converting Rust to Something Drivable
66 Fastback Fairstang Project http://www.mustangtech.com.au/Forums/vi ... art=0.html
67 convertibuild project http://www.mustangtech.com.au/Forums/vi ... art=0.html
Thought Collecting Couch http://www.mustangtech.com.au/Forums/vi ... =1739.html
Caddy Wacked http://www.mustangtech.com.au/Forums/vi ... art=0.html
-
unilec5544
- Mustang Star

- Posts: 537
- Joined: Thu Dec 16, 2010 11:04 pm
Re: Black Beauty!
Oh well it looks like the long way round, anyway the money saved will come in handy. 
Re: Black Beauty!
I do a lot of paint stripping with 8" velcro back padds on a sander/polisher. Just don't heat up the panel. Then use stripper for the hard bitts.
-
unilec5544
- Mustang Star
- Posts: 537
- Joined: Thu Dec 16, 2010 11:04 pm
Re: Black Beauty!
Time for another small update, been busy at work so had to put the car on the back burner for a while.
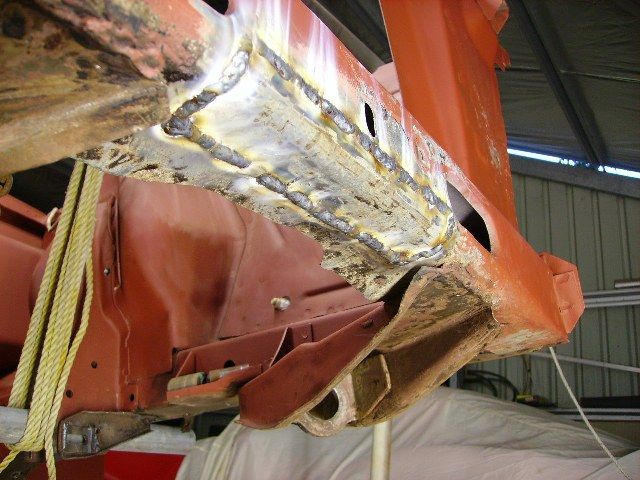
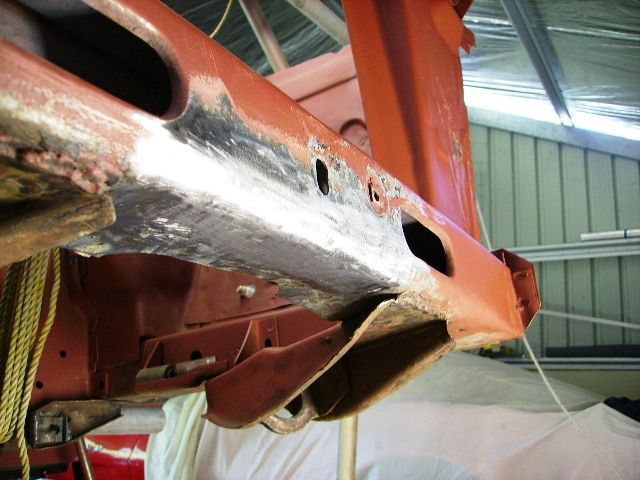
Decided to straighten out the front radiator support, where some idiot thought it would be a good place to jack the car up.
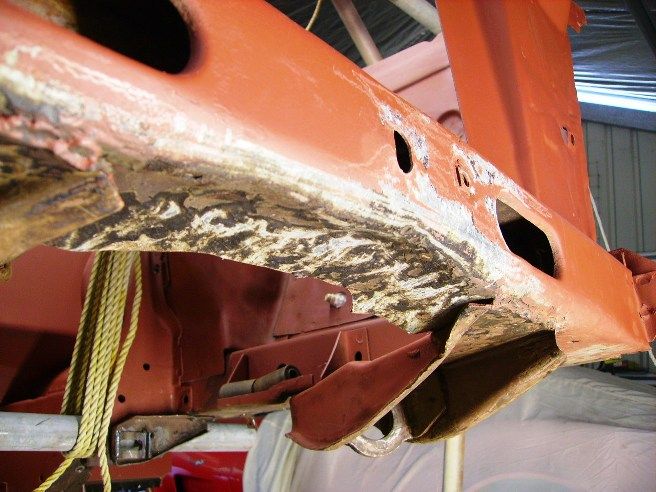
Just removed to damaged section and beat it back into shape, then welded it back together.
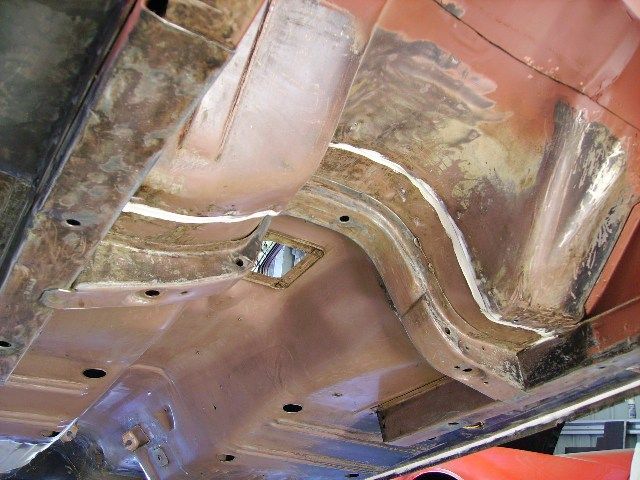
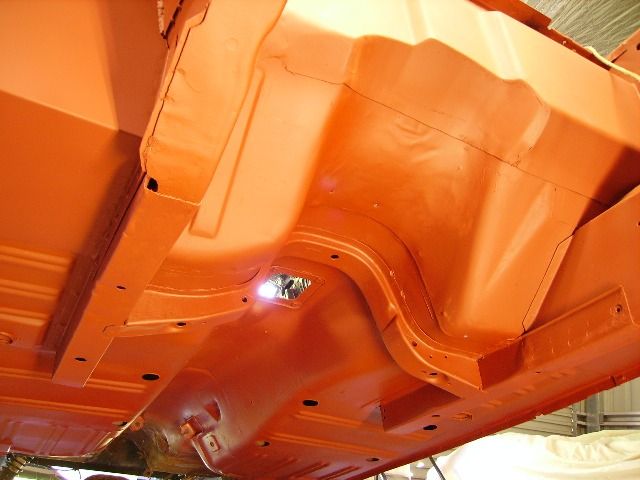
Also been busy a couple of hours when I get home from work and feel like crawling under the car to scape and clean all the oil gunk and old undersealer, so I can get back to the factory under coat.
I have sprayed almost to the back, once i have the front back together I will remove the back diff and complete the under body to the back of the car.
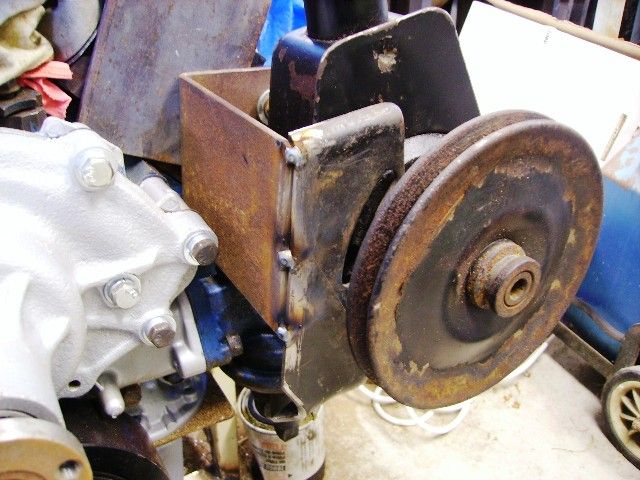
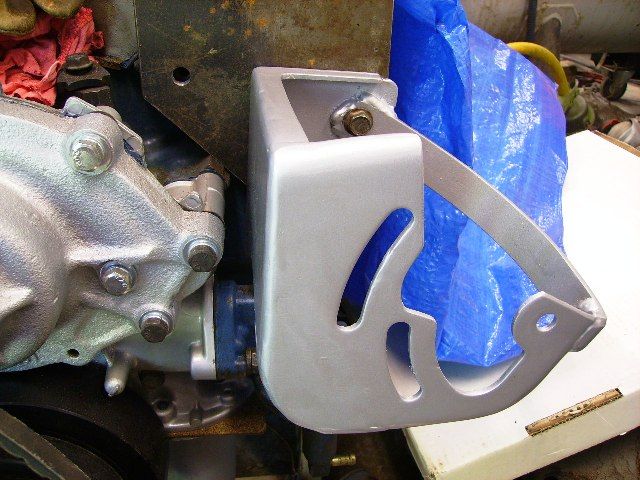
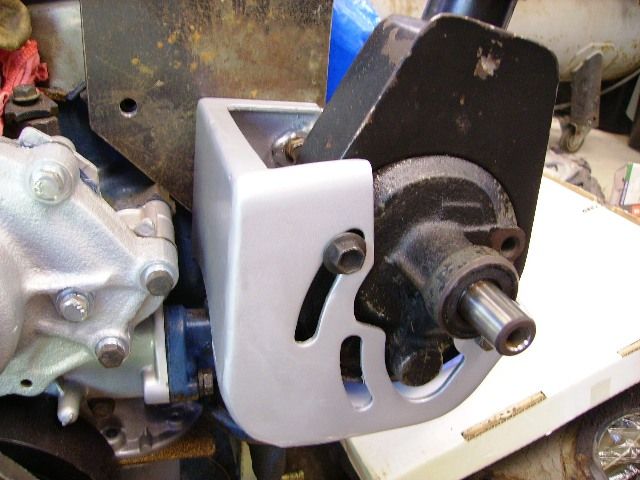
Found time to get the power steering pump bracket made as well, used a section of the old XF bracket that came with the pump, a fab'd a bracket from there, must admit there is no flex at all. all thats left now is to rebuild the pump.
Finished another small project I have been working at off and on.I like the idea of having a seperate indicator in the light bucket, so modified the existing one to accommadate three globes. Found a guy in the states that sells the amber lens, so very happy with the results.
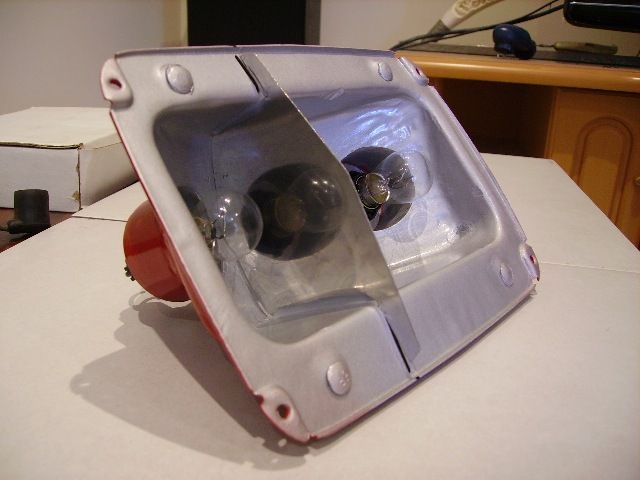
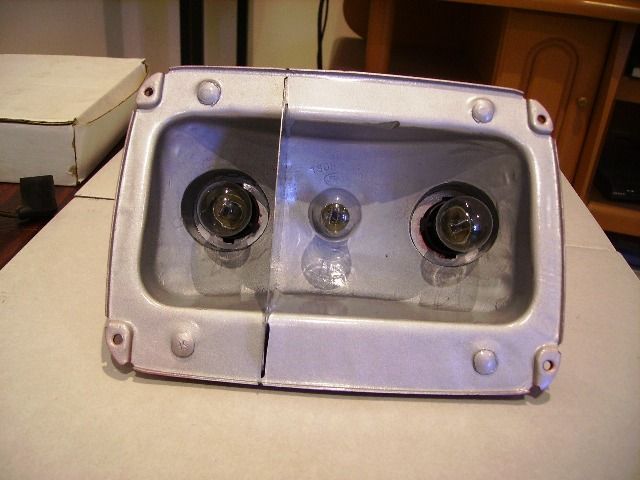
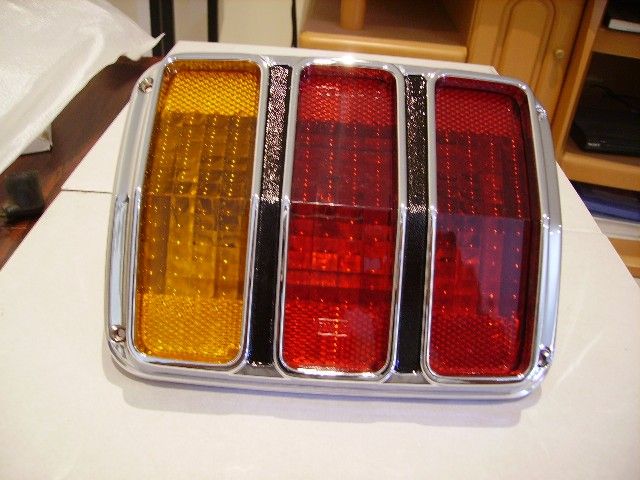
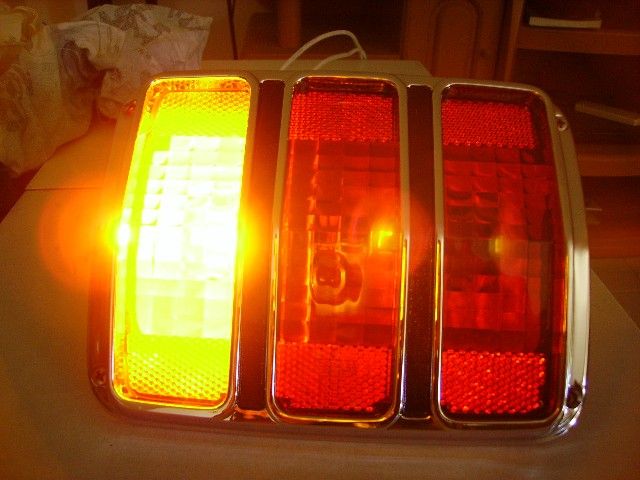
The camera does not do the amber colour justice, looks better in person. Well next is to get the engine bay spray painted, so that the front steering and suspension can go together, then hopefully the engine and box.
Cheers, Neil.
Decided to straighten out the front radiator support, where some idiot thought it would be a good place to jack the car up.
Just removed to damaged section and beat it back into shape, then welded it back together.
Also been busy a couple of hours when I get home from work and feel like crawling under the car to scape and clean all the oil gunk and old undersealer, so I can get back to the factory under coat.
I have sprayed almost to the back, once i have the front back together I will remove the back diff and complete the under body to the back of the car.
Found time to get the power steering pump bracket made as well, used a section of the old XF bracket that came with the pump, a fab'd a bracket from there, must admit there is no flex at all. all thats left now is to rebuild the pump.
Finished another small project I have been working at off and on.I like the idea of having a seperate indicator in the light bucket, so modified the existing one to accommadate three globes. Found a guy in the states that sells the amber lens, so very happy with the results.
The camera does not do the amber colour justice, looks better in person. Well next is to get the engine bay spray painted, so that the front steering and suspension can go together, then hopefully the engine and box.
Cheers, Neil.
Re: Black Beauty!
Nice work there Neil. Looks pretty tidy and solid underneath there where you cleaned her up and painted.
Fifty Years Afloat
We can't alter the direction of the wind,
But we can adjust our sails
We can't alter the direction of the wind,
But we can adjust our sails

Re: Black Beauty!
Looking great
Just that under chassis that took you 1 second to take the pic yet I know the endless hours behind it just to get it to look like that
Awesome work Neil...love the tail light bucket too...very cool
Matt
Just that under chassis that took you 1 second to take the pic yet I know the endless hours behind it just to get it to look like that
Awesome work Neil...love the tail light bucket too...very cool
Matt


-
unilec5544
- Mustang Star
- Posts: 537
- Joined: Thu Dec 16, 2010 11:04 pm
Re: Black Beauty!
Thanks guys, yeah Matt its amazing all the hours of work it takes to remove 40 odd years of crud, well at least thats one job that I wont have to tackle again for a while. 
-
unilec5544
- Mustang Star
- Posts: 537
- Joined: Thu Dec 16, 2010 11:04 pm
Re: Black Beauty!
About to mod the strut rods and as you know the 65 did not have this sleeve.I would like to know from someone, what size is the metal sleeve that I need and how long to make it???
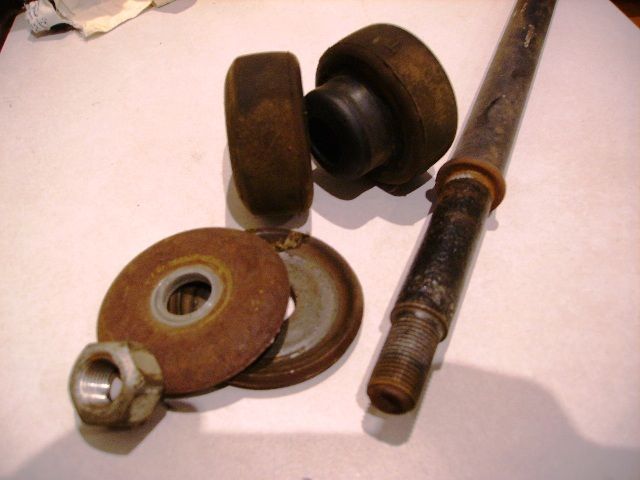
Cheers, Neil.
Cheers, Neil.
Re: Black Beauty!
The distance of the flat part past the thread minus 0.125"
Diameter is the same as that section is now so it would be a tube about 0.075" thick
Diameter is the same as that section is now so it would be a tube about 0.075" thick
Last edited by ozbilt on Fri Nov 09, 2012 12:24 pm, edited 1 time in total.
Kerry
To our wives and sweethearts. May they never meet
To our wives and sweethearts. May they never meet
Re: Black Beauty!
Hi Neil
Looks like you are doing some nice work there. Keep the updates coming.
Looks like you are doing some nice work there. Keep the updates coming.
'68 J-code GT Fastback
'67 S-code GT coupe, 'Pink Bitz' formerly known as 'Hookin' up a brother'
'69 M_____ GTS Fastback 'Blasted'
'67 S-code GT coupe, 'Pink Bitz' formerly known as 'Hookin' up a brother'
'69 M_____ GTS Fastback 'Blasted'
-
unilec5544
- Mustang Star
- Posts: 537
- Joined: Thu Dec 16, 2010 11:04 pm
Re: Black Beauty!
Thanks Jacko, Unfortunately work is getting in the way at the moment, so updates are getting few and far between.Ausjacko wrote:Hi Neil
Looks like you are doing some nice work there. Keep the updates coming.
-
unilec5544
- Mustang Star
- Posts: 537
- Joined: Thu Dec 16, 2010 11:04 pm
Re: Black Beauty!
Thanks for that Kerry, so measure back to the shoulder? Now I just need to find some tubing to suit.ozbilt wrote:The distance of the flat part past the thread minus 0.125"
Re: Black Beauty!
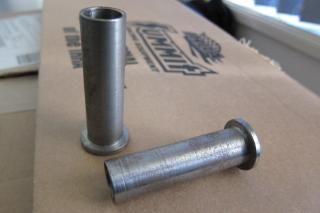
These are the ones that I made. I put the shoulder on the sleeve as well. I thought it would help keep the washer with the large hole located better. They are also the 1/8 shorter like Kerry suggested.
The thread on the bars is 9/16 UNF just to save you measuring.
The thread on the bars is 9/16 UNF just to save you measuring.
-
unilec5544
- Mustang Star
- Posts: 537
- Joined: Thu Dec 16, 2010 11:04 pm
Re: Black Beauty!
Hawko wrote:These are the ones that I made. I put the shoulder on the sleeve as well. I thought it would help keep the washer with the large hole located better. They are also the 1/8 shorter like Kerry suggested.
The thread on the bars is 9/16 UNF just to save you measuring.
Damn, I just made some sleeves on Friday