Page 17 of 21
Re: Finally - the Bullitt begins! :-)
Posted: Mon Apr 22, 2019 7:39 am
by mungus
Not sure. I thought I might just fill them with some new short 1/2” UNC bolts. Welding is an option too. The other cars I’ve seen with the Shelby drop just leave the holes as is, but to me that’s untidy.
Re: Finally - the Bullitt begins! :-)
Posted: Mon Apr 22, 2019 5:36 pm
by Nuts
Nice progress and write up. Personally I'd weld the holes up and make it look stock..
Re: Finally - the Bullitt begins! :-)
Posted: Tue Apr 23, 2019 4:48 am
by mungus
So I welded the 4 old upper control arm holes today. All sorted.
Does look tidier than spare holes IMHO.
Re: Finally - the Bullitt begins! :-)
Posted: Tue Apr 23, 2019 7:27 am
by Dwayne
Certainly looks better.
I welded up my old holes too, crazy not to if it's pre-paint stage.
Re: Finally - the Bullitt begins! :-)
Posted: Sun Jul 21, 2019 6:18 am
by mungus
Not much of an update today.
Have been gapping the LHS door, which came up nicely at the front. The back is more of a challenge, with some skin surgery required to match the 1/4 at the top. Also finished contouring my new RHS rocker / sill cover panel.
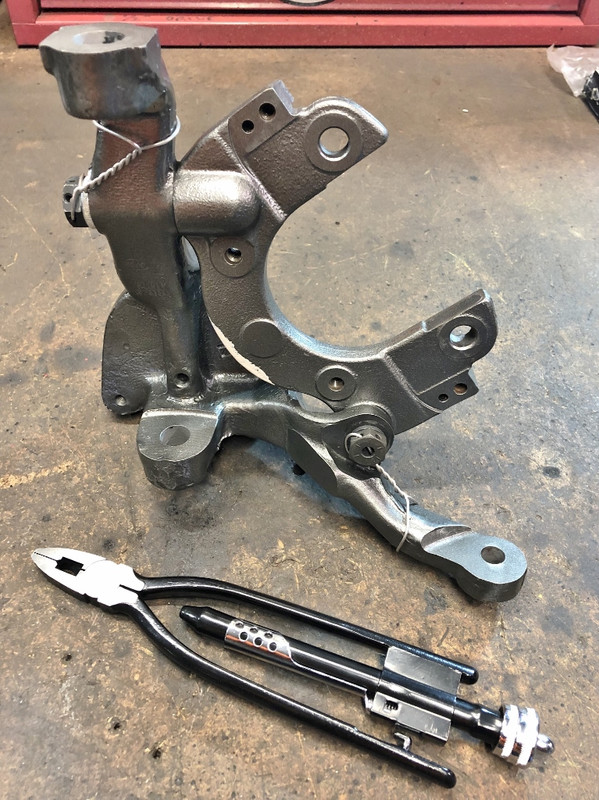
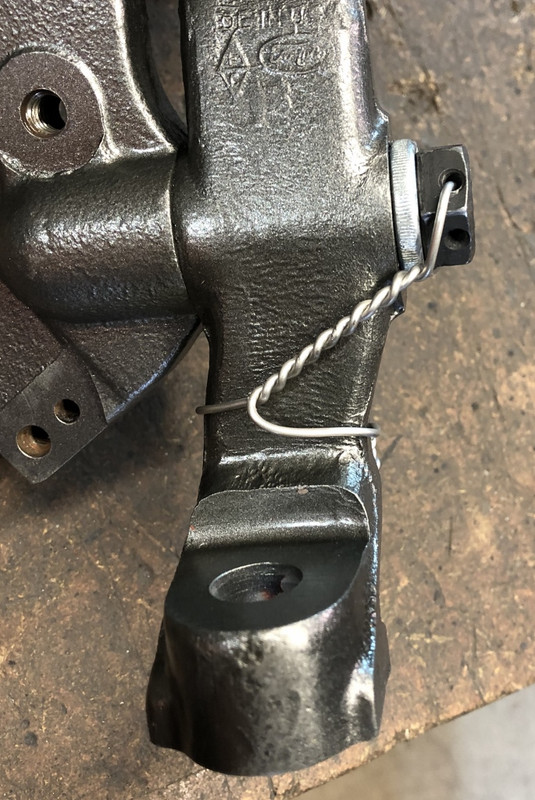
Running gear wise I finally got some 1.6mm SS lock wire to do the caliper frames. Have seen some folks using the .80 mm stuff. IMHO with the bolt sizes and torques involved that's almost a waste of effort. A small clue might be that Ford provided 3mm wire holes in the bolt heads, the the rule of thumb we use in aviation is the wire is typically 1/2 the hole diameter. Also I noted with some web searching, that the factory lockwire I've seen on survivor cars looks to be around the 1.6mm size too (albeit often very poorly applied). I'm guessing the finishing of the underside and engine bay is around 20-30 man hours away. So I'm hoping to post up some more photos then.
Meantime plodding along. Aiming to paint the body this spring or summer.
Re: Finally - the Bullitt begins! :-)
Posted: Sun Jul 21, 2019 8:48 pm
by nassi
My those lockwire pliers look shiny. Mine are getting a bit old now as they came off the 10 Sqn tool board in 1977 when the squadron moved to Adelaide.
Re: Finally - the Bullitt begins! :-)
Posted: Mon Jul 22, 2019 12:54 am
by mungus
Yup not wrong. My first pair went walkabout when I was working in PNG many moons ago. These are some Chinese knock offs from Total Tools I bought a couple of years back. Do the trick though...
Re: Finally - the Bullitt begins! :-)
Posted: Thu Jul 25, 2019 4:47 am
by ozbilt
mungus wrote:Yup not wrong. My first pair went walkabout when I was working in PNG many moons ago. These are some Chinese knock offs from Total Tools I bought a couple of years back. Do the trick though...
That's all I have. Now over 20 years old and still working fine
Re: Finally - the Bullitt begins! :-)
Posted: Sun Aug 25, 2019 5:11 am
by mungus
Well nothing very exciting to report this month, albeit it took plenty of hours to do it...
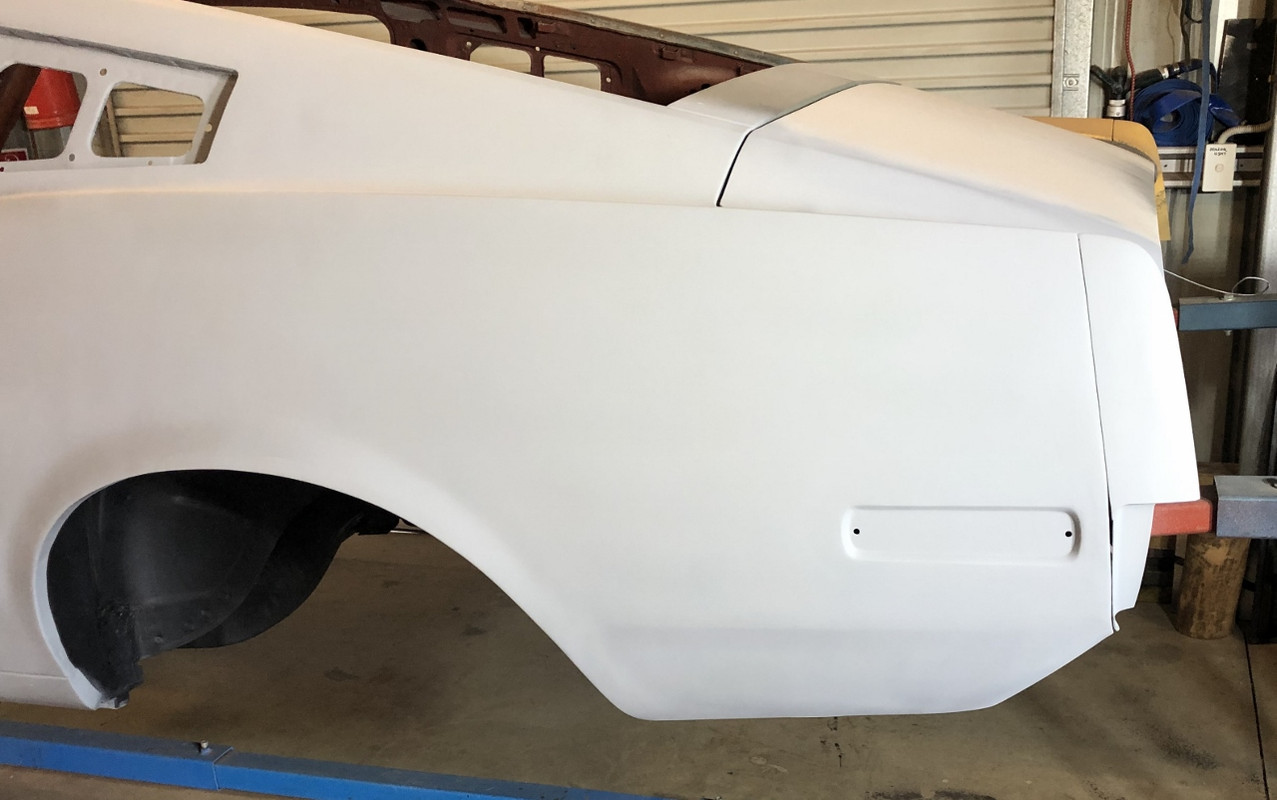
My "shipper" had put some forklift skid marks along both outer rocker panels, the worst being the RHS which was buggered beyond easy repair, and so got replaced. (covered a few pages ago). The LHS was not as bad, so no replacement needed but still need some dents pulled, filed and filled etc. Also the PO had bogged over some of the OEM rocker moulding clip holes, so those needed to be located and drilled clean. The measurements stated in the Ford assembly manual were pretty much on. The back ones 2-1/2" from the rear lip and the others gapped 12-3/4" apart. (6 in all, like fastbacks are meant to have, not 7 as convertibles get - anyone know why? More flexing on convertible rockers? Even with the extra steel in them?).
So that's all done plus the required holes on the front fender. While I had the LHS up in the air I went over the underside of the trunk etc.
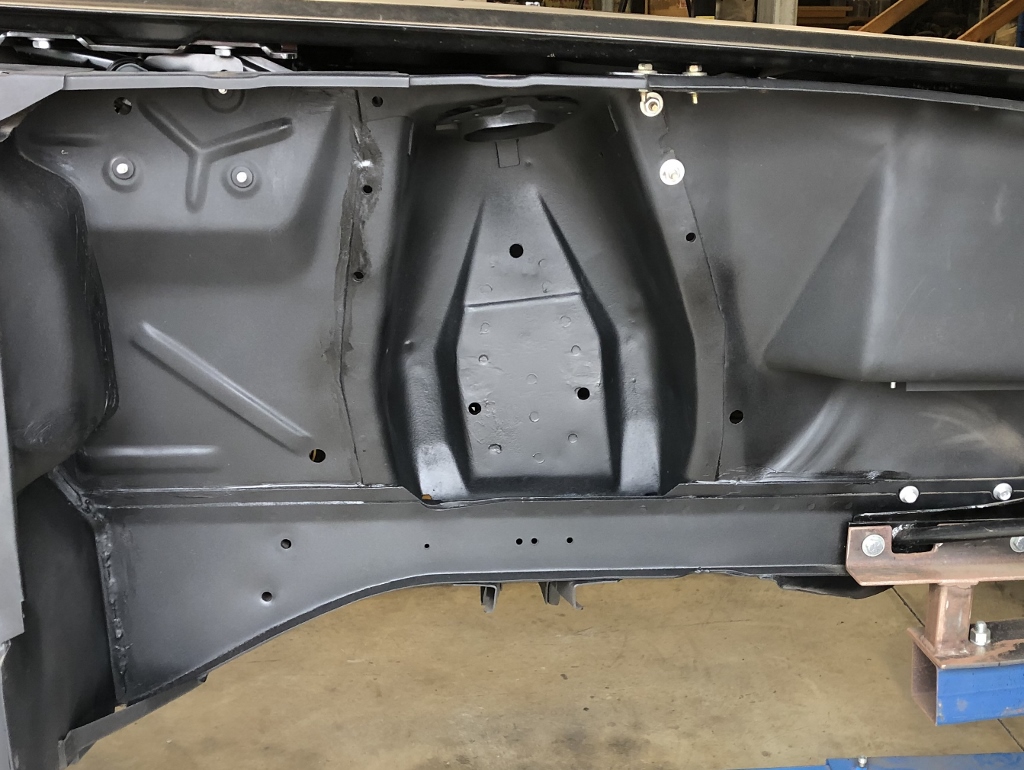
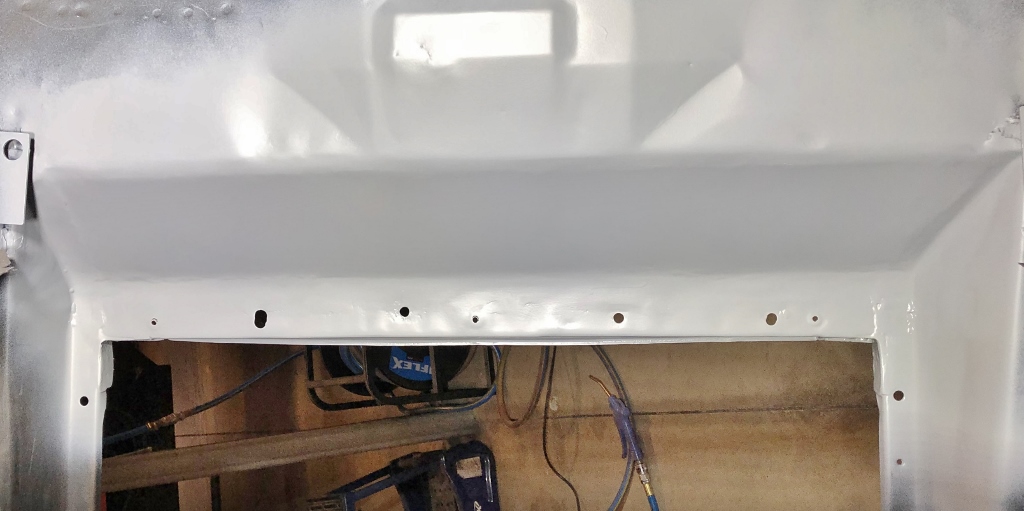
A few tiny pin holes had been revealed by blasting and all the caulking had to be redone with Sikaflex 227 etc, but a day later, job done there. Then came some fun with the transition panel. It not only had a collection of smallish rust holes covered maybe an 8" area, but was covered in dings both sides. Looked like someone's loved dumping heavy junk in the boot! Anyway looking at an orrible mess to beat out / weld I took the easy way and cut the whole sloping trunk section out and put a new piece in. Voila!
Next is working my way around the inside of the trunk, Sikaflexing and priming etc. Looks like the Ford primer painters in Metuchen missed a few spots inside the upper trunk crevisses back in the day. No paint of any sort that I could see (to be fair you need a torch and have to look for it), and a nice layer of rust scale above the OEM wheel houses between the rear quarter and the inner framing. No holes, well protected in there I suppose, but that surface rust has to come off...
Bloody hate this iPhone camera. Never looks right. Picks up funny shading and makes flat things look wonky.
GRRRR.

Re: Finally - the Bullitt begins! :-)
Posted: Sun Aug 25, 2019 9:34 am
by rkmiller73
looking good!
Re: Finally - the Bullitt begins! :-)
Posted: Mon Aug 26, 2019 12:46 am
by ozbilt
Rockers do not flex on any car. No idea why converts are different as they are stronger torsionally due to the inner rocker.
Re: Finally - the Bullitt begins! :-)
Posted: Thu Dec 26, 2019 7:36 am
by mungus
I just remembered I hadn't uploaded any progress for a while.
I have been plodding away, albeit with the warmer weather I got side tracked with my newly registered 39' Velocette MSS and some early 70’s Gemini mini bikes. And the management ordered some repairs around the house and farm, such is life...
Anyway I got into some more bodywork. Recently I've MIG’d in the 68' side reflector recesses. A friendly Mustang wrecker in Colorado cut a pair out and posted them over a while back.
This was necessary as when the PO replaced them only the generic 67/68 quarters were available. These days specific 68 rear quarters are available, with the recesses already pressed in.
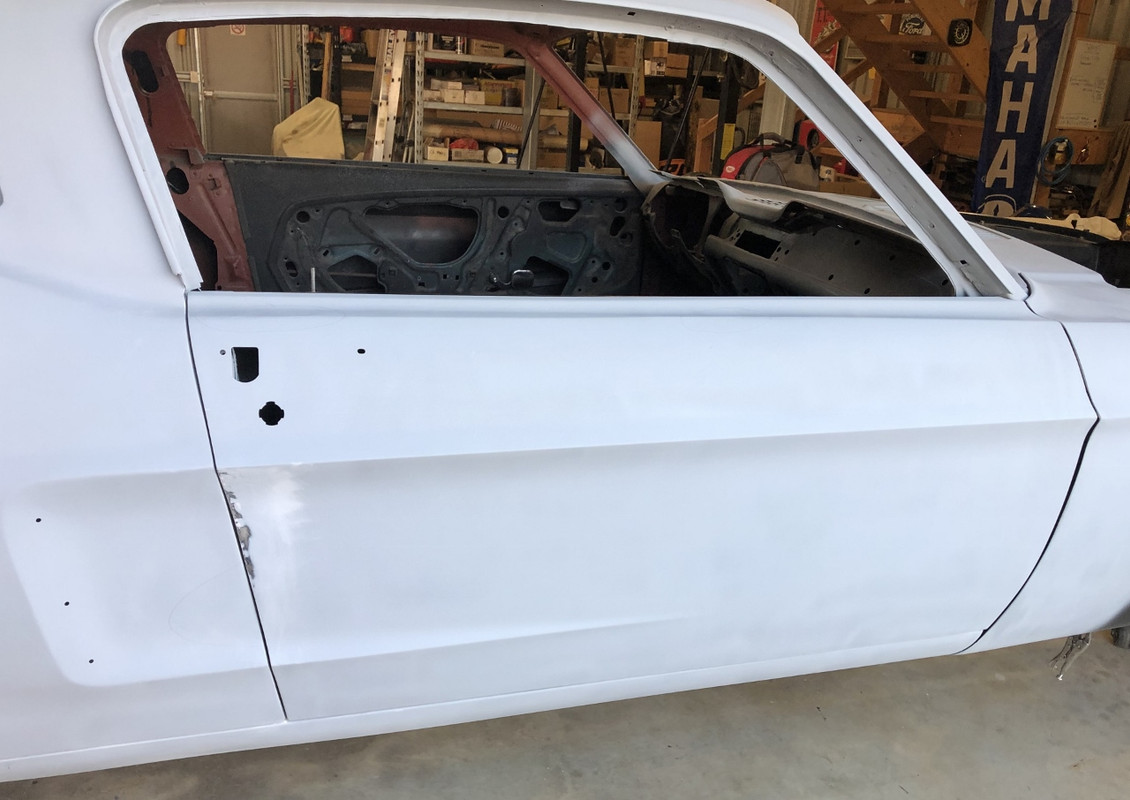
Mostly gapped the doors and aligned the C stripe lines and both sides. I had to unstitch the front of both quarters, then cut and weld all 4 of the C lines, as the PO did a crap job of fitting the rear quarters... Takes a lot of time! But the end result is nice. Very little filler required and a nice panel match achieved. Also drilled the C stripe ornament holes, and yes the movie car had them, only painted Highland Green, (like the rocker moldings). You can just see them if you freeze frame the movie, and it’s been confirmed by the reveal of the second movie car, which whilst it’s had some minor changes and repairs to keep it roadworthy, is still mostly unmolested.


Fixed the top of the RHS repop door that had a bad shape, detailed in an earlier post (pie cut and restitched etc) ignore the front gap, fender is just sitting on there:
And also filled the reverse light holes (movie car correct). Apologies for the crap photos.

Lastly I trial fitted my rare movie correct door mirror. McQueen did not use a 66' stang mirror as some used car dealers and YouTube “experts” claim, he chose an aftermarket mirror by Yankee Metal Products, model 503 to be exact. These really are like hen's teeth, only made for a couple of years back in the day, and I spent years tracking mine down from a fellow Bullitt tribute owner in CA. Anyway its off again, safe in its box. I just wanted the holes in before I paint.
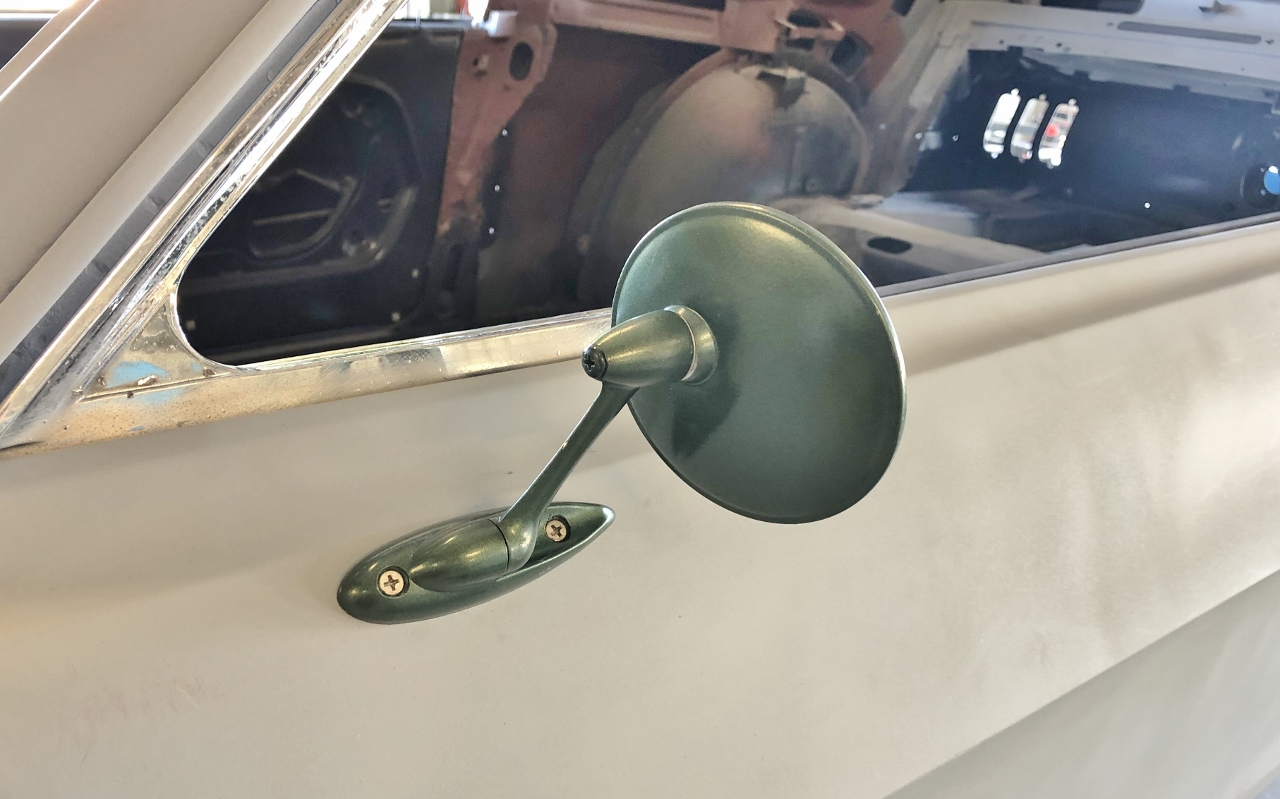
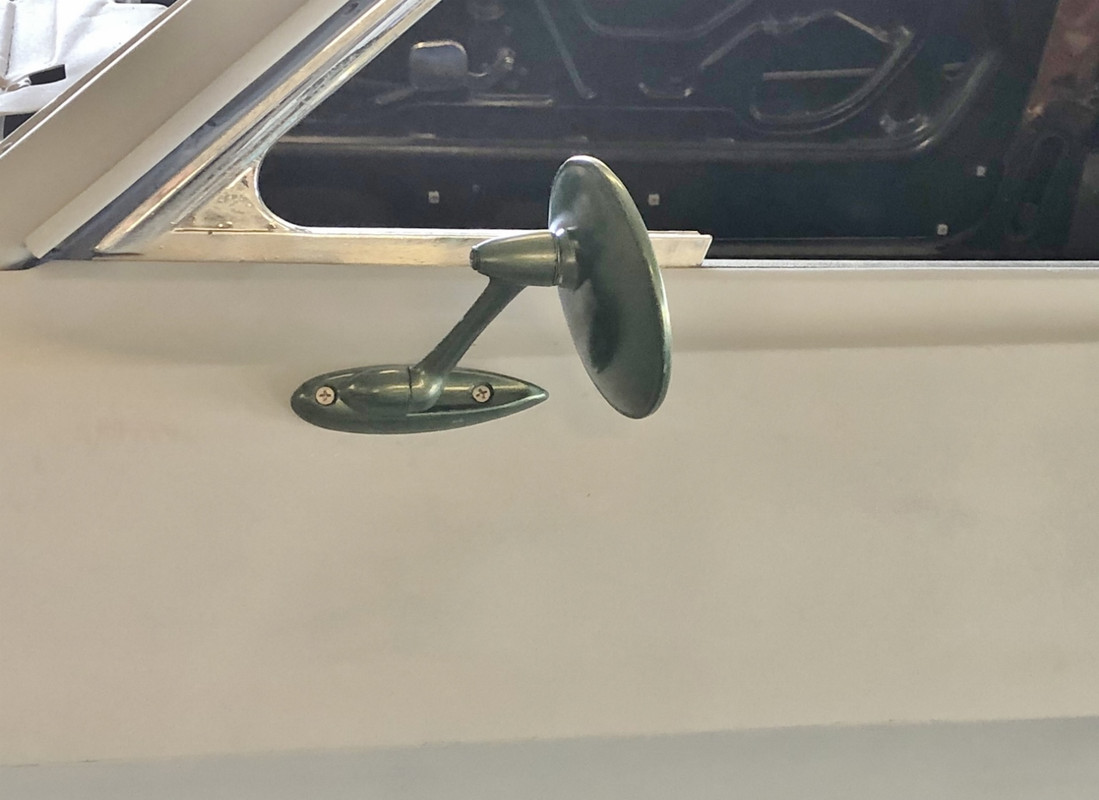
I am toying with the idea of attaching them with chromed /polished stainless Philips head machine screws and nylocks / penny washers on the back. I never liked using self tappers on door mirrors. Had them on lots of my older cars. IME they eventually come loose and in time the holes flog out and they can distort the metal a bit, etc. Its hardly impossible to drop off the door liner and wind the window up to access the back in the rare instance that the need arises.
Anyway onward we plod. Just slowly going around everything, tidying little bits up, getting ready to paint the underside with Intergard 2K red soonish.
Merry Christmas everyone.
Re: Finally - the Bullitt begins! :-)
Posted: Thu Dec 26, 2019 5:05 pm
by Nuts
Why not use Rivnuts for the mirrors?
Re: Finally - the Bullitt begins! :-)
Posted: Thu Dec 26, 2019 5:13 pm
by mungus
Not a bad idea. I’ll check if there’s enough space behind the mirror plinth today.
Re: Finally - the Bullitt begins! :-)
Posted: Thu Dec 26, 2019 7:39 pm
by Nuts
Should be plenty of room. I do them regularly. Because our rego nazi's want rh mirrors.