Page 20 of 21
Re: Finally - the Bullitt begins! :-)
Posted: Mon May 31, 2021 10:00 pm
by Dwayne
I use a hairdryer to heat up the vinyl to work out the wrinkles, just don't burn your hands

Re: Finally - the Bullitt begins! :-)
Posted: Tue Jun 01, 2021 10:08 pm
by Ausjacko
looks good
Re: Finally - the Bullitt begins! :-)
Posted: Mon May 15, 2023 3:28 am
by mungus
Been a while!
COVID took me out of action for 2 years. Slowly back in to it now. Had to wait even longer after that silliness stopped too, as the farm and home had lots of jobs that needed to be done after so much time away. I'm still away 20 days a month with the post COVID job (same employer) but thems the breaks. Any job is better than no job eh! I was getting very close to paint and then reassembly (all the other systems are done), but one thing had always bugged me...
A previous owner had done a dodgy repair on the RHS toe board. It was watertight and structurally OK I'd say, but from underneath it just looked sh*t. Whoever did it just put a new toe board over a big hole, with some ugly welds and lots of sealant etc. YUK! You would only see it on a hoist but that's enough for me. And if seen it could make a decent roadworthy inspector suspicious... So I thought bugger it, she's coming out. Anyway a few days work later and she's all gone. Add in a making and fitting a new plate for top of the torque box that had some pitting and a wee rust hole in it, and the new one is done. Away overseas for work again but a new front floor pan is all prepped too so it will be all done a day or so after I'm back. In a way it was nice to cut it out so I could see the condition of the floor supports and torque box. And now at least I know they're good. Thoroughly cleaned, wire brushed, etched and primed before anything went back on. Thankfully the other side is sweet.
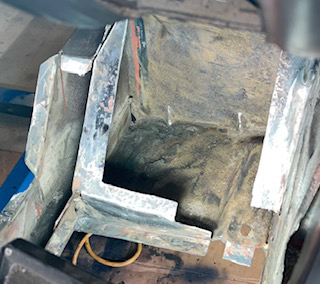
Sorry I've lost the after photo of the torque box. When I track it down I'll put it up.
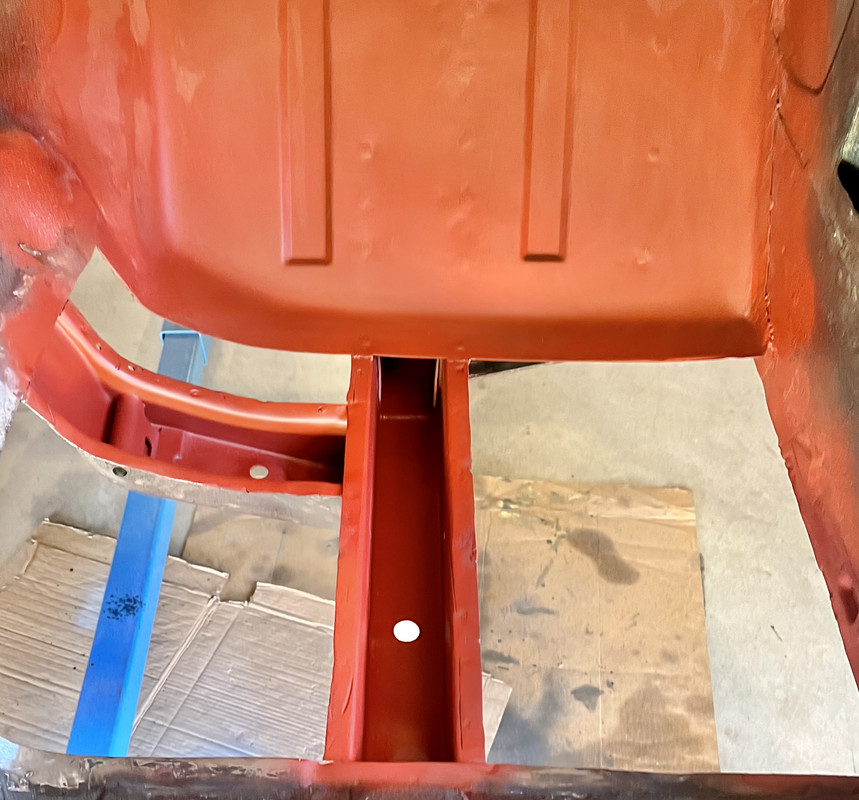
I'll upload some more photos from various sides once its done.
Have a couple more little things I want to tweak before paint, and then she's all go! The outer rocker profiles are a bit weird at the back (the moldings (and the plastic clips) would have to curve around to fit the shape), so they may need to be pie cut to make them perfect, or maybe I'll just cheat and just chop up a repop outer sill and MIG a couple of sections in. Also the drip rails need some building up on the corners, where someone has "trimmed" them out a bit too much. No doubt makes the stainless moldings easy to pop over, but I'm not sure if its gonna look weird once done. So I'm hoping to get a profile of someone with some handy drip rails... (Anybody???) Then its ready for some 2K marine red oxide underneath, and some 2K satin black in the engine bay and aprons etc.
Really wishing I didn't need to go away to work these days!
Re: Finally - the Bullitt begins! :-)
Posted: Tue May 16, 2023 11:33 am
by hybrid
Never gets old seeing these things in that primer.
Re: Finally - the Bullitt begins! :-)
Posted: Mon May 29, 2023 4:37 am
by mungus
Re: Finally - the Bullitt begins! :-)
Posted: Sat Jul 29, 2023 3:02 pm
by ozbilt
Hey, a bit late, but I guess better than never, but the corners of the drip rail support were about 2/3rds the width of the straighter sections.
The corners have no impact on keeping the mouldings in place.
Re: Finally - the Bullitt begins! :-)
Posted: Wed Aug 16, 2023 9:25 pm
by mungus
Thanks Kerry, it's still appreciated.
However I'm not sure what you mean by those dimensions. Did you mean the width of the mounting section of the drip rails? The flat bit of panel where the drip rails get spot welded into the door frame / roof?
What I was after was something like a rubbing / tracing of the rear curve of the drip rails themselves. The bit where they go around the rear corner and head down the door pillar. There's a section maybe 3" long where the drip rails are removed. Someone has ground the ends of that part down, I'm guessing they've probably ground down a cm or so off each end.
Hopefully one day I'll be in a shop where they have one of the replacement drip rails in stock and I'll trace one of those corners on to a piece of paper.
Thanks anyway.
Re: Finally - the Bullitt begins! :-)
Posted: Fri Oct 06, 2023 7:37 pm
by mungus
Re: Finally - the Bullitt begins! :-)
Posted: Mon Oct 09, 2023 10:14 pm
by mungus
Finally found the solution to stripping the hard to access trunk roof area. Get my teenage daughter to do it! (smaller hands and younger back).
So one more bit done!
Re: Finally - the Bullitt begins! :-)
Posted: Tue Oct 10, 2023 7:25 am
by Nuts
Re: Finally - the Bullitt begins! :-)
Posted: Sun Nov 26, 2023 5:40 pm
by mungus
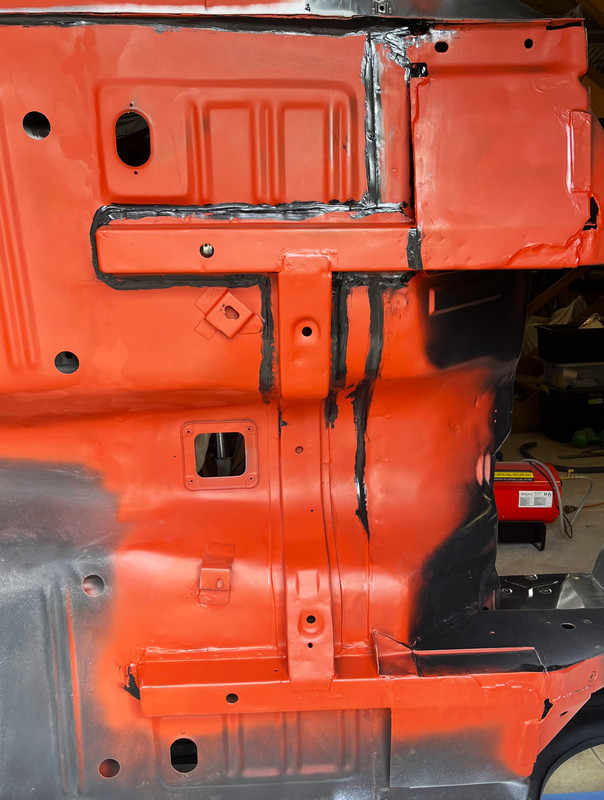
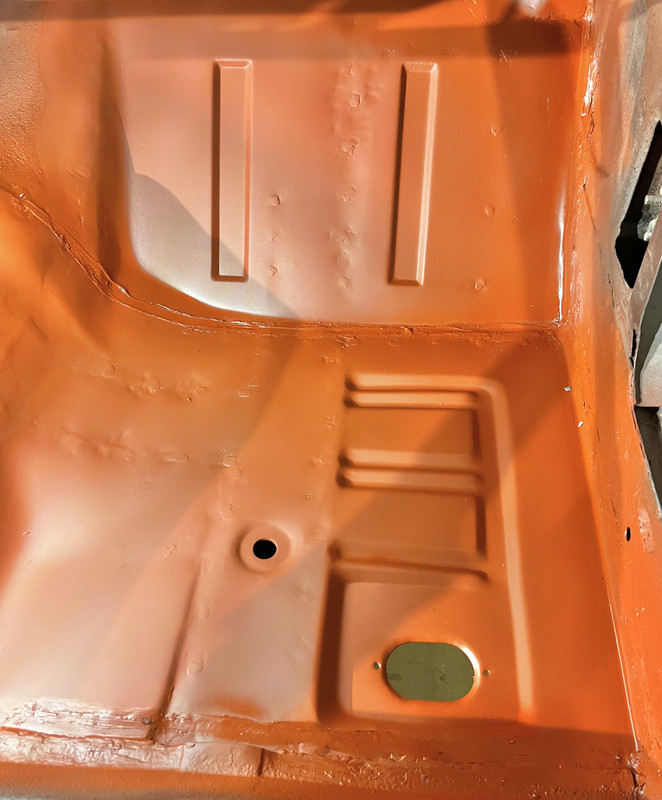
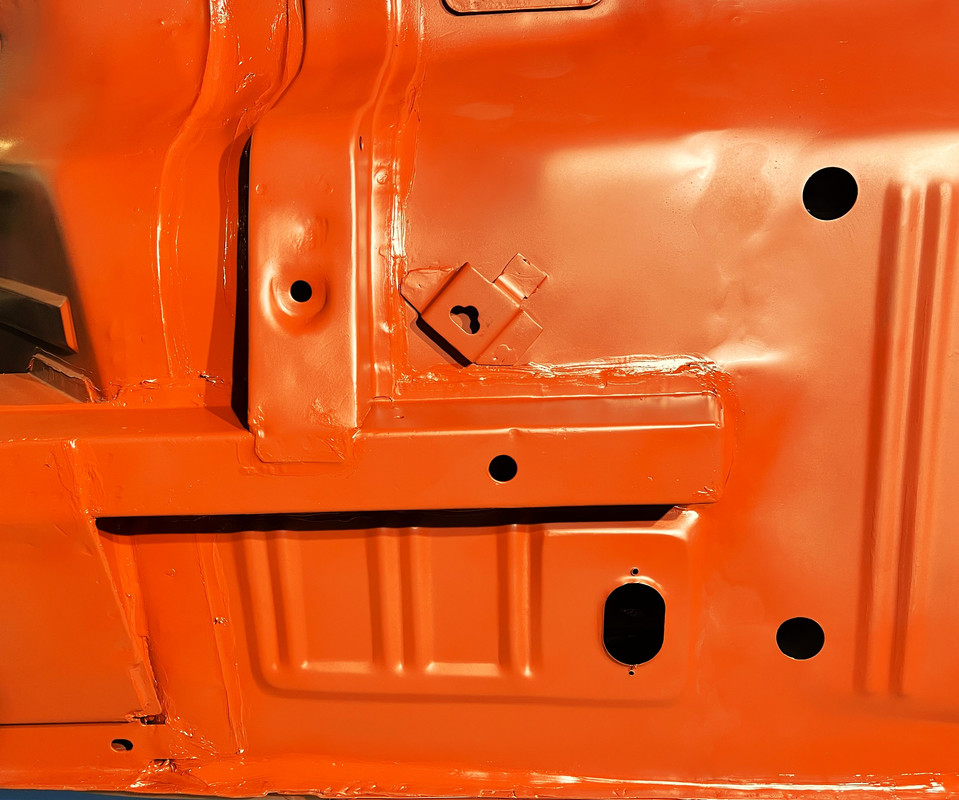
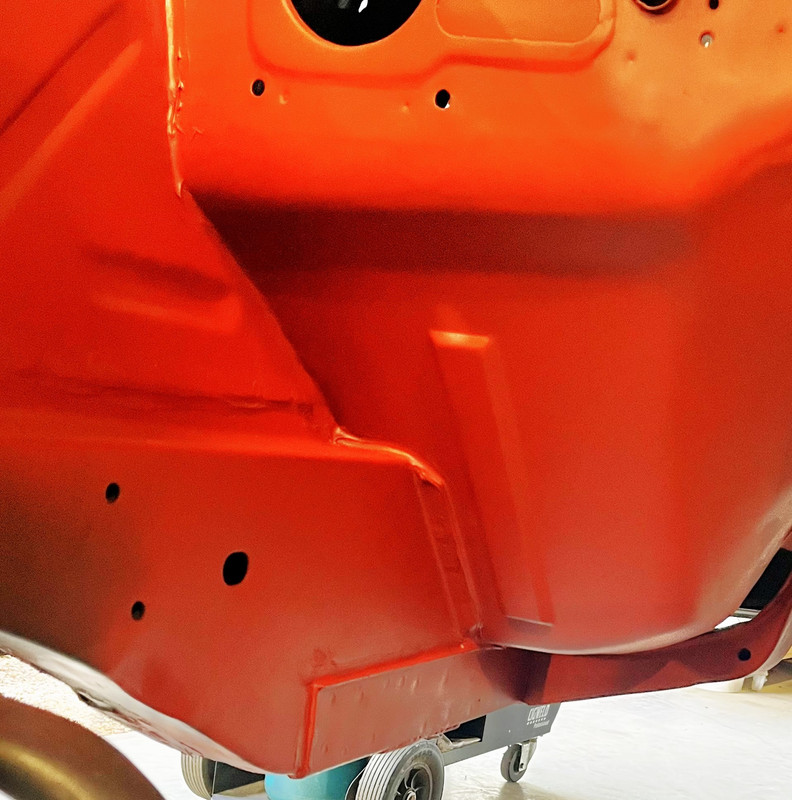
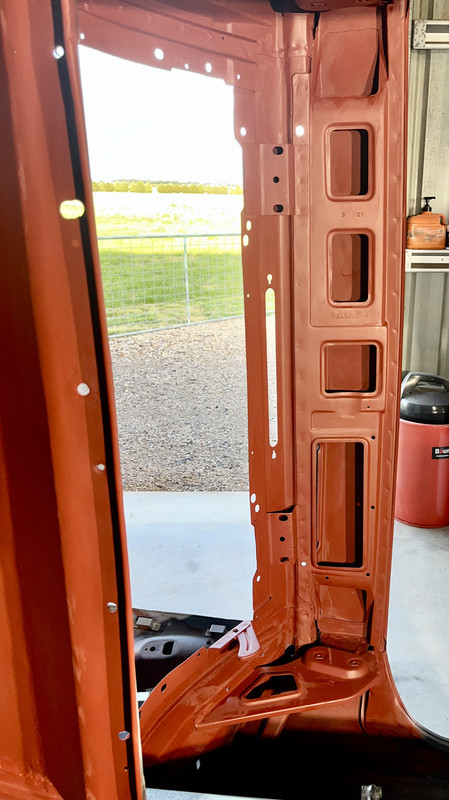
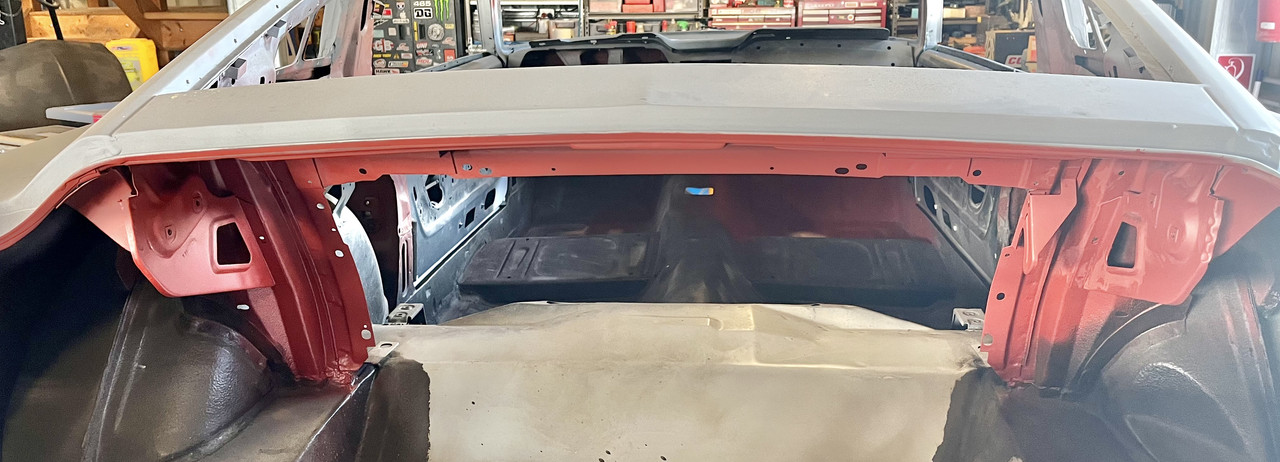
Finally, after a few days detailing the underside and engine bay / aprons etc, I painted the underside (2K Intergard 269) and the engine bay / aprons (Hi-Chem 2K Satin Black 30). Only 2 years late! Thanks so much to all those lockdowns...
Came up nicely I think. The satin black paint is fresh in this photo, and should be less glossy in a few days if past experience is anything to go by.
I've tried my best to replicate the black overspray I found before blasting. Broadly in keeping with what the survivor photos I've seen on line seem to show too.
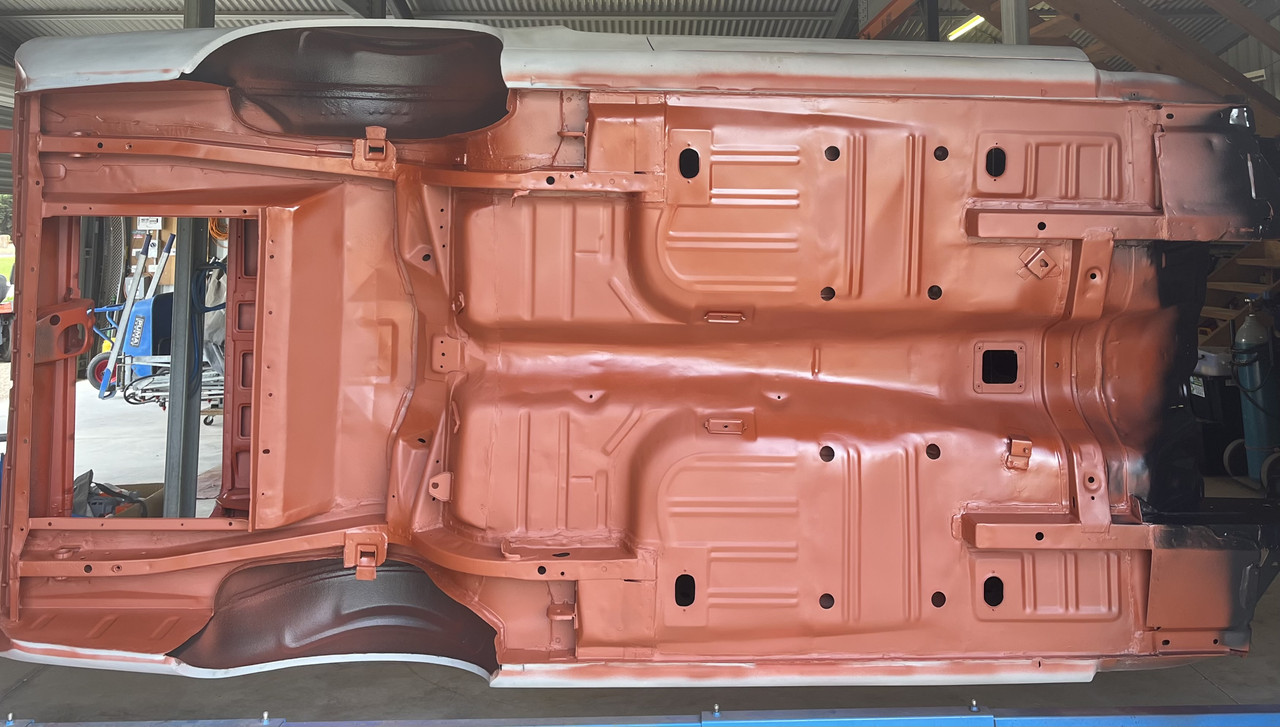

Finished priming the trunk with the same stuff and will use it (Intergard 269 Primer / Sealer) to paint underneath the NOS front fenders too...

Re: Finally - the Bullitt begins! :-)
Posted: Mon Nov 27, 2023 6:54 am
by Nuts
Looks Great!!

Re: Finally - the Bullitt begins! :-)
Posted: Wed Nov 29, 2023 11:46 am
by mungus
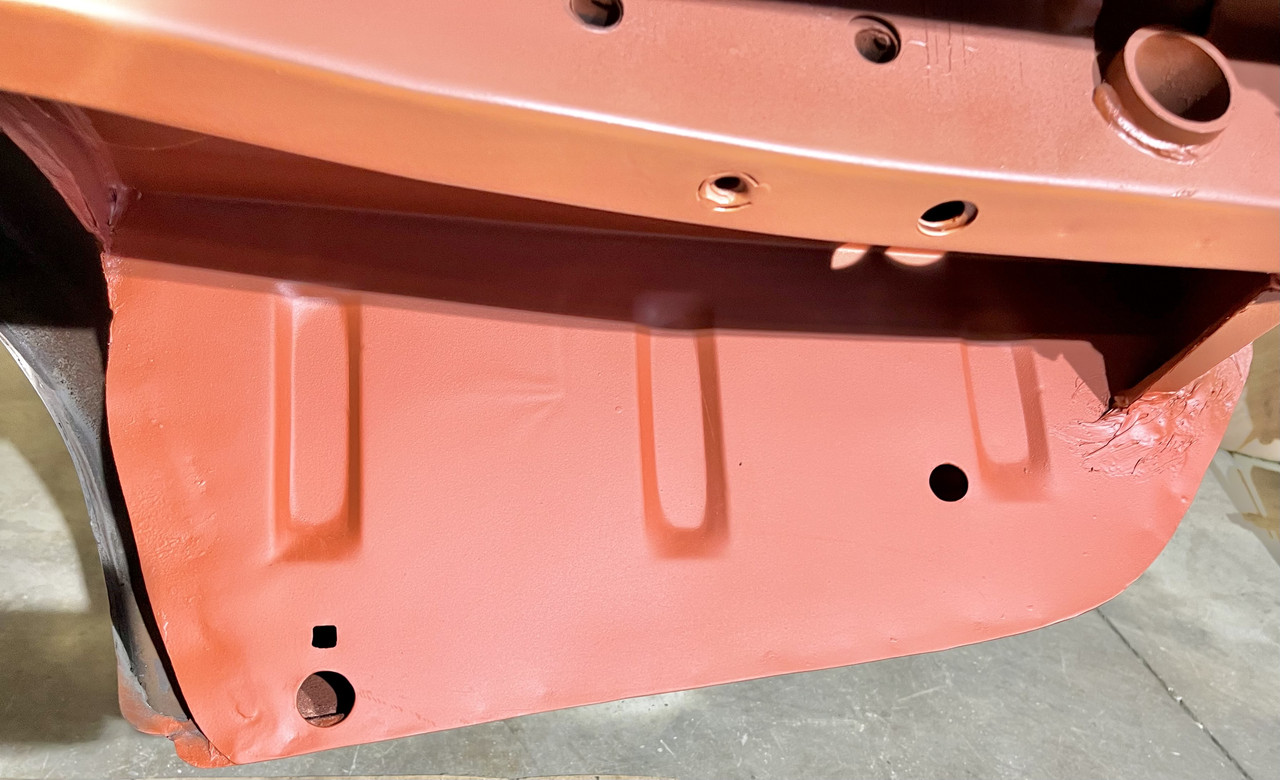
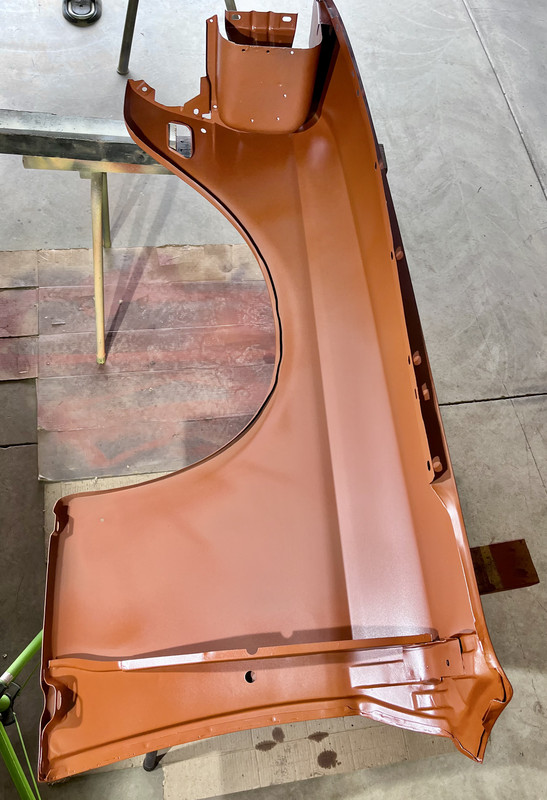
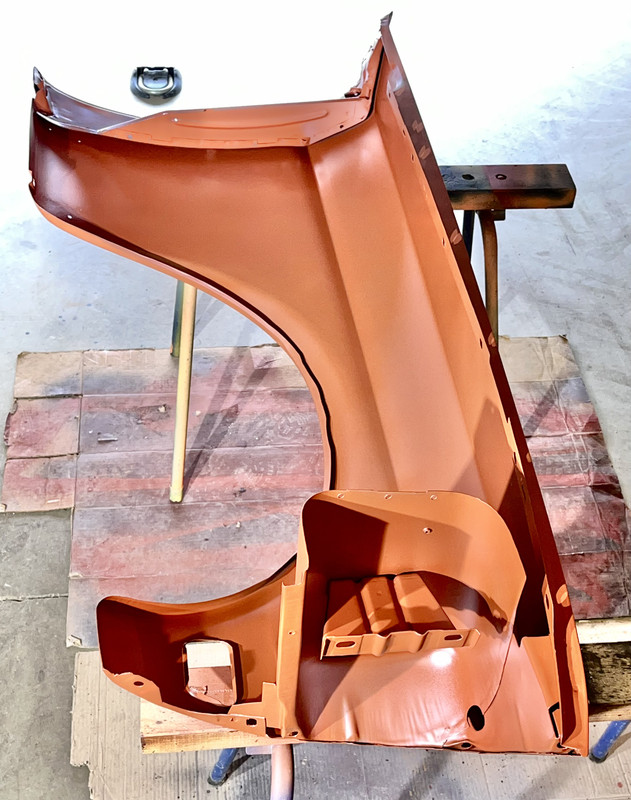
As promised, prepped and primed / sealed the fender undersides with Intergard 269 today. San Jose (Bullitt) correct…
Re: Finally - the Bullitt begins! :-)
Posted: Wed Nov 29, 2023 3:23 pm
by hybrid
Hard to beat a fresh intergard job!
Re: Finally - the Bullitt begins! :-)
Posted: Wed Nov 29, 2023 3:47 pm
by mungus
Ha! Yup and on NOS 1993 mfg Ford fenders to boot! I couldn’t believe it when I found them all still boxed up in NY in 2015.
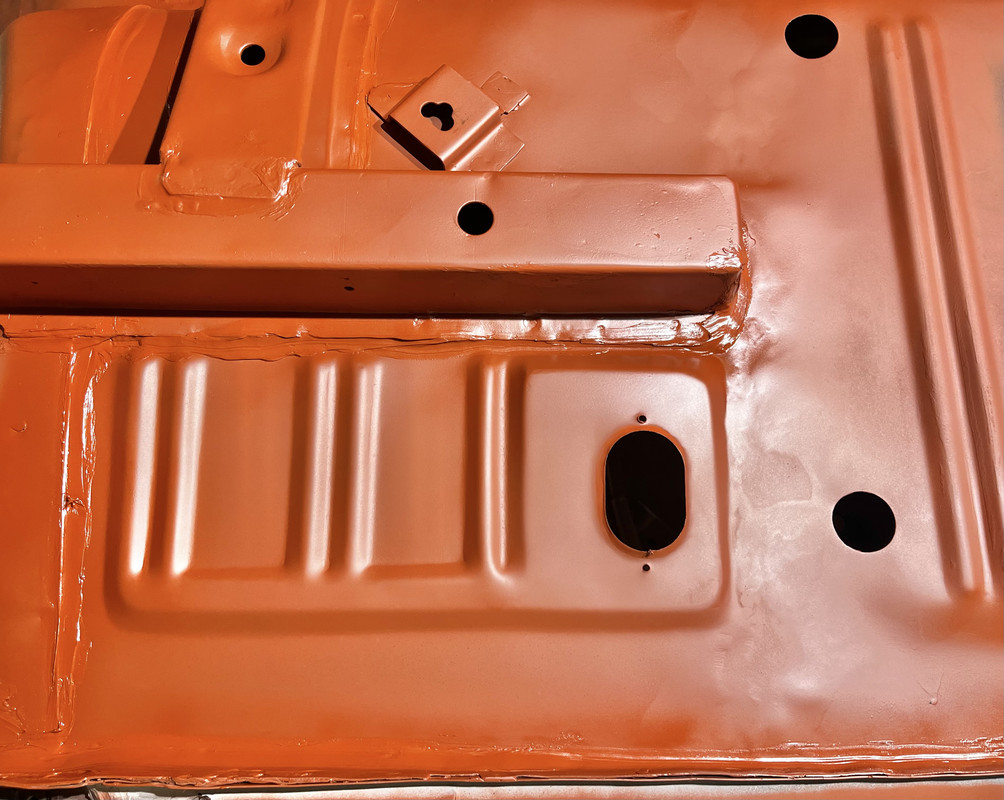
Found another job missed by the PO. He failed to put either the back up light or drain holes in the drop off panels he installed...
So some web time searching dimensions and locations etc., and more drilling, filing and priming...
LHS beforehand (dot marks back up light hole position, I made them about 18mm ID. Based on measuring the smallest OD (panel hole section) of 4 grommets from 2 pairs of OEM back up lights.
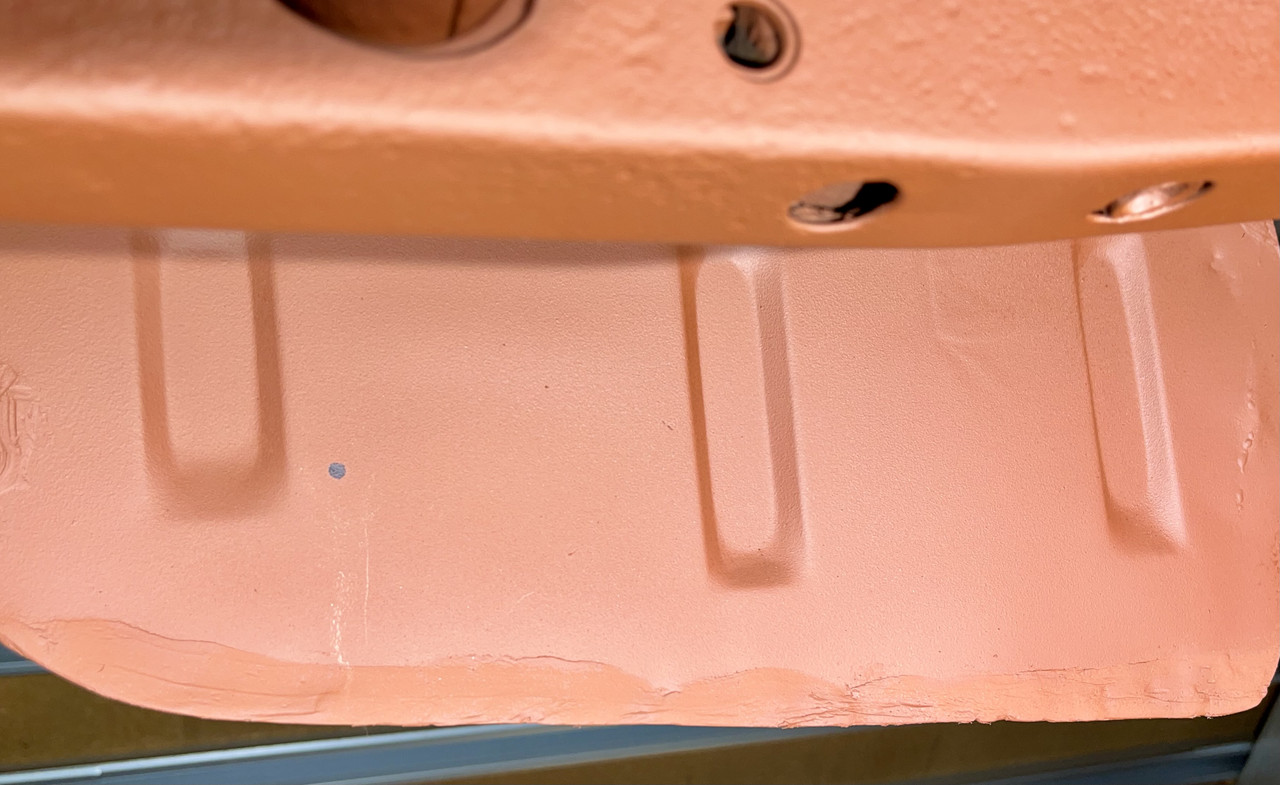
RHS afterwards...