70 Mach 1 - Slowly
Moderator: Moderators

Re: 70 Mach 1 - Slowly
Cool another white car!!!!. On the bright side at least it was a low budget spray job so they scrimpted on the red paint and battleship thickness spray bog - easy clean up.
1965 Fastback A code
I am Borg. Resistance is futile. You will be assimilated.
I am Borg. Resistance is futile. You will be assimilated.

Re: 70 Mach 1 - Slowly
Good update. Lots of surprises often to be found but easy fixes. I would fix the guard as your likely to need to fix the new one.
I will someday think of something clever to say.
Re: 70 Mach 1 - Slowly
Chux wrote:Having a shed load of trouble getting my welder to run .6mm wire. Running the right roller but its stubbing and then the wire bends and then crimps at the feed roller and I end up pulling another 3 m of wire out of the gun and binning it. Just about lost my banana today.
Welder is a Unimig 250 inverter. The guys have ordered me in a 5kg spool adapter which will bring it back to the centre line for the feed but I have a sneaking suspicion that the spool I have is rooted. The wire is sitting down on itself in patches and gets really tight to pull out - Boss brand wire. 15kg spools are bloody expensive....but the frustration of not being able to weld is costing me time and energy.
Went back to .9 and I at least got the heavier metal welded. So cross member is replaced, got the patch welded in to the rad support and the chassis rail extension welded on.
I'll tidy up the grinds when the engine comes out.
15 kg rolls are only $40 at BOC in 0.9?
Welding in a patch in the apron at present - I reckon it would be a shed load easier with .6mm wire feeding properly, but I will persevere with .9mm and get it done so I can move on. Hope that I will have that finished tomorrow afternoon.


Checkout my car builds - edzv8s.com
66 Convertible Bench Seat AODE 3.5 9"
66 Convertible Bench Seat AODE 3.5 9"

Re: 70 Mach 1 - Slowly
Time for a bit of update. Well saw my beater friend who offered the worlds best advice. Have a go, you have nothing to lose if you want to learn. Watch the videos on the net and see how you go and I'll offer advice.
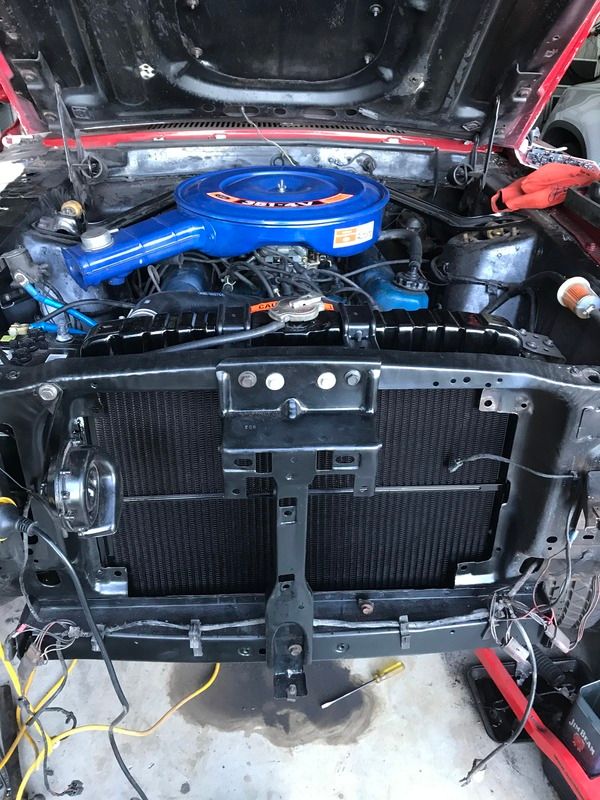
So anyway I have got rad in, apron welded in and battery cradle in. Bought some new trans cooler lines today so should get it running on the weekend for what its worth as with no guard its not a driver.


PS I have ground the rosette welds on the apron I finished late and sprayed to stop rust.
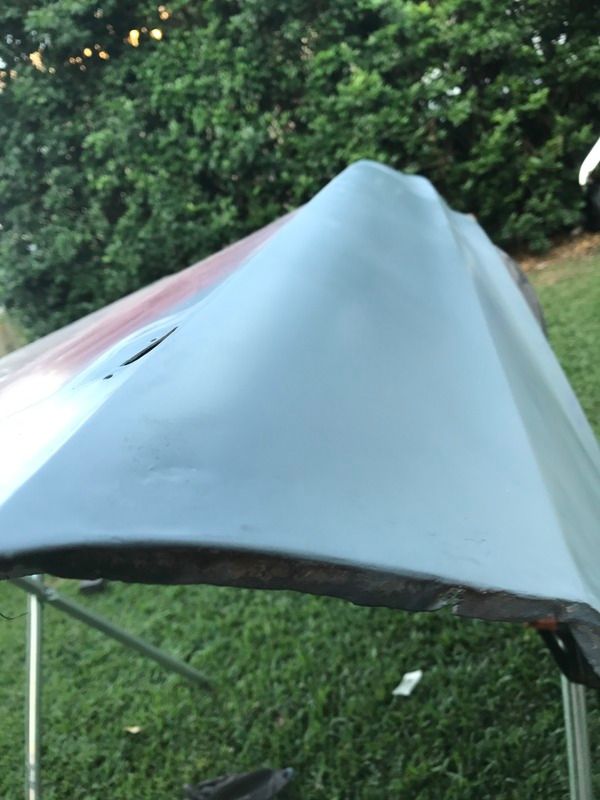
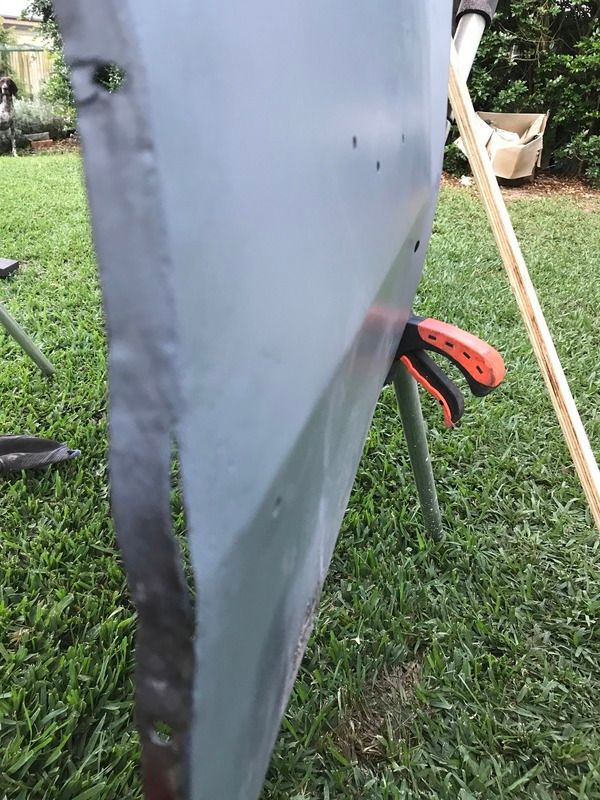
Stripped the guard below the belt line and found more bog and dents which I have been working on. Released a large crease nicely and now slowly working on how to get the rest of it out. Thinking I need to work on the edge section first to make sure its not putting the area closest to it under tension as well.
Sure is ugly but I bent an old file up as a slapping spoon which does make it easier to see where you are working as per the video advice.
So anyway I have got rad in, apron welded in and battery cradle in. Bought some new trans cooler lines today so should get it running on the weekend for what its worth as with no guard its not a driver.
PS I have ground the rosette welds on the apron I finished late and sprayed to stop rust.
Stripped the guard below the belt line and found more bog and dents which I have been working on. Released a large crease nicely and now slowly working on how to get the rest of it out. Thinking I need to work on the edge section first to make sure its not putting the area closest to it under tension as well.
Sure is ugly but I bent an old file up as a slapping spoon which does make it easier to see where you are working as per the video advice.
Last edited by Chux on Sun Jul 09, 2017 5:49 am, edited 1 time in total.
Cheers
Craig
Craig
Re: 70 Mach 1 - Slowly
That was good advice. Whatever you do can be undood!
My Motto - Don't get Caught! If you do, Blame Someone Else!
MUSTANG - Fantastic Not Plastic
MUSTANG - Fantastic Not Plastic
-
rkmiller73
- Mustang Star

- Posts: 343
- Joined: Thu Jan 03, 2013 3:44 am
Re: 70 Mach 1 - Slowly
Awesome work!
Re: 70 Mach 1 - Slowly
I agree - for me doing is most of the fun. Learn and have high levels of satisfaction.Chux wrote:Time for a bit of update. Well saw my beater friend who offered the worlds best advice. Have a go, you have nothing to lose if you want to learn. Watch the videos on the net and see how you go and I'll offer advice.
Great work.
I will someday think of something clever to say.
Re: 70 Mach 1 - Slowly
Been having a bash on the guard damage. Posted an advice thread separately.
Being a newby with panel work its slow but you can see when you get things going the right way.
Refer back in the thread for the pic of guard as it was.
Being a newby with panel work its slow but you can see when you get things going the right way.
Refer back in the thread for the pic of guard as it was.


Cheers
Craig
Craig
Re: 70 Mach 1 - Slowly
Righto been a bit slow, been a bit diverted with work commitments generally.
Have been practising my panel beating (lack of) skills on the lower valance. Its not impossible but the theory of high spot planishing works but its fairly slow. I would hate to be paying $70-90/hr for someone to do this but based on - nothing to lose principles its been an good experience. I feel like I am making progress with it and if I can get it to a reasonable standard I will slick it with some colour just to check whether its actually useable. It had about 200gms of bog in it to start and had taken some serious hits at various points.
The bad end is - well ugly bad.
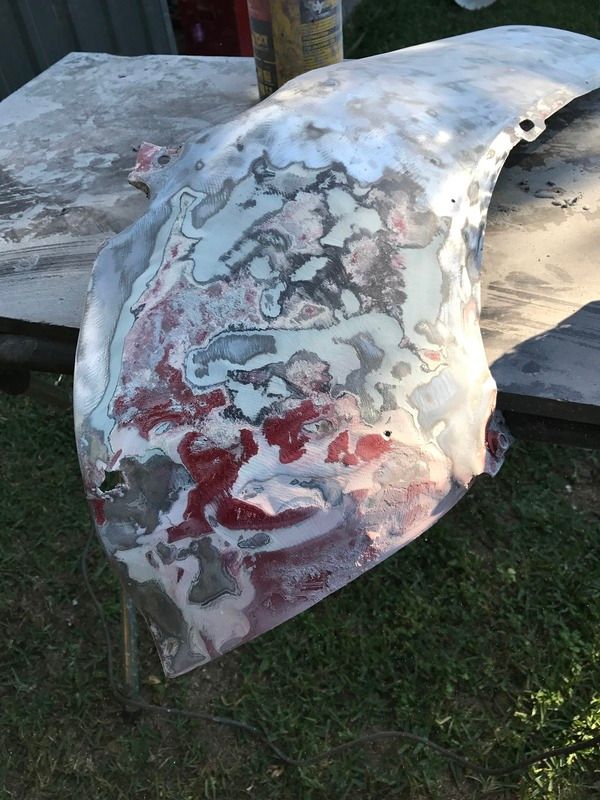
This is the good end - couple of sharp gouges in it, but generally easy enough with a spoon and dolly.
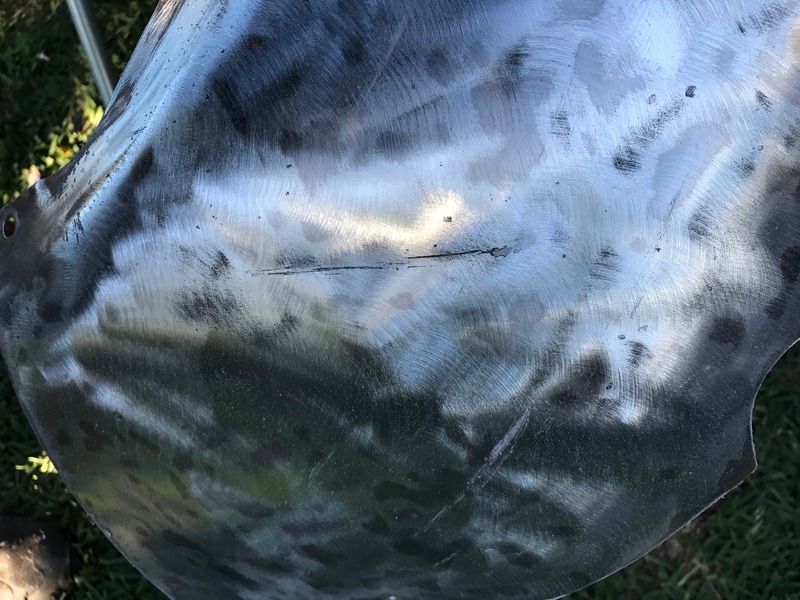
Hoping for arrival of the shrinking discs to see how it goes on the bad end. Its a heck of a lot of work so if it can take some of the pain out of the repair would be great.
Got the rad sorted and its ready to start up again. Nothing like a few stickers to make it look nice. $77 for a Dayco Cleveland thermostat...faarkkk dont remember that from my youth. I have some new vac hoses so can redo all that with the factory schematic in hand.
Also picked up (through another forum) rear cut off a front guard so got a nice brace and also section to use as a template repairing my RH guard. I do see a NOS RH front guard on fleabay currently that is mightly tempting but I'll stick with mine I think.
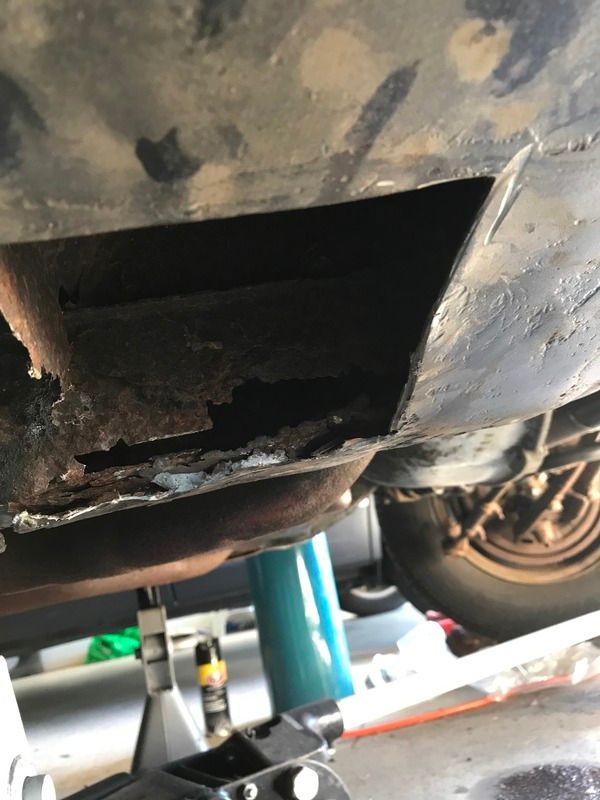
With that out of the way it was time for door hinges and a look at the RH torque box. (have another thread on questions there).
Gotta love some zincalume and bog and black paint as your repair technique. Saldy LH side has a similar patch but will tackle this one first but if its only outer cover will order them from NPD who sell just the outside section for cheap.

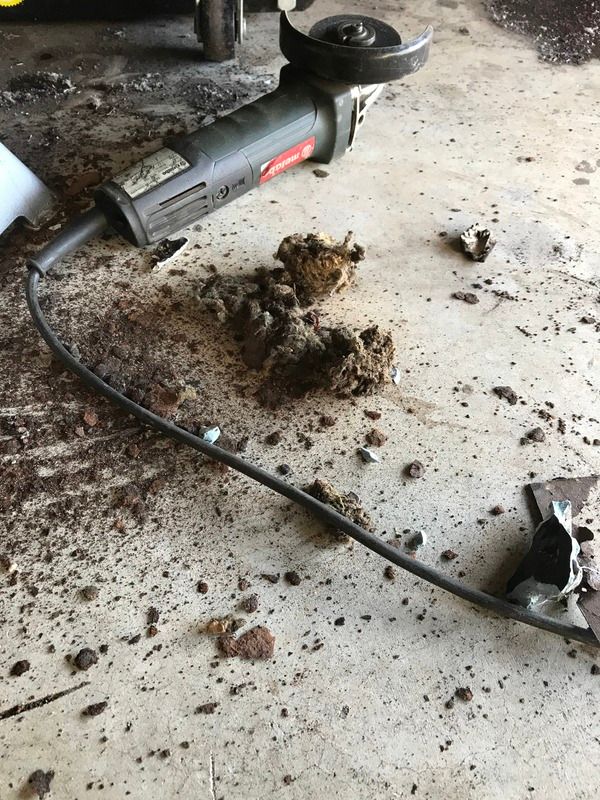
Nice mouse nest out of the torque box.
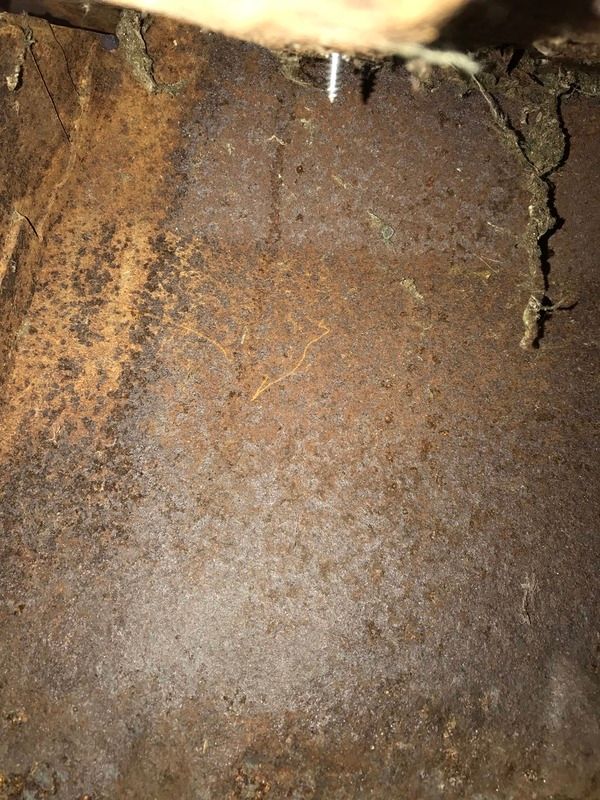
Bit of rust on the chassis rail join for the floor support area. I think it is repairable given its just 2 or 3mm steel.
Havent got a pic to show but the RH front floor is a new section. It starts out ok but ends up about an inch off the floor support at the front - me thinks the screw in this pic is probably how a quality trademan has attached the floor to the toe board.
Have new floors standing by with toe boards anyway. I want to do this properly.
Have been practising my panel beating (lack of) skills on the lower valance. Its not impossible but the theory of high spot planishing works but its fairly slow. I would hate to be paying $70-90/hr for someone to do this but based on - nothing to lose principles its been an good experience. I feel like I am making progress with it and if I can get it to a reasonable standard I will slick it with some colour just to check whether its actually useable. It had about 200gms of bog in it to start and had taken some serious hits at various points.
The bad end is - well ugly bad.

This is the good end - couple of sharp gouges in it, but generally easy enough with a spoon and dolly.

Hoping for arrival of the shrinking discs to see how it goes on the bad end. Its a heck of a lot of work so if it can take some of the pain out of the repair would be great.
Got the rad sorted and its ready to start up again. Nothing like a few stickers to make it look nice. $77 for a Dayco Cleveland thermostat...faarkkk dont remember that from my youth. I have some new vac hoses so can redo all that with the factory schematic in hand.

Also picked up (through another forum) rear cut off a front guard so got a nice brace and also section to use as a template repairing my RH guard. I do see a NOS RH front guard on fleabay currently that is mightly tempting but I'll stick with mine I think.
With that out of the way it was time for door hinges and a look at the RH torque box. (have another thread on questions there).
Gotta love some zincalume and bog and black paint as your repair technique. Saldy LH side has a similar patch but will tackle this one first but if its only outer cover will order them from NPD who sell just the outside section for cheap.

Nice mouse nest out of the torque box.

Bit of rust on the chassis rail join for the floor support area. I think it is repairable given its just 2 or 3mm steel.

Havent got a pic to show but the RH front floor is a new section. It starts out ok but ends up about an inch off the floor support at the front - me thinks the screw in this pic is probably how a quality trademan has attached the floor to the toe board.

Have new floors standing by with toe boards anyway. I want to do this properly.
Cheers
Craig
Craig

Re: 70 Mach 1 - Slowly
Stay away from "shrinking discs". Even in professional hands, they are crap. The only one that has got benefit out of them was the guy selling them .........Chux wrote:Righto been a bit slow, been a bit diverted with work commitments generally.
Have been practising my panel beating (lack of) skills on the lower valance. Its not impossible but the theory of high spot planishing works but its fairly slow. I would hate to be paying $70-90/hr for someone to do this but based on - nothing to lose principles its been an good experience. I feel like I am making progress with it and if I can get it to a reasonable standard I will slick it with some colour just to check whether its actually useable. It had about 200gms of bog in it to start and had taken some serious hits at various points.
The bad end is - well ugly bad.
This is the good end - couple of sharp gouges in it, but generally easy enough with a spoon and dolly.
Hoping for arrival of the shrinking discs to see how it goes on the bad end. Its a heck of a lot of work so if it can take some of the pain out of the repair would be great.
Got the rad sorted and its ready to start up again. Nothing like a few stickers to make it look nice. $77 for a Dayco Cleveland thermostat...faarkkk dont remember that from my youth. I have some new vac hoses so can redo all that with the factory schematic in hand.
Also picked up (through another forum) rear cut off a front guard so got a nice brace and also section to use as a template repairing my RH guard. I do see a NOS RH front guard on fleabay currently that is mightly tempting but I'll stick with mine I think.
With that out of the way it was time for door hinges and a look at the RH torque box. (have another thread on questions there).
Gotta love some zincalume and bog and black paint as your repair technique. Saldy LH side has a similar patch but will tackle this one first but if its only outer cover will order them from NPD who sell just the outside section for cheap.
Nice mouse nest out of the torque box.
Bit of rust on the chassis rail join for the floor support area. I think it is repairable given its just 2 or 3mm steel.
Havent got a pic to show but the RH front floor is a new section. It starts out ok but ends up about an inch off the floor support at the front - me thinks the screw in this pic is probably how a quality trademan has attached the floor to the toe board.
Have new floors standing by with toe boards anyway. I want to do this properly.
Kerry
To our wives and sweethearts. May they never meet
To our wives and sweethearts. May they never meet
Re: 70 Mach 1 - Slowly
Damn, have watched a few utube videos and they looked the schnitz nitz. Probably should have asked firstozbilt wrote:Stay away from "shrinking discs". Even in professional hands, they are crap. The only one that has got benefit out of them was the guy selling them .........Chux wrote:Righto been a bit slow, been a bit diverted with work commitments generally.
Have been practising my panel beating (lack of) skills on the lower valance. Its not impossible but the theory of high spot planishing works but its fairly slow. I would hate to be paying $70-90/hr for someone to do this but based on - nothing to lose principles its been an good experience. I feel like I am making progress with it and if I can get it to a reasonable standard I will slick it with some colour just to check whether its actually useable. It had about 200gms of bog in it to start and had taken some serious hits at various points.
The bad end is - well ugly bad.
This is the good end - couple of sharp gouges in it, but generally easy enough with a spoon and dolly.
Hoping for arrival of the shrinking discs to see how it goes on the bad end. Its a heck of a lot of work so if it can take some of the pain out of the repair would be great.
Got the rad sorted and its ready to start up again. Nothing like a few stickers to make it look nice. $77 for a Dayco Cleveland thermostat...faarkkk dont remember that from my youth. I have some new vac hoses so can redo all that with the factory schematic in hand.
Also picked up (through another forum) rear cut off a front guard so got a nice brace and also section to use as a template repairing my RH guard. I do see a NOS RH front guard on fleabay currently that is mightly tempting but I'll stick with mine I think.
With that out of the way it was time for door hinges and a look at the RH torque box. (have another thread on questions there).
Gotta love some zincalume and bog and black paint as your repair technique. Saldy LH side has a similar patch but will tackle this one first but if its only outer cover will order them from NPD who sell just the outside section for cheap.
Nice mouse nest out of the torque box.
Bit of rust on the chassis rail join for the floor support area. I think it is repairable given its just 2 or 3mm steel.
Havent got a pic to show but the RH front floor is a new section. It starts out ok but ends up about an inch off the floor support at the front - me thinks the screw in this pic is probably how a quality trademan has attached the floor to the toe board.
Have new floors standing by with toe boards anyway. I want to do this properly.
Cheers
Craig
Craig
Re: 70 Mach 1 - Slowly
Question
Is this a factory pull cable or aftermarket? I haven't tracked down what it actually pulls - wondering if it might be an aftermarket choke although carby is an electronic choke Holley.

Haven't had much time of late and I see good old Photobucket have screwed us all with image hosting so will have to go through and repost some pics.
I pulled off the windscreen wipers to have a look into the plenum. What did I see - drivers side, small rust hole directly under opening which must have been the water source for the floor rust!

Best thing was the massive mouse nest that I had to pull out and a nice wasps nest....ahh barn find cars, home to America's outdoors.


The air duct side of the plenum was actually really good. I gave it all a good vacuum and cannot feel any holes, just some sealant that is dry and flaking.

Interior came out as I wanted to get a decent look at the torque boxes and chassis rail. Ahhh yes - some fine workmanship on display. Just screw the new floor section over the rusted out floor and bog over everything else. Cover it up with black paint and you are an awesome restorer. I just love the "welding"!


My car is supposed to be white with medium ginger. Interior is currently black and the cost of a full reupholster was putting me off doing it considering seats are all in great condition (fronts are new covers). Looks like I might be heading back to full original colour scheme!
Seems the rear seats are the originals (and in really good condition) but been vinyl painted.

Same with the 1/4 trim panels although they will always been an easy colour change.

Is this a factory pull cable or aftermarket? I haven't tracked down what it actually pulls - wondering if it might be an aftermarket choke although carby is an electronic choke Holley.
Haven't had much time of late and I see good old Photobucket have screwed us all with image hosting so will have to go through and repost some pics.
I pulled off the windscreen wipers to have a look into the plenum. What did I see - drivers side, small rust hole directly under opening which must have been the water source for the floor rust!
Best thing was the massive mouse nest that I had to pull out and a nice wasps nest....ahh barn find cars, home to America's outdoors.
The air duct side of the plenum was actually really good. I gave it all a good vacuum and cannot feel any holes, just some sealant that is dry and flaking.
Interior came out as I wanted to get a decent look at the torque boxes and chassis rail. Ahhh yes - some fine workmanship on display. Just screw the new floor section over the rusted out floor and bog over everything else. Cover it up with black paint and you are an awesome restorer. I just love the "welding"!
My car is supposed to be white with medium ginger. Interior is currently black and the cost of a full reupholster was putting me off doing it considering seats are all in great condition (fronts are new covers). Looks like I might be heading back to full original colour scheme!
Seems the rear seats are the originals (and in really good condition) but been vinyl painted.
Same with the 1/4 trim panels although they will always been an easy colour change.
Cheers
Craig
Craig
Re: 70 Mach 1 - Slowly
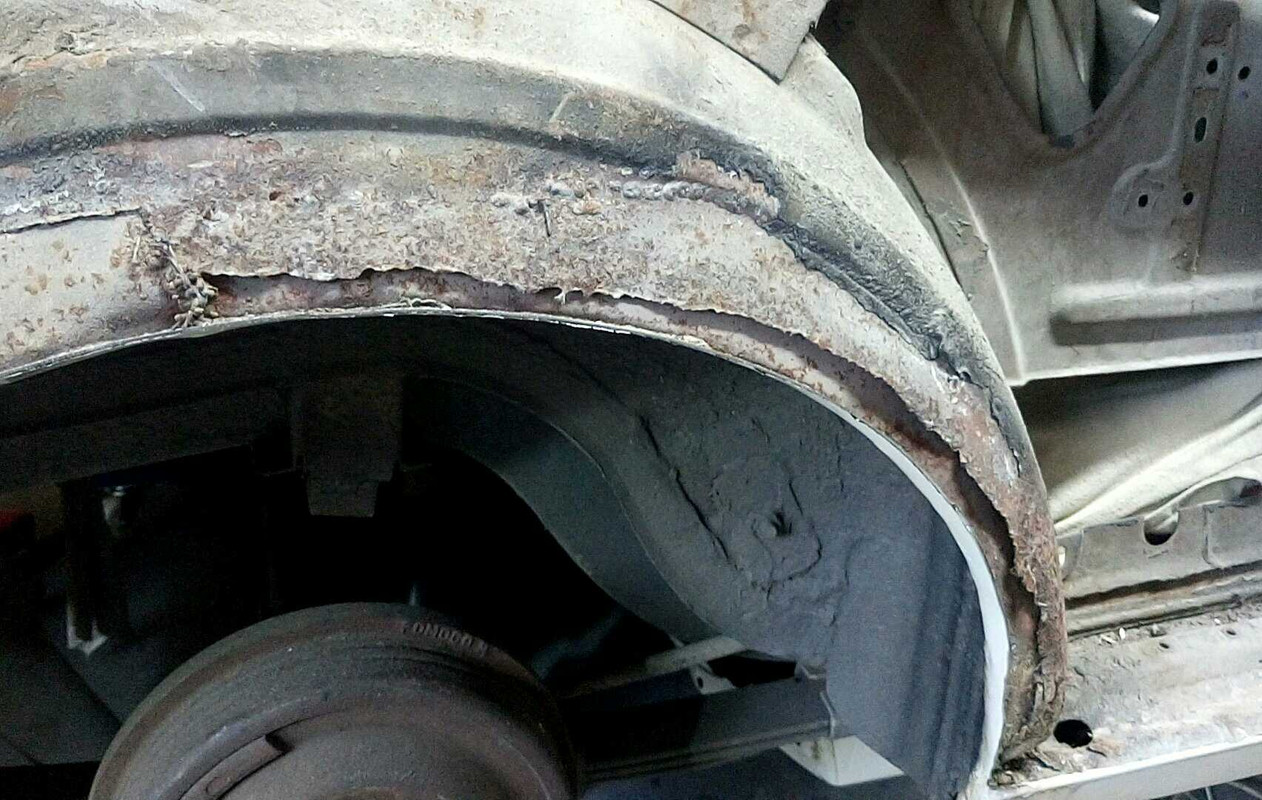
Sounds like the outer wheelhouse "repair" I just found when my quarter came off. Just weld a new bit over the top and bog it.Chux wrote: Interior came out as I wanted to get a decent look at the torque boxes and chassis rail. Ahhh yes - some fine workmanship on display. Just screw the new floor section over the rusted out floor and bog over everything else. Cover it up with black paint and you are an awesome restorer. I just love the "welding"
Re: 70 Mach 1 - Slowly
Long time no update.
I am finding time is a lot harder to come by than I thought. On call every 2 or 3 weeks has made it tough plus I still like to play golf ?
Anyway I made fatal mistake...I cut out some metal then got carried away and before I know it, I had the DS floor out and the job took on a life of its own....stuff torque box, rust in the chassis rail extension from the TB, rotted toe board, rust in the kick panel and off course a totally stuffed floor and fairly rooted top plate on the rear torque box. As a result it was on the floor in the garage not up in the shed where I would have space to move around it (getting it to the shed is not easy - I live in suburbia - easy in the landcruiser, not so easy in a 2wd car to get up the bank off the street)
All of a sudden it wasn't a quick fix from cutting out a torque box to major rust repairs and the realising welding and grinding in summer is less appealing than sitting in the AC doing work.
After a battleroyal with the toe board and a less than cooperative torque box I have reached a rather momentus point today...the front and rear torque boxes are done and the toe board in. All that is left is the floor section and seat riser....shit shouldnt take more than 2 months at this rate!
Cheers
Craig
Craig
Re: 70 Mach 1 - Slowly
I feel your pain, I also struggle to find time and have just replaced a rear torque box that took forever to do.