Page 26 of 29
Re: Project Pheonix
Posted: Wed Mar 14, 2018 6:39 am
by Nuts
Can't move the top of the fender without moving the side. Go for smaller gaps. Whats the size of the door to qtr gap?
Re: Project Pheonix
Posted: Thu Mar 15, 2018 3:50 am
by 66STNG
Nuts wrote:Can't move the top of the fender without moving the side. Go for smaller gaps. Whats the size of the door to qtr gap?
.
The qtr to door is a bit tight, approx 2mm, and the front of door to fender is about 3mm.
I think I may be able to giggle a little, but in reality I stuffed up with not having the trim in when I mocked the car up.
.
The lesson learnt is, find the car you like and buy it.....LOL.
Re: Project Pheonix
Posted: Thu Mar 15, 2018 5:19 am
by Nuts
Close it up the same as the rear and it may look ok.
Re: Project Pheonix
Posted: Thu Mar 15, 2018 6:06 am
by 66STNG
Nuts wrote:Close it up the same as the rear and it may look ok.
.
That's what I was thinking ?. Whats the worst that could happen..
Crack the paint, bend the guard or door, but apart from that.LOL...
Re: Project Pheonix
Posted: Thu Mar 15, 2018 7:24 am
by ozbilt
Panel gaps on 60's cars were 3/16" (4.75mm). We checked and set them using a 3/16" screwdriver (#1 Phillips)
Re: Project Pheonix
Posted: Fri Mar 16, 2018 1:49 am
by 66STNG
ozbilt wrote:Panel gaps on 60's cars were 3/16" (4.75mm). We checked and set them using a 3/16" screwdriver (#1 Phillips)
.
Bugger.... mine are a bit less than 3/16". Will have to make do, as it's a tad too late...
Again, Bugger.
Re: Project Pheonix
Posted: Fri Mar 16, 2018 2:05 am
by Dwayne
How do the front lower corners of your doors line up with the sills?
I'm using that as my starting point, with 5/16" door-sill gap and working back from there with my new rear quarters.
Re: Project Pheonix
Posted: Fri Mar 16, 2018 2:47 am
by 66STNG
Dwayne wrote:How do the front lower corners of your doors line up with the sills?
I'm using that as my starting point, with 5/16" door-sill gap and working back from there with my new rear quarters.
.
The lower front corners are good, I'm not really sure where I stuffed up the gaps as there was so much repaired/ repalaced, old parts new parts.
And possibly that fact that I have no idea of what I'm doing......
Re: Project Pheonix
Posted: Fri Mar 16, 2018 2:52 am
by Dwayne
I look forward to sharing this same post with you all again at some stage in the future with my project to then.
Re: Project Pheonix
Posted: Thu Apr 19, 2018 4:35 am
by 66STNG
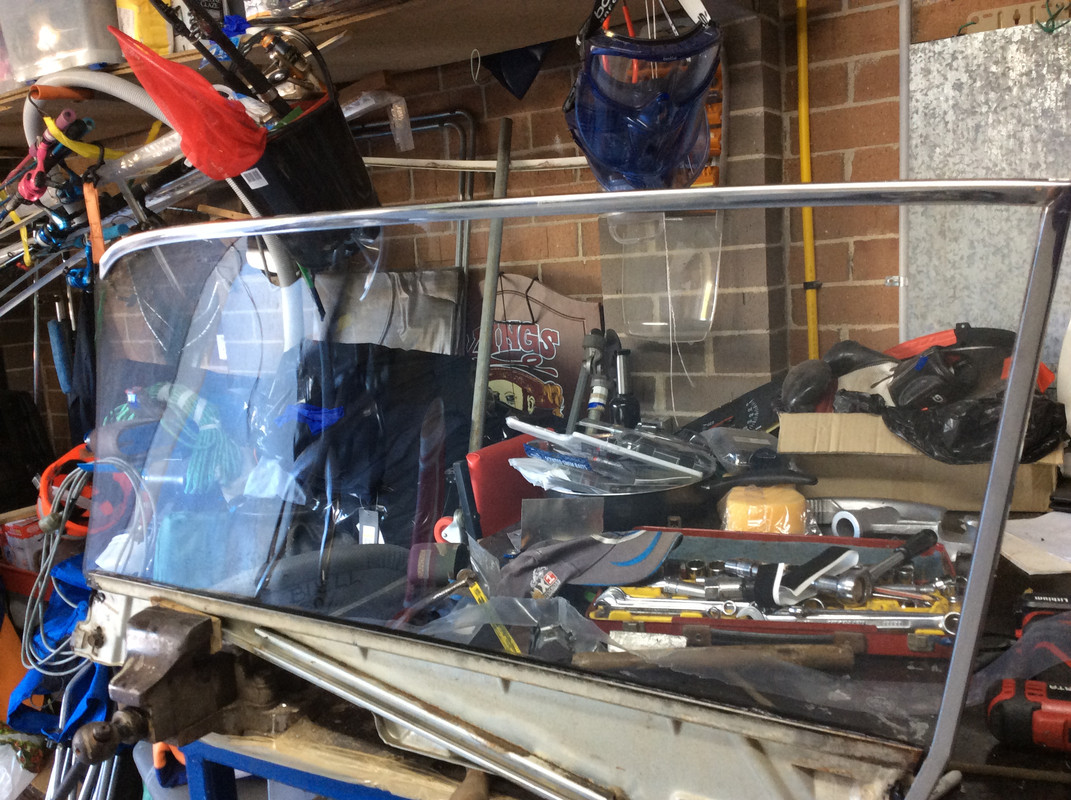
Quick up date.
.
Built the front vent windows, with all new glass, rubbers and surrounds, polished the stainless and came up a treat.
.
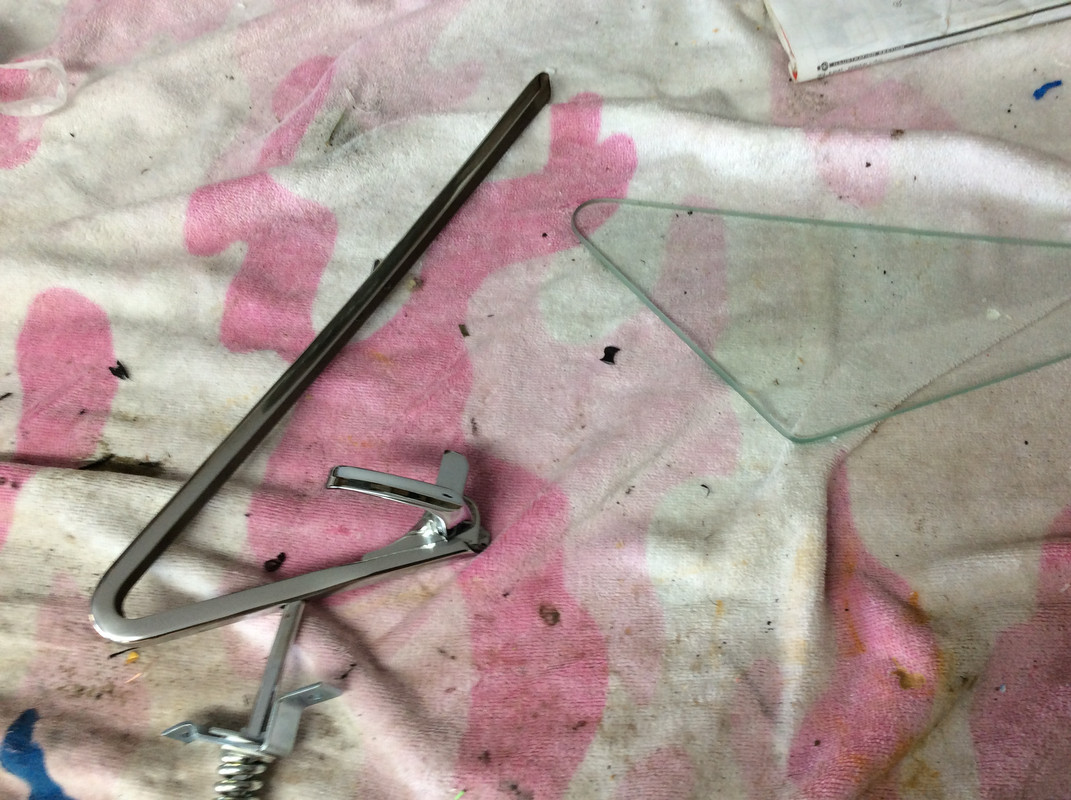
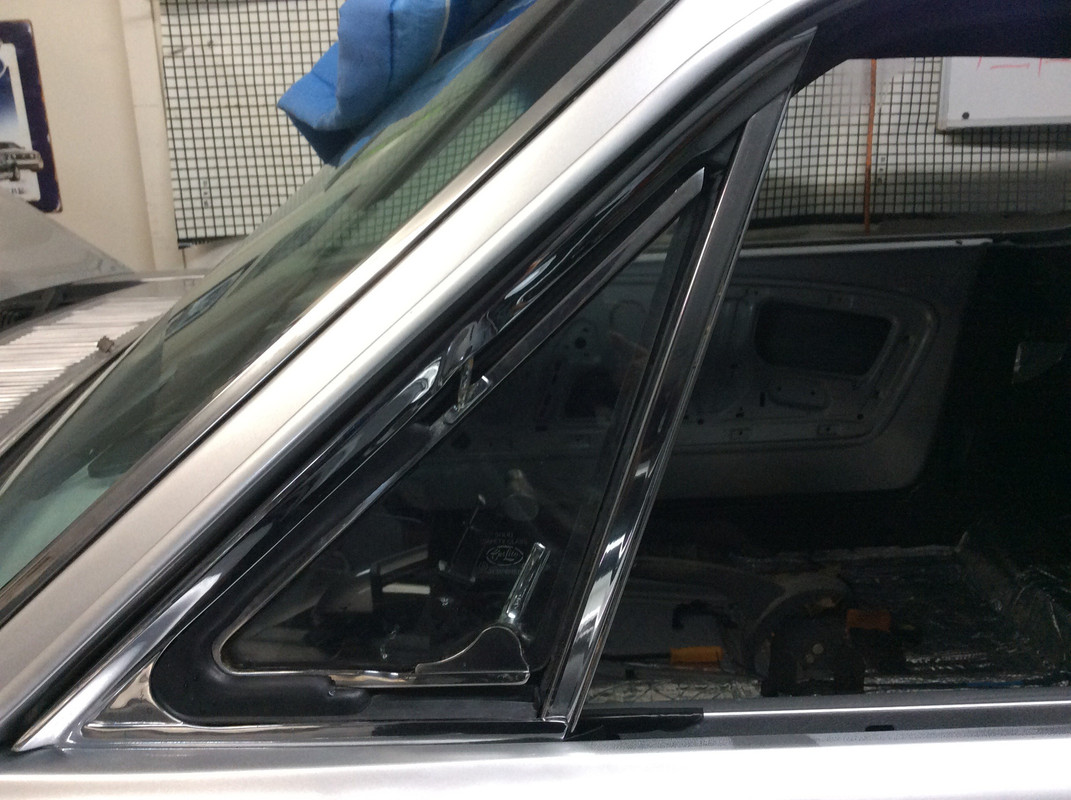
.
Then put new glass in the windows..
.
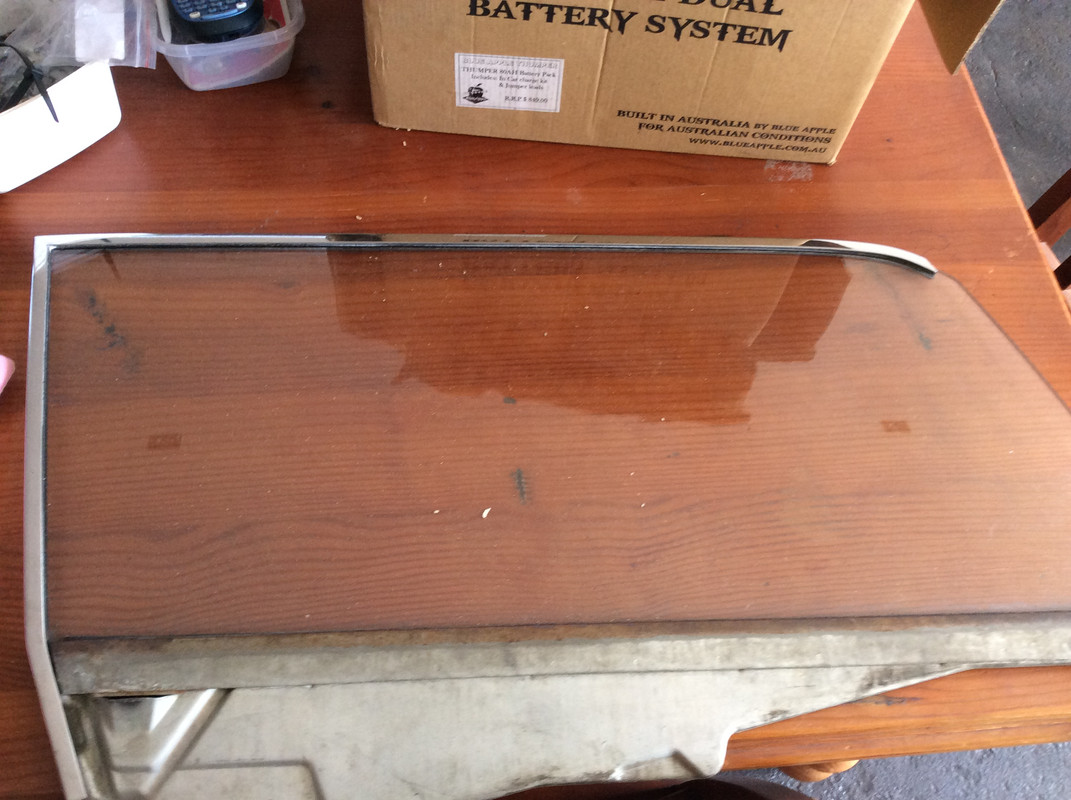
.
Ready to now put the glass in and new regulators.
Re: Project Pheonix
Posted: Thu Apr 19, 2018 8:54 am
by Ausjacko
nice work
Re: Project Pheonix
Posted: Thu Apr 19, 2018 6:26 pm
by Nuts
Well Done. What did you use to glue the glass in?
Re: Project Pheonix
Posted: Thu Apr 19, 2018 7:01 pm
by 66STNG
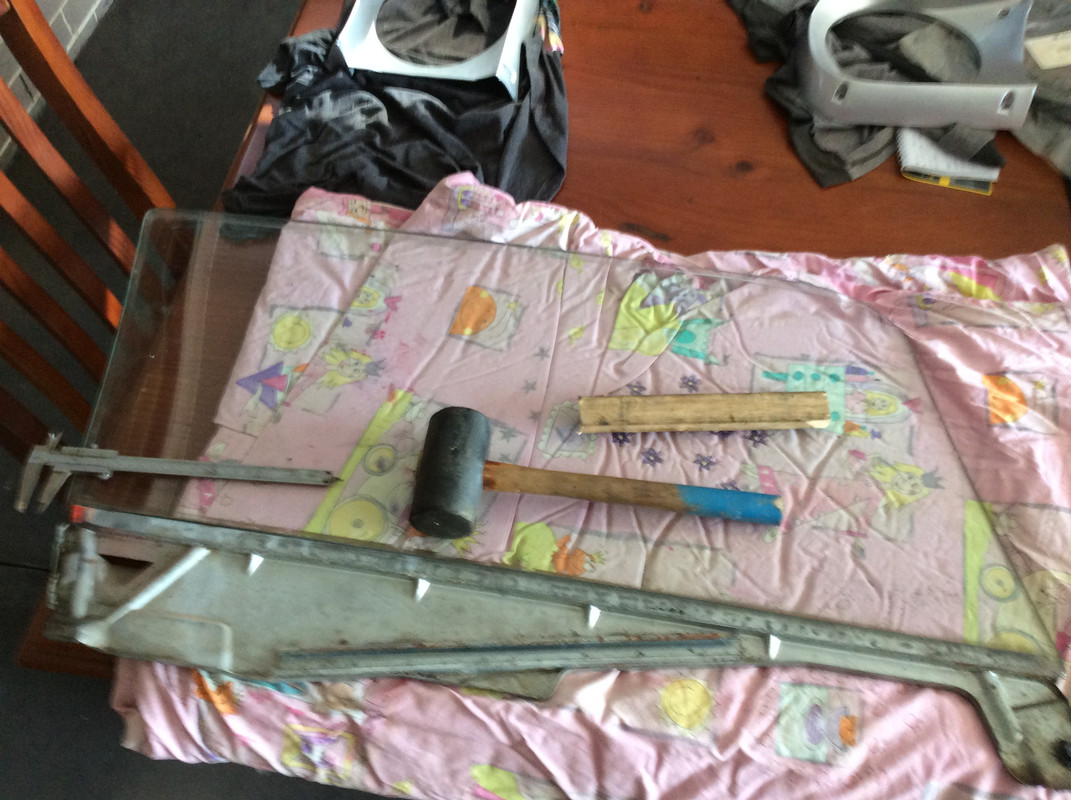
Nuts wrote:Well Done. What did you use to glue the glass in?
.
I cut up some of the old strip rubber into small pieces and used them to centre the glass and hold it temporarily. Then I used black window urethane to glue the glass to the steel Chanel.
Re: Project Pheonix
Posted: Fri Apr 20, 2018 8:43 am
by nassi
Sounds like a good solution.
Re: Project Pheonix
Posted: Thu May 17, 2018 5:12 am
by 66STNG
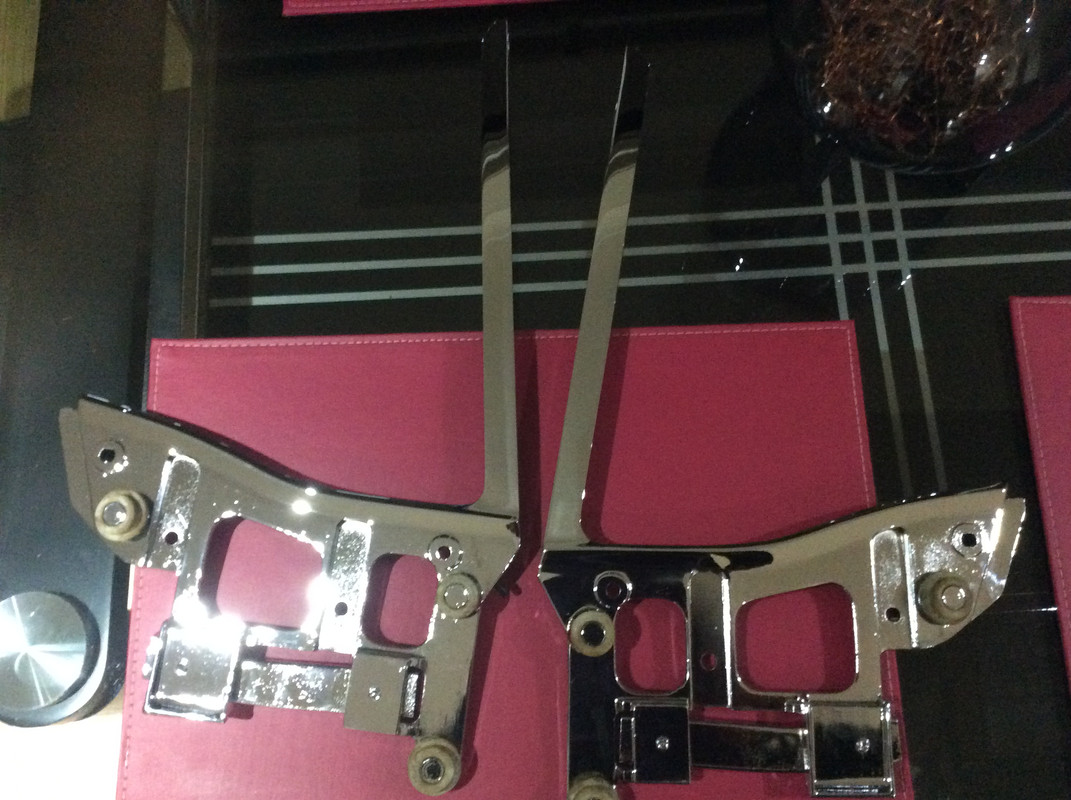
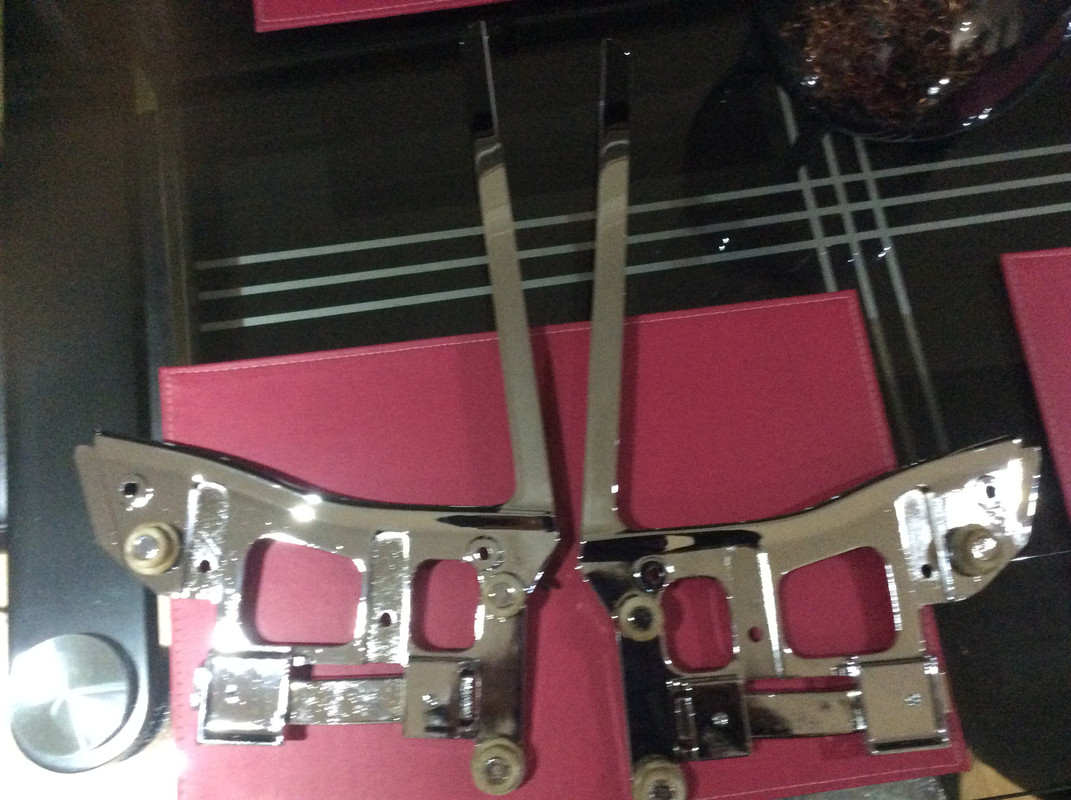
Wooo hooo,
Got my quarter windows back from the chrome place. They did an excellent job as they were quite pitted. $360 for both, so not bad.
.
.
Now to put the glass in, then into the car.