Tim's 65 vert (Caroline)
Moderator: Moderators

Re: Tim's 65 vert (Caroline)
Good luck mate, t all of you.
Re: Tim's 65 vert (Caroline)
Congrats on the additions.
I have another one coming any day now, so get to go through all the fun again.
Car is coming along nicely.

Re: Tim's 65 vert (Caroline)
Great write up & the car is getting exactly what it needs in the way of prep.
Well done on the family front also. Hopefully it will not be too long before you get to do this .......
Well done on the family front also. Hopefully it will not be too long before you get to do this .......
Kerry
To our wives and sweethearts. May they never meet
To our wives and sweethearts. May they never meet
Re: Tim's 65 vert (Caroline)
Hey Tim, what is the NPD number on B1 and B2- so I don't mistakenly order a set. Seriously, congratulations and it must be the season for it; my daughter had a baby last week.
There is a lot of work gone into that last update and it looks great.
Cheers
Jacko
There is a lot of work gone into that last update and it looks great.
Cheers
Jacko
'68 J-code GT Fastback
'67 S-code GT coupe, 'Pink Bitz' formerly known as 'Hookin' up a brother'
'69 M_____ GTS Fastback 'Blasted'
'67 S-code GT coupe, 'Pink Bitz' formerly known as 'Hookin' up a brother'
'69 M_____ GTS Fastback 'Blasted'
Re: Tim's 65 vert (Caroline)
Thanks all.
Good luck with your next arrival hybrid and Jacko if you change your mind don't order any as you can borrow one or both of mine.
Hopefully the next update won't be too far away. (car update that is)
Good luck with your next arrival hybrid and Jacko if you change your mind don't order any as you can borrow one or both of mine.
Hopefully the next update won't be too far away. (car update that is)
"The Mustang is full of Awesome"
Re: Tim's 65 vert (Caroline)
Quick update from the last 2 Saturdays. Nothing too exciting just more blocking and got a couple of the smaller add ons sanded and in primer. Also got the inside of the trunk lid and trunk painted but not happy with the trunk so will need to do a bit more work on it. Just a few photos of the progress.xpconnor wrote:Thanks all.
Good luck with your next arrival hybrid and Jacko if you change your mind don't order any as you can borrow one or both of mine.
Hopefully the next update won't be too far away. (car update that is)


I think the car is starting to look fairly straight so i will do one more bolt up of all the panels and bumpers to make sure everything is good and then hit it with some more primer another blocking and it will be close to colour.
"The Mustang is full of Awesome"
Re: Tim's 65 vert (Caroline)
coming along nicely; good work.
'68 J-code GT Fastback
'67 S-code GT coupe, 'Pink Bitz' formerly known as 'Hookin' up a brother'
'69 M_____ GTS Fastback 'Blasted'
'67 S-code GT coupe, 'Pink Bitz' formerly known as 'Hookin' up a brother'
'69 M_____ GTS Fastback 'Blasted'
Re: Tim's 65 vert (Caroline)
Struggling to find time to write these updates at the moment but with a gentle nudge from hybrid and a bit of spare time in my lunch break I thought I would post a quick but possibly little dull update.
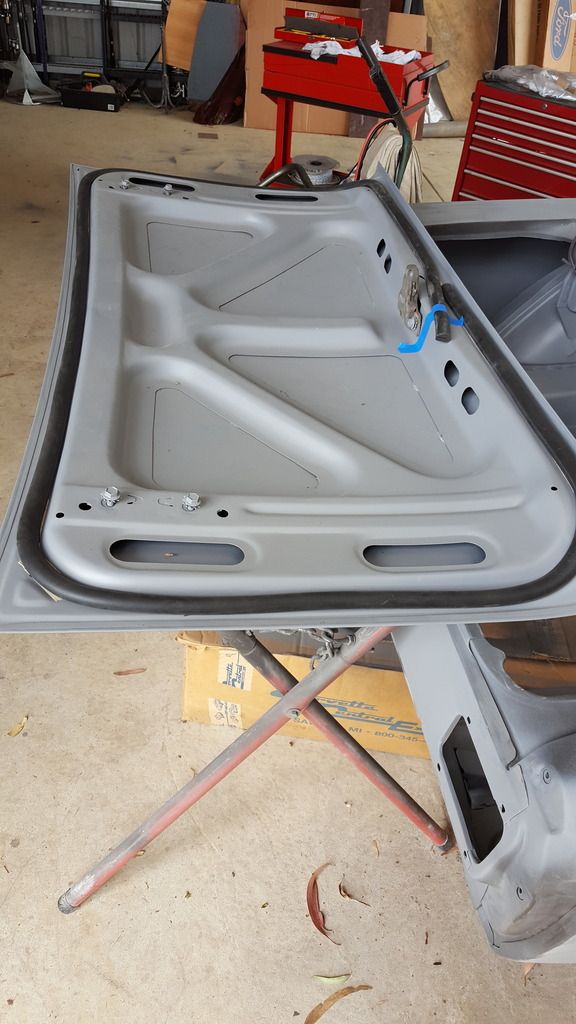
Last time we left the story I had decided that the best way to proceed was for me to hang all the panels back on the car for a final check of fitment before doing the last few coats of primer and blocking before the colour. Heeding the advice of fellow forum members I had already temporarily fitted the door and trunk seals for alignment purposes and whilst the door seals still remain stuck to the doors the trunk seal was removed for prep and primer. I think I mentioned earlier in my thread that I used double sided tape to do this and as a tip for backyarders that may have seals sitting in place for long periods and don't want to use the proper adhesive as it will be well and truly stuck by the time you get to removing your seals so will probably damage them I would recommend trying the tape. It does give out on the trunk seal after a while as it is hanging upside down but i think it is still a good alternative.
Here is the trunk with the seal applied and a photo of what the tape looks like, the brand was Henkel

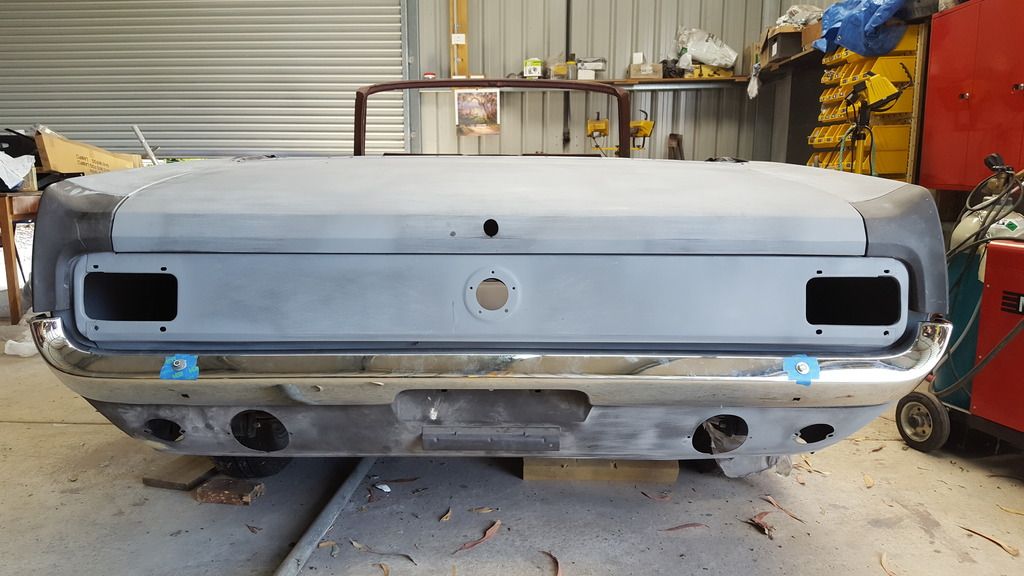
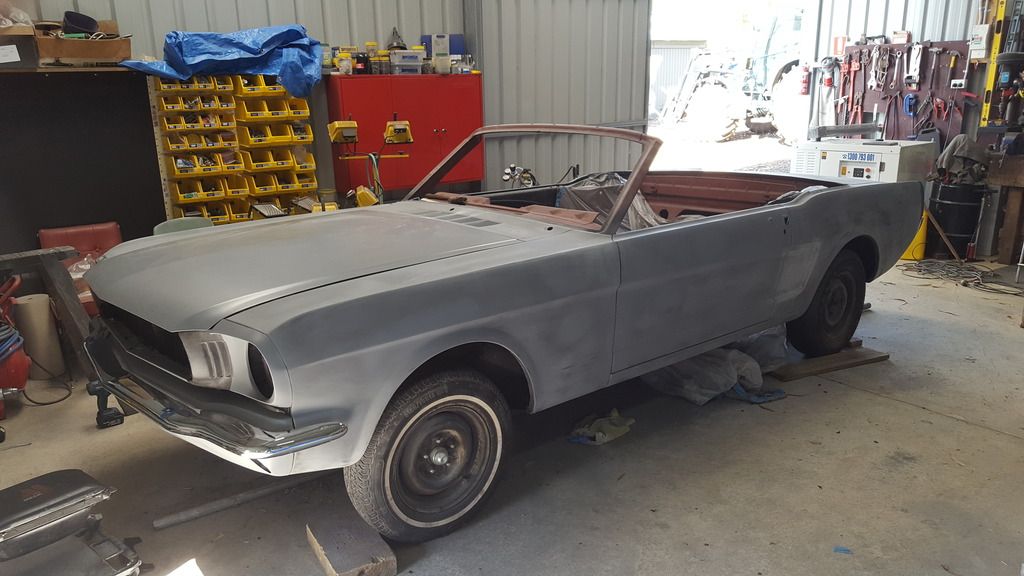
So the trunk went on, rear extensions, valance and bumper and with some dicking around it looks pretty good. It is a little high at the right corner and low at the left but I'm hoping that can just be manipulated into place. I have since done some filler work on the extensions but that is a later update as I don't have the photos at the moment.
Next I fitted up all the front end panels and most of it came together fairly well.
Bumper needs a bit of adjusting still but nothing too offensive.
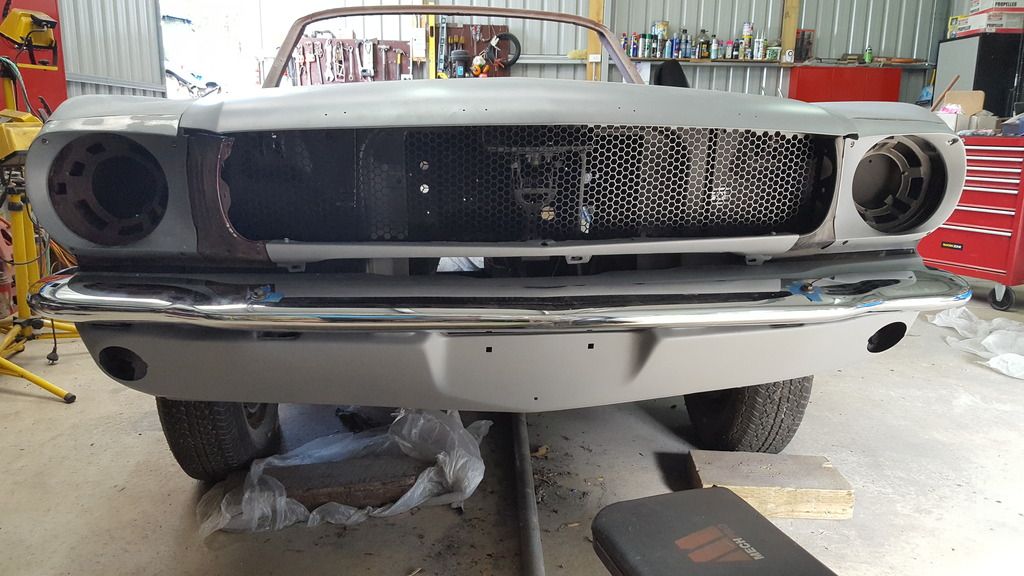
The bonnet looks a bit high at the front but it is just because it is not latched.
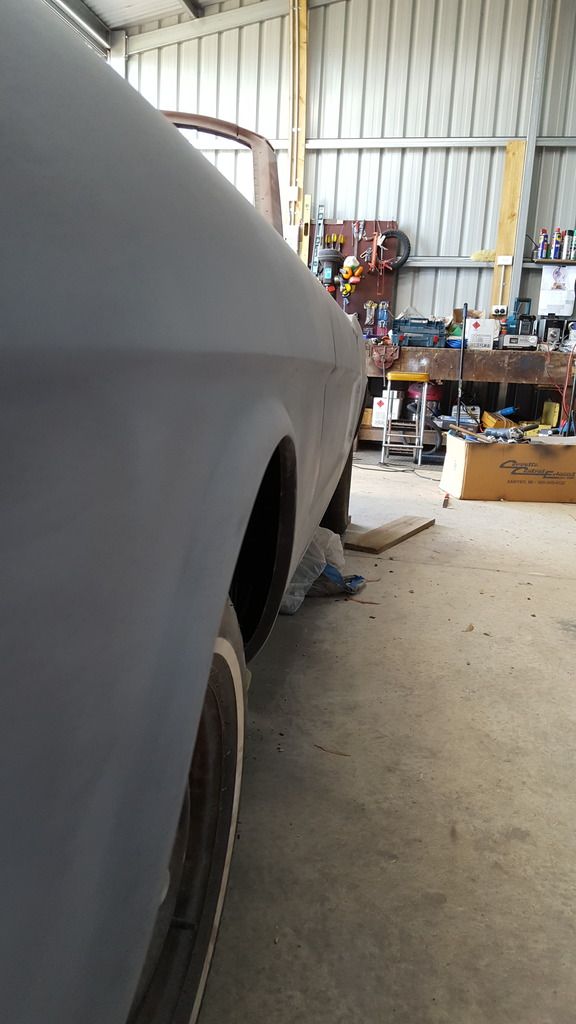
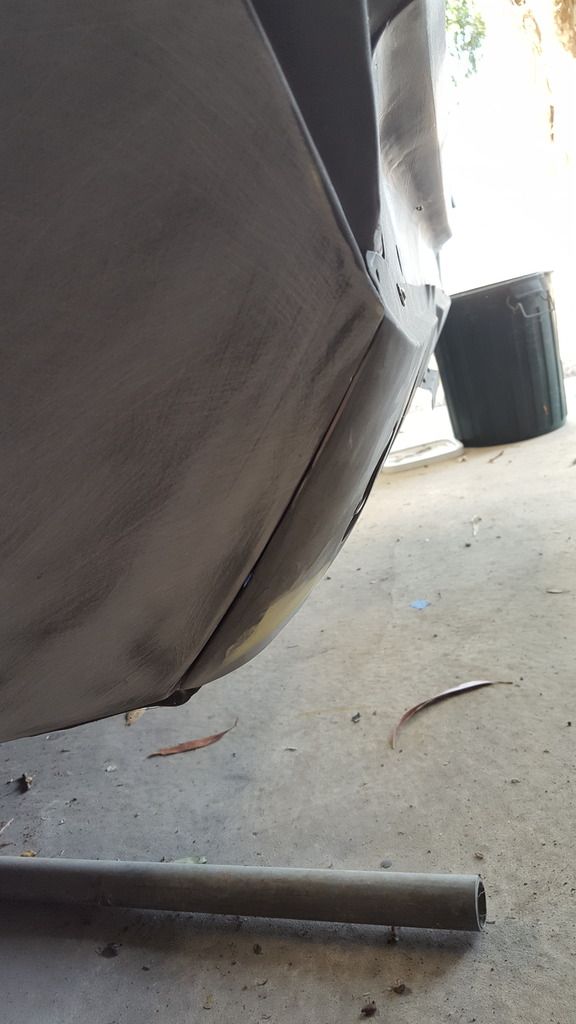
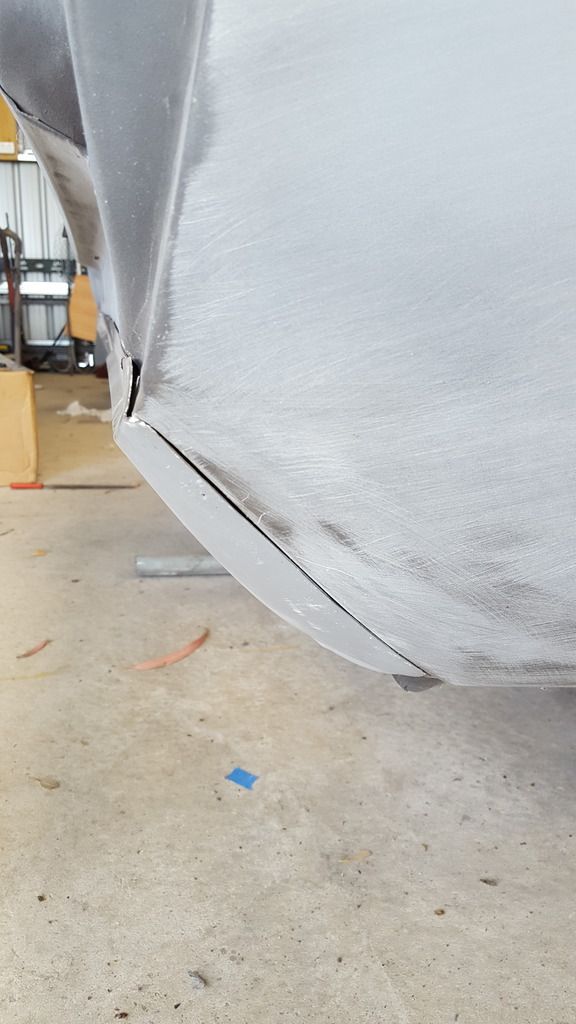
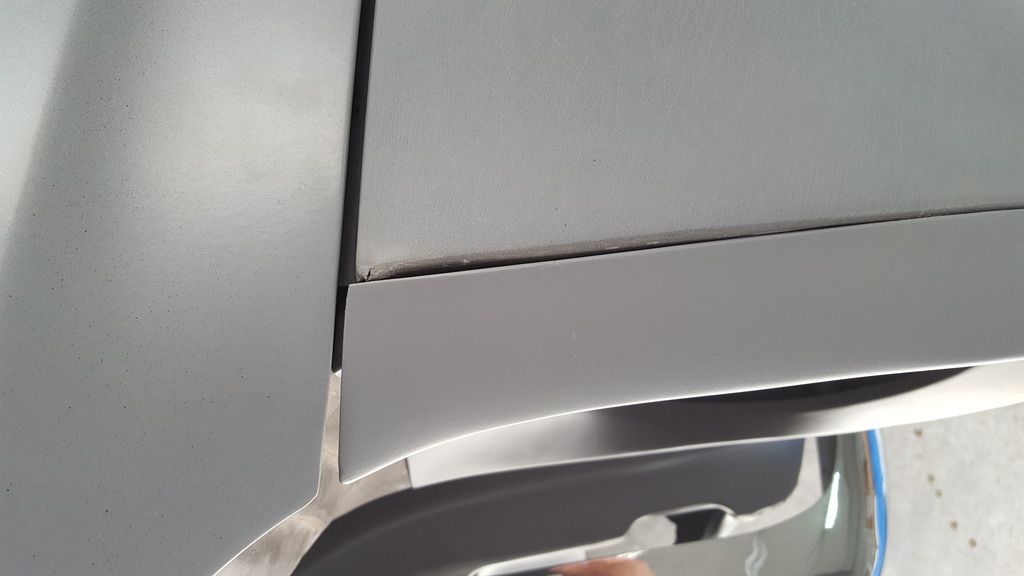
I did have one mishap when i was pounding out a bit more room so the headlight bucket could be moved up and I didn't realize I was bending the part of the fender you actually see and put a tiny tear in the corner and bent it a little. Now the extension fits like rubbish but hopefully if I take the quarter off the front edge can be straightened and it will all line up again.
So a bit more work to do with the headlight extensions and a couple of other small details and I think I will be happy enough to move it forward to the final coats of primer.
Hopefully my next update won't be to far away.
Last time we left the story I had decided that the best way to proceed was for me to hang all the panels back on the car for a final check of fitment before doing the last few coats of primer and blocking before the colour. Heeding the advice of fellow forum members I had already temporarily fitted the door and trunk seals for alignment purposes and whilst the door seals still remain stuck to the doors the trunk seal was removed for prep and primer. I think I mentioned earlier in my thread that I used double sided tape to do this and as a tip for backyarders that may have seals sitting in place for long periods and don't want to use the proper adhesive as it will be well and truly stuck by the time you get to removing your seals so will probably damage them I would recommend trying the tape. It does give out on the trunk seal after a while as it is hanging upside down but i think it is still a good alternative.
Here is the trunk with the seal applied and a photo of what the tape looks like, the brand was Henkel


So the trunk went on, rear extensions, valance and bumper and with some dicking around it looks pretty good. It is a little high at the right corner and low at the left but I'm hoping that can just be manipulated into place. I have since done some filler work on the extensions but that is a later update as I don't have the photos at the moment.


Next I fitted up all the front end panels and most of it came together fairly well.
Bumper needs a bit of adjusting still but nothing too offensive.

The bonnet looks a bit high at the front but it is just because it is not latched.


I did have one mishap when i was pounding out a bit more room so the headlight bucket could be moved up and I didn't realize I was bending the part of the fender you actually see and put a tiny tear in the corner and bent it a little.

So a bit more work to do with the headlight extensions and a couple of other small details and I think I will be happy enough to move it forward to the final coats of primer.
Hopefully my next update won't be to far away.
Last edited by xpconnor on Fri Jan 13, 2017 11:23 pm, edited 1 time in total.
"The Mustang is full of Awesome"
Re: Tim's 65 vert (Caroline)
It's looking great... that's got to be worth a front page update next time 
Re: Tim's 65 vert (Caroline)
Hopefully by Feb I should have a bit more done seeing as we have Australia day coming up. If I get time to polish my stainless window surrounds I will be able to put the door glass back in the channels so all going well I will add a small write up for that as well.hybrid wrote:It's looking great... that's got to be worth a front page update next time
"The Mustang is full of Awesome"

Re: Tim's 65 vert (Caroline)
Thanks for the double sided tape tip, I'll be using this one soon.
Re: Tim's 65 vert (Caroline)
Nice update XP, keep them coming mate.
"The simple answer is, even if I have decided I still don't know what to do."
Re: Tim's 65 vert (Caroline)
Nice work mate. As for the small crack on the front corner of the fender, I have seen so many I thought they were factory.
Re: Tim's 65 vert (Caroline)
Thanks all. I think it is looking pretty good for a car where almost the only original panel remaining is the RH fender.
"The Mustang is full of Awesome"