Fairstang Project

Create your project threads here if you prefer to keep them out of the regular forums

Moderator: Moderators

scott66stang
Mustang King
Mustang King
Posts: 4716
Joined: Wed Jul 28, 2010 6:15 am

Re: Fairstang Project

Post by scott66stang »

Wanted to keep them as low as possible so made these brackets to take the original mustang tracks as i already had brand new ones.
Had to heat up and bend the 5mm flatbar to clear the track release movements, would of been easier if i had a bigger offset vice.

Image

Image

Image

Image

Image

Had to bend down these edges so the flat bar sat flat

Image

seat fully forward

Image

Image

And fully back

Image

Image

And Fitted

Image

Image

Image

A poor attempt at covering the XR logo with some external vinyl stickers i got online, also wanted darker but will do for now. :lol:

Image
Last edited by scott66stang on Sat Mar 30, 2013 10:17 am, edited 1 time in total.
Dynamic
Living the Mustang Dream
Posts: 1336
Joined: Wed Jul 28, 2010 10:37 am
Contact:

Re: Fairstang Project

Post by Dynamic »

I tried to find a picture of your floors, are those seats bolted to the factory seat risers?
Pete
Mustang Project:
http://dynamicstang.blogspot.com
scott66stang
Mustang King
Mustang King
Posts: 4716
Joined: Wed Jul 28, 2010 6:15 am

Re: Fairstang Project

Post by scott66stang »

Yes mate std height factory risers, got plenty of head room, and if you have long legs you could mount the tracks further forward which will then make the seat go further back, i have done it more to factory settings which is fine for a short ass.

BTW i ended up redrilling the track holes 5mm further to the edge of the flatbar because the seats where touching the Pony trim, will be fine for std trim door handles.
Dynamic
Living the Mustang Dream
Posts: 1336
Joined: Wed Jul 28, 2010 10:37 am
Contact:

Re: Fairstang Project

Post by Dynamic »

scott66stang wrote:Yes mate std height factory risers, got plenty of head room, and if you have long legs you could mount the tracks further forward which will then make the seat go further back, i have done it more to factory settings which is fine for a short ass.

BTW i ended up redrilling the track holes 5mm further to the edge of the flatbar because the seats where touching the Pony trim, will be fine for std trim door handles.
:like: sweet that sounds good. Awesome progress Scott it's looking real sweet :fap:
Pete
Mustang Project:
http://dynamicstang.blogspot.com
scott66stang
Mustang King
Mustang King
Posts: 4716
Joined: Wed Jul 28, 2010 6:15 am

Re: Fairstang Project

Post by scott66stang »

Remember this lot ??? Time to make it neatly fit into the engine bay and under dash using some of the original mustang switches. 6 control units , engine ecu, gearbox controller, speed controller, climate controller, trip computer and cruise controller. :vomit:

Image

Image

Image

Image
Nuts
Mustang King
Mustang King
Posts: 4635
Joined: Sat Jul 31, 2010 6:07 pm

Re: Fairstang Project

Post by Nuts »

You have too much fun Scott!
My Motto - Don't get Caught! If you do, Blame Someone Else!

MUSTANG - Fantastic Not Plastic
cage
Mustang King
Mustang King
Posts: 3775
Joined: Fri Jul 30, 2010 1:25 pm
Contact:

Re: Fairstang Project

Post by cage »

Been a while Scott. Great job on the seats and they are sitting nice and low in the beast. Well done mate.
"The simple answer is, even if I have decided I still don't know what to do."
scott66stang
Mustang King
Mustang King
Posts: 4716
Joined: Wed Jul 28, 2010 6:15 am

Re: Fairstang Project

Post by scott66stang »

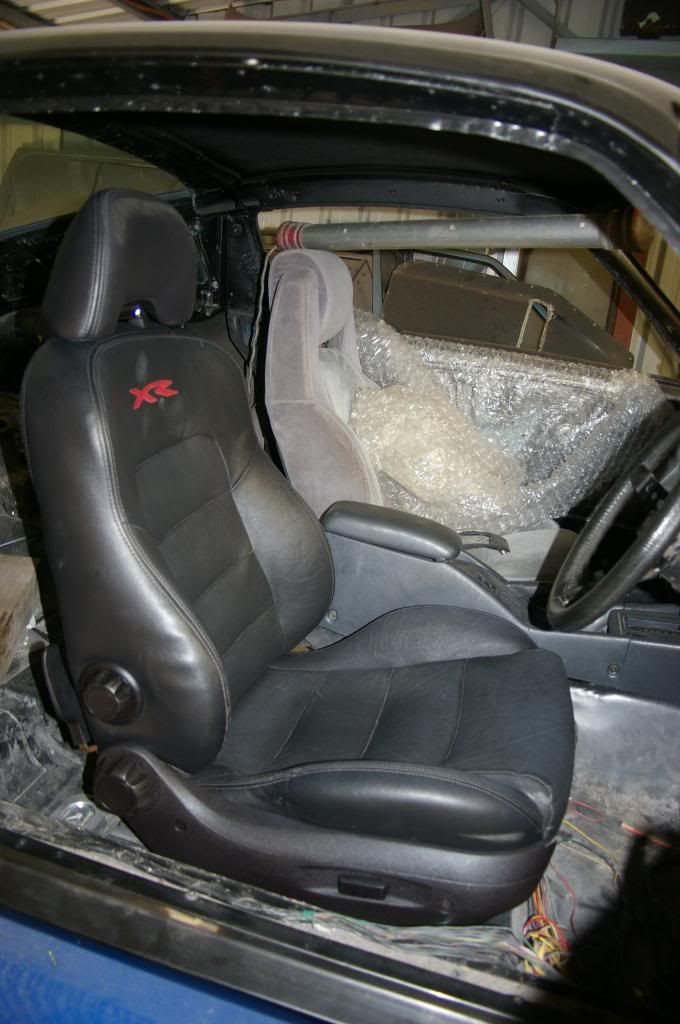
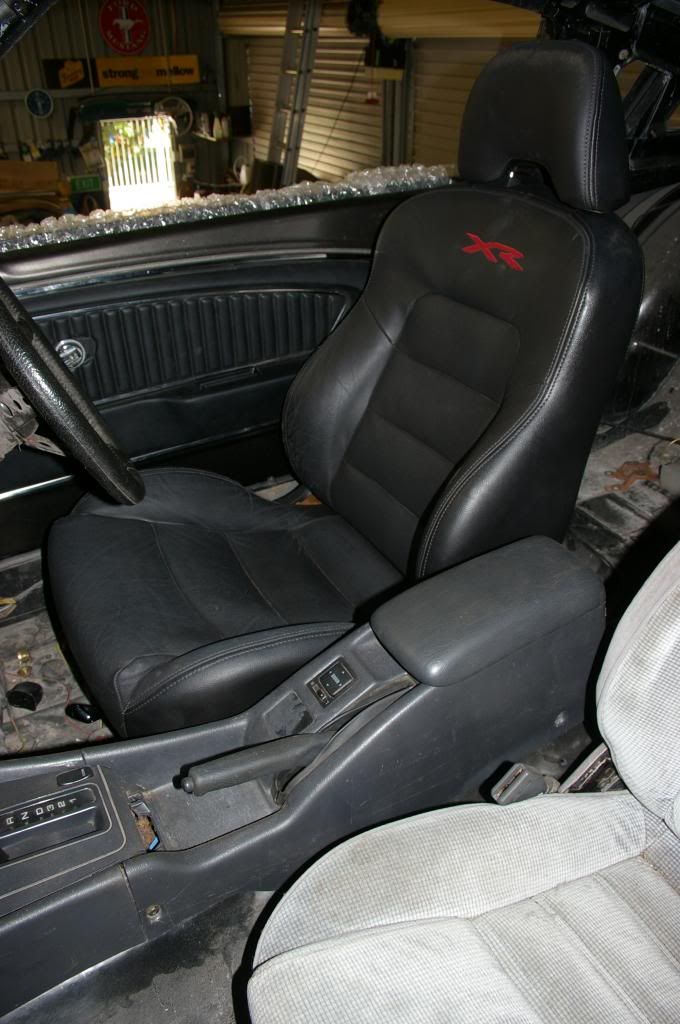
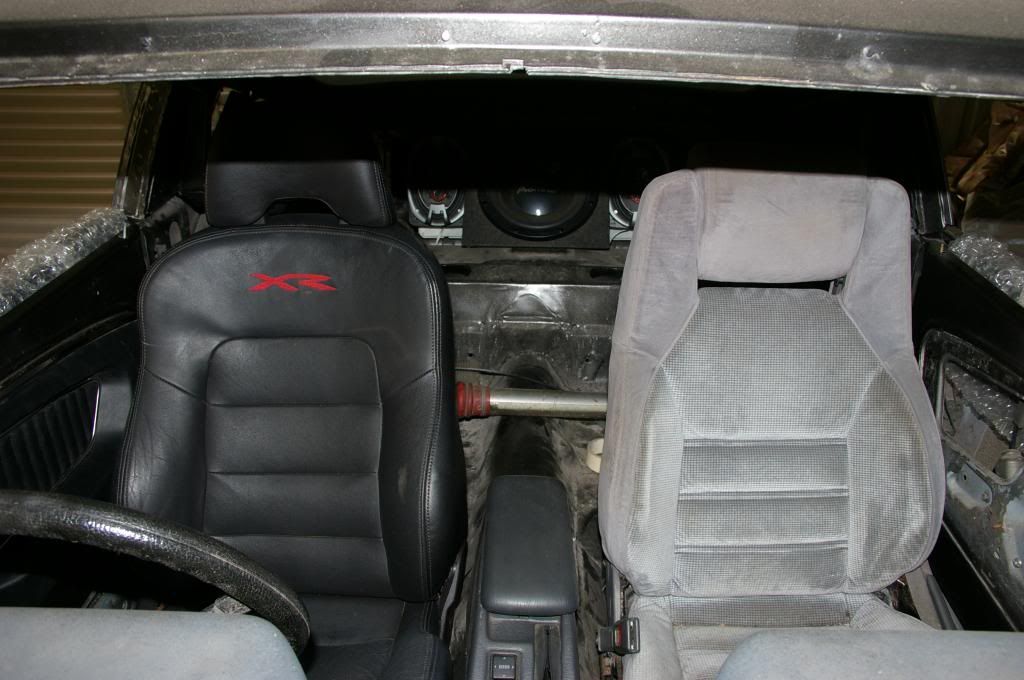
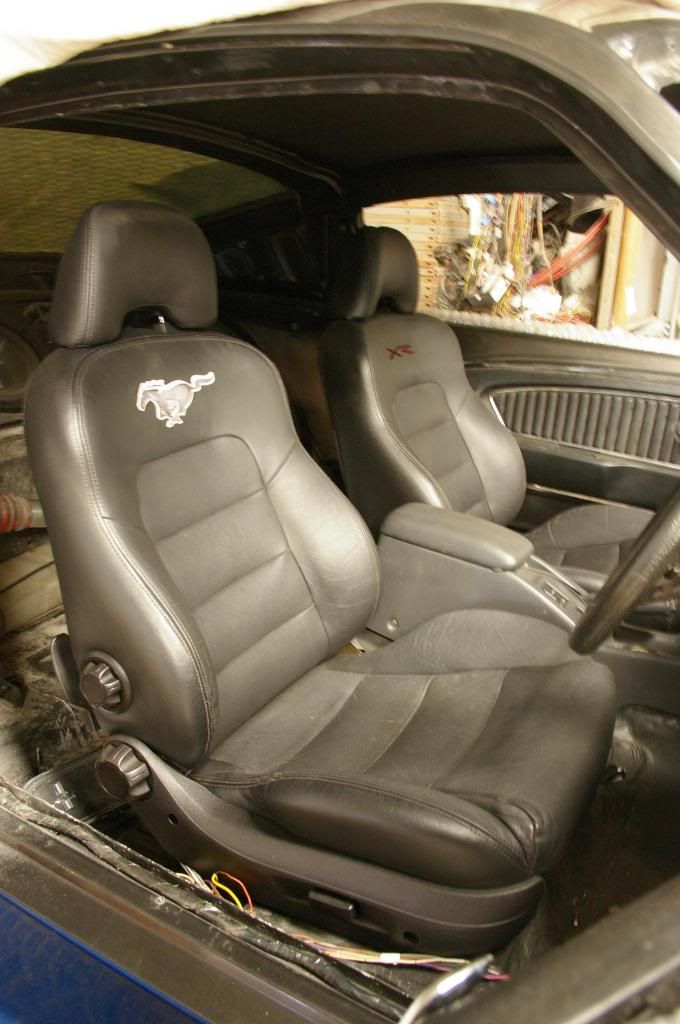
cage wrote:Been a while Scott. Great job on the seats and they are sitting nice and low in the beast. Well done mate.
Yes Cage
And almost 1 1/2 years further again since i worked on her last. :lol:
I have cleared "some" backlog of stuff keeping me away from the Mustang. Although in that time it did include importing the Cadillac and getting it on the road.
I’m not going to jinx myself and say its all plain sailing to the finish line from here but hell I’m still bloody keen.

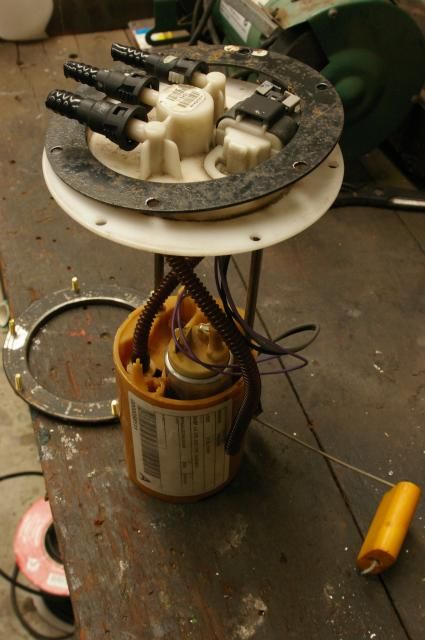
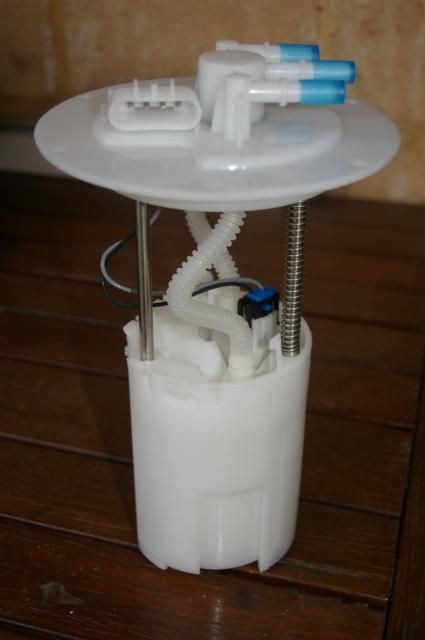
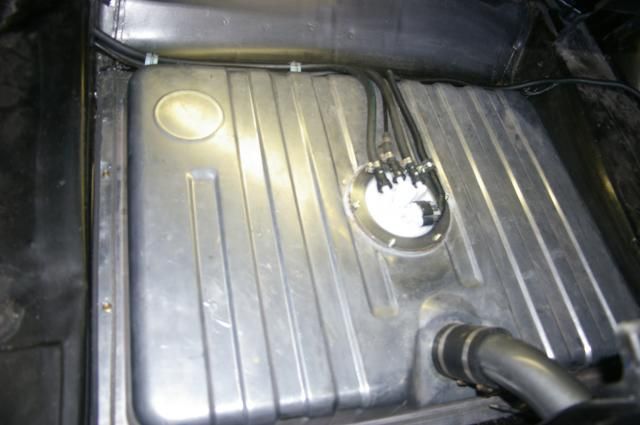
The last few days I have been bolting in the new 1970 22 gallon fuel tank, doing the filler neck mod and decided to fit a BF sedan fuel pump unit.

Image

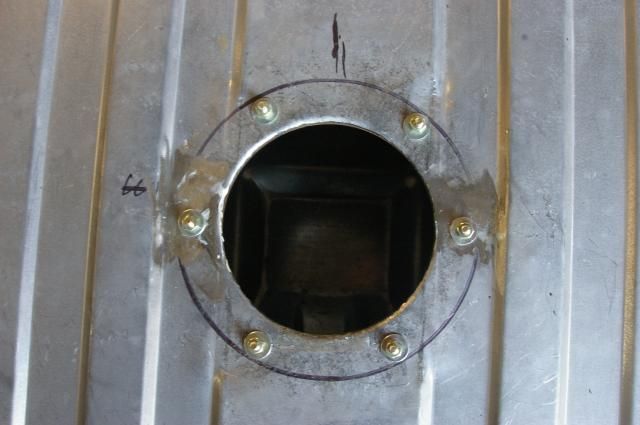
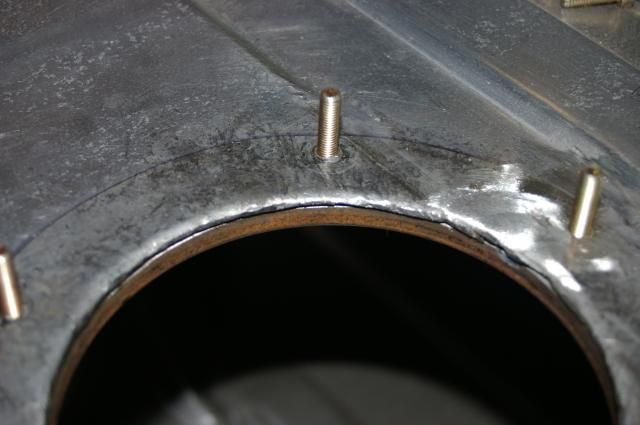
Apart from cutting some slices each side of the pump hole to fit the support ring underneath and then welding them back up i didn’t do any other welding. The slices also helped in the flattening out process taking out the raised stretched metal.
The welding would of been avoided if i just put one slice in the support ring and wound it through, but at the time i was planning a different approach of totally welding the ring to the tank and making blind nuts so fuel doesn’t leak out the screw threads.

Image

Image

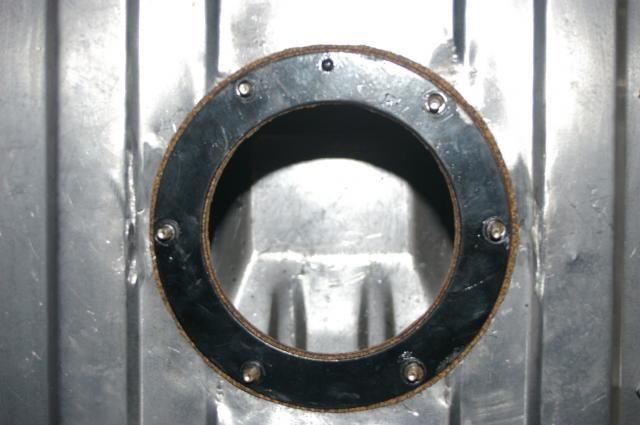
It occurred to me that with my Cadillac fuel sender unit which is screwed into position through open holes into the tank, all that stood between the fuel seeping through the screw holes was the cork gasket, so why not just use cork for this.

When making the gasket it is important to punch the holes smaller than the thread size to ensure a tight seal so fuel doesn’t leak past the thread and out the top.

Image

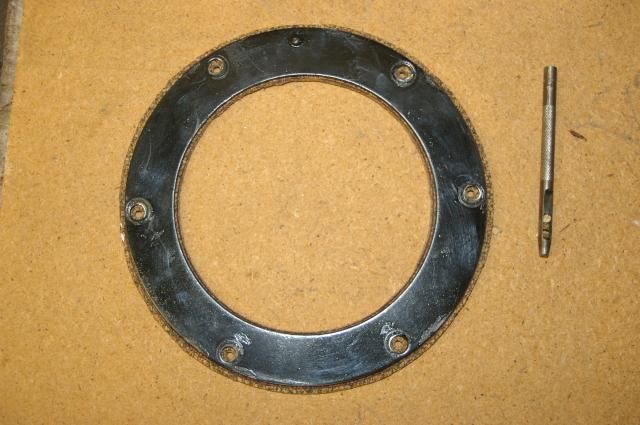
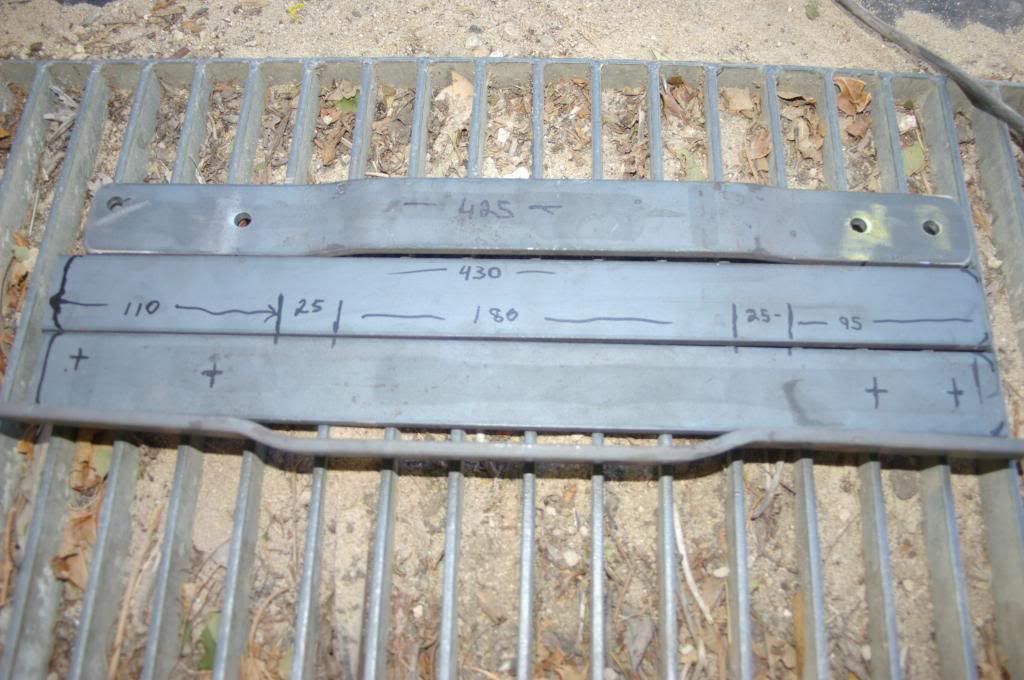
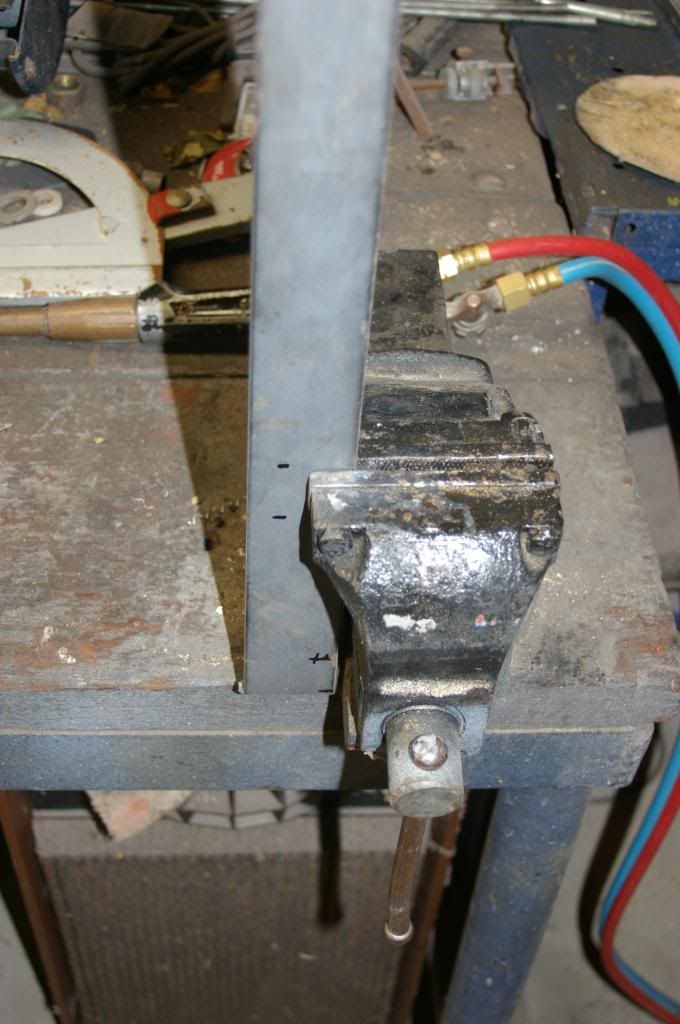
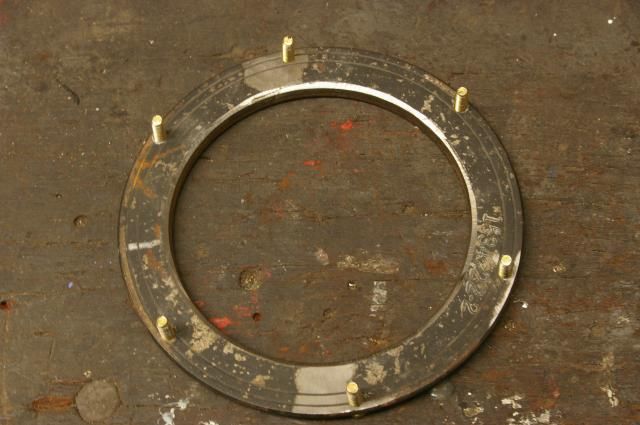
I made the bottom support ring by cutting off the outer vbelt ring from my mitushiti family van harmonic balancer I replaced recently, using my lathe I have recently purchased. This was after I almost gave up after spending hours trying to find the right size piece of metal laying around my house and our local hardware stores. The inner and outer circle diameters were perfect and is a solid bit of metal., I just drilled and tapped and ground out a bit of taper for the bolt heads to sit flush. I drilled the corresponding holes in the tank just big enough for the threads to push through with force which easily held the plate up.

Image

Image

Image

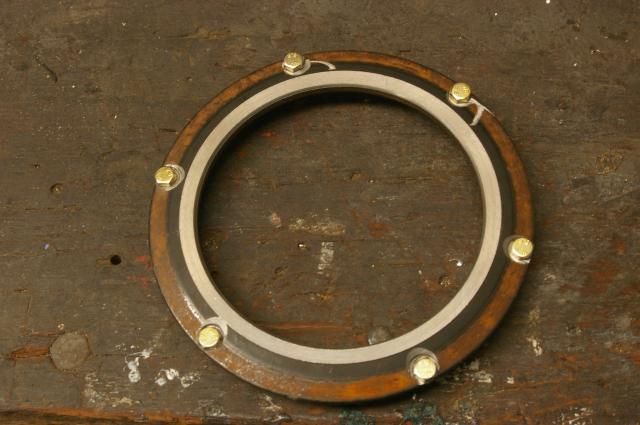
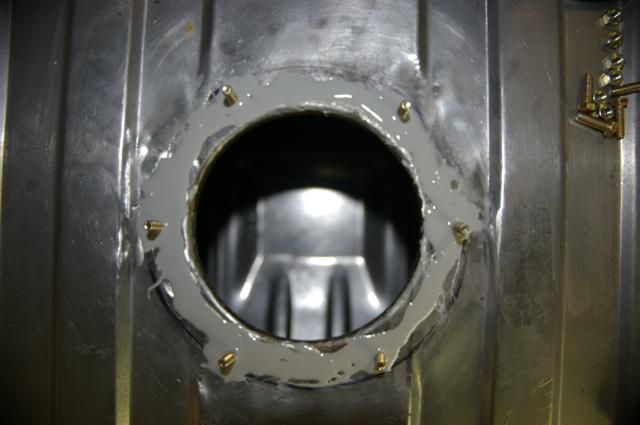
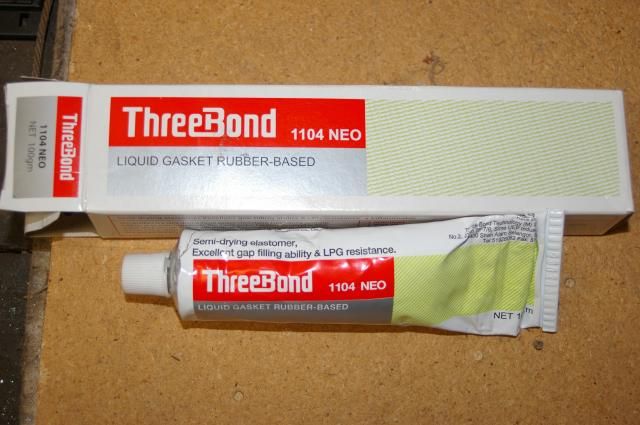
For extra peace of mind I coated around the studs and gasket area with this stuff that was recommended from the auto shop which is supposed to be very resistant to fuels oils and LPG . It squished out all the sides when I bolted it down with the gasket and upper plate, I then cleaned up the excess and left it overnight to dry.

Image

Image

Image

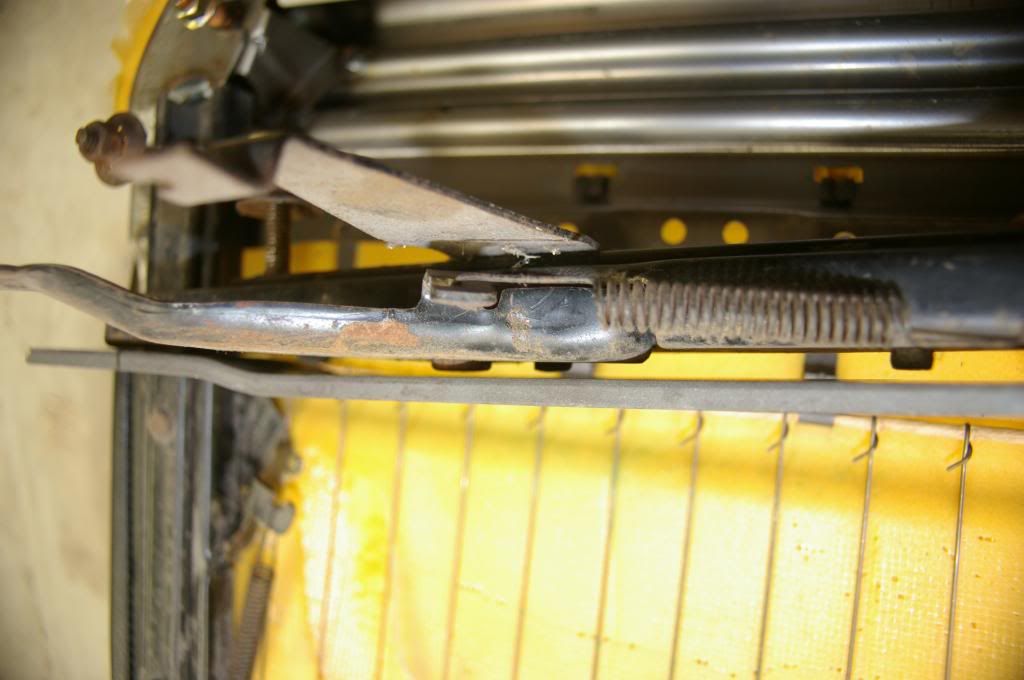
Fitted the tank the next day with the rubber tape between tank and car body and new sccrews, modified the filler neck and purchased some new 57mm fuel grade rubber hose for filler neck to tank connection.

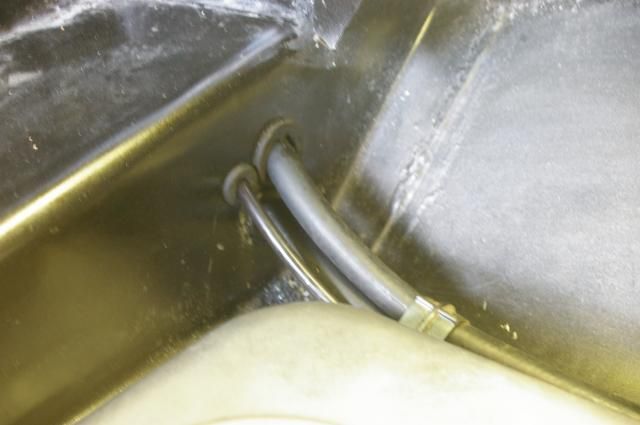
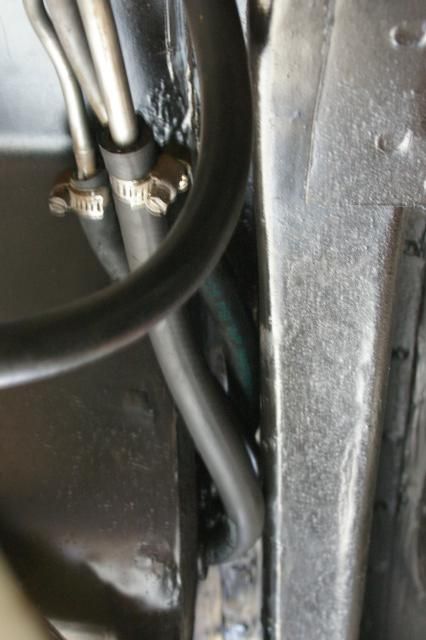
Put in the new fuel pump and ran fuel hose through the floor to the pipes underneath , ran the electrical wires and fitted some clamps to neaten it all up. Will make a protective cover for the pump later and put some plastic wrapping around hoses where they run near the chassis rails.

Image

Image

Image

Image

Also blanked of the new old pickup and ran the fuel sender wire.

Image

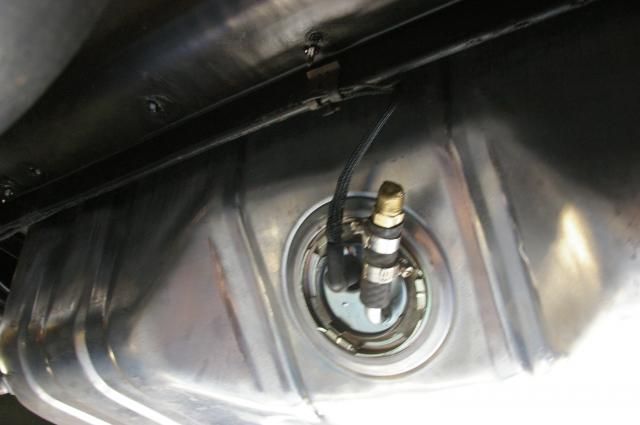
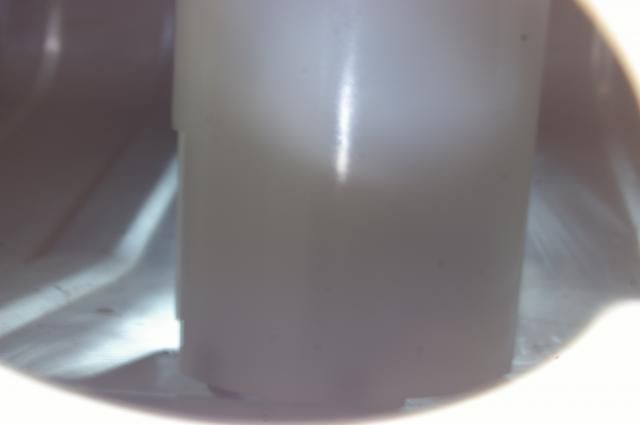
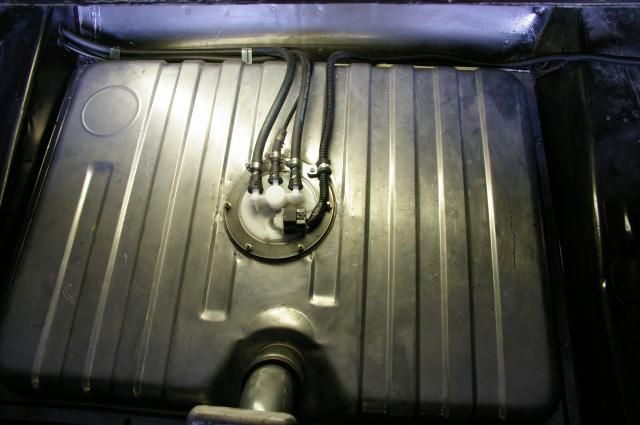
This is the pump inside the tank looking through the old pickup/sender unit hole. Hard to make out in the pic but it sits about 10mm off the bottom of the tank in the 15-20mm pressed rebate in the tank.

Image
boofhead
Mustang King
Mustang King
Posts: 4505
Joined: Tue Nov 02, 2010 8:33 pm
Contact:

Re: Fairstang Project

Post by boofhead »

Very good stuff. Nice to see progress. This is one of the easiest ways to add a baffle and pump into the tank resulting in a neat package.
I will someday think of something clever to say.
hybrid
Mustang King
Mustang King
Posts: 9354
Joined: Tue Jul 27, 2010 2:13 pm
Contact:

Re: Fairstang Project

Post by hybrid »

Nice work Scott!
Now where did you get the plug for the electricals for the pump? I still haven't got one yet.

I wish I had have gone for the deeper tank too. My pump gets compressed a fair bit in the bottom of the tank. It doesn't matter if it sits on the bottom anyway. It's designed to still let the fuel in.

The higher tank provides a nice little crevice to run the pipes and wiring in too... very cool.
cage
Mustang King
Mustang King
Posts: 3775
Joined: Fri Jul 30, 2010 1:25 pm
Contact:

Re: Fairstang Project

Post by cage »

Great to see an update Scott, I like the idea of the 80+ litre tank also.

Can you please post a picture of the car from behind and how low the tank sits please.
"The simple answer is, even if I have decided I still don't know what to do."
hybrid
Mustang King
Mustang King
Posts: 9354
Joined: Tue Jul 27, 2010 2:13 pm
Contact:

Re: Fairstang Project

Post by hybrid »

I don't think it hangs down any lower cage.. it's just higher inside.
Pinto-Pete
Mustang King
Mustang King
Posts: 3210
Joined: Fri Mar 04, 2011 7:57 pm

Re: Fairstang Project

Post by Pinto-Pete »

hybrid wrote:I don't think it hangs down any lower cage.. it's just higher inside.
I do believe you are right Jeff... :like:
I'm Batman...

Crane Operator
Mammoet Australia
Rye Park Wind Farm
Ausjacko
Mustang King
Mustang King
Posts: 2367
Joined: Tue Aug 03, 2010 7:30 pm
Contact:

Re: Fairstang Project

Post by Ausjacko »

OK, how did you get the ring inside the tank to bolt up from inside? Isn't it a larger diameter than the hole you created?

The steel lines in that underside shot look very neat, nice work.
'68 J-code GT Fastback
'67 S-code GT coupe, 'Pink Bitz' formerly known as 'Hookin' up a brother'
'69 M_____ GTS Fastback 'Blasted'
scott66stang
Mustang King
Mustang King
Posts: 4716
Joined: Wed Jul 28, 2010 6:15 am

Re: Fairstang Project

Post by scott66stang »

hybrid wrote:Nice work Scott!
Now where did you get the plug for the electricals for the pump? I still haven't got one yet.

I wish I had have gone for the deeper tank too. My pump gets compressed a fair bit in the bottom of the tank. It doesn't matter if it sits on the bottom anyway. It's designed to still let the fuel in.

The higher tank provides a nice little crevice to run the pipes and wiring in too... very cool.

I got a working BA ute fuel pump off EBAY $20 that came with the metal mounting ring, electrical plug and fuel line fittings. The pump was too long when pushed down so i pulled it apart and shortened the rods which didnt go too well, i decided to put in a new pump i had, but in the end i couldnt find correct submersible replacement hose so just went and got the new BF one instead.
The ute one also had the fuel sender in it but the variable electrical part broke in half when i tried to remove it and fit to the BF one which had the sender mounting points and electrical terminals already available to use.

BA ute pump

Image

hybrid wrote:I don't think it hangs down any lower cage.. it's just higher inside.
Thats correct

But i will put up a pic anyway because now the fuel cap is fitted :lol:
Ignore the droopy exhaust extentions i have new ones to fit, they worked out flat to the cutouts on mockup because of the angle but when i welded it all together the rest of the exhaust straightened. I didnt realise untill i lowered the hoist :-|

Image

Image

Image
Last edited by scott66stang on Sat Aug 16, 2014 11:45 am, edited 2 times in total.
Post Reply