Supercharger seal replacement

Need help on paint, paint prep, welding, engines etc?

Moderator: Moderators

Husky65
Mustang Star
Mustang Star
Posts: 955
Joined: Sun Jun 21, 2015 11:53 pm

Supercharger seal replacement

Post by Husky65 »

As gbx78 knows, I have been trying to track down a leak from my novi 2000 supercharger. I replaced the seals when I first got it with a seal replacement kit I bought from the states(yes I know I shouldn't have touched it :argh: ). However, there was oil that was pooling on the rear of the volute, and dripping down onto the alternator underneath. I thought it was my drain hose, so replaced that. Yup, still did it. Replaced all my drain fittings, and enlarged the drain hose. Still leaking. I then thought it could be too much crank pressure, which would stop the drain pipe from draining, and force oil out the seals. So added another valve breather. Also re routed my pcv valve venting, so it is being sucked up via the novi under boost(via a catch can). Still leaking.
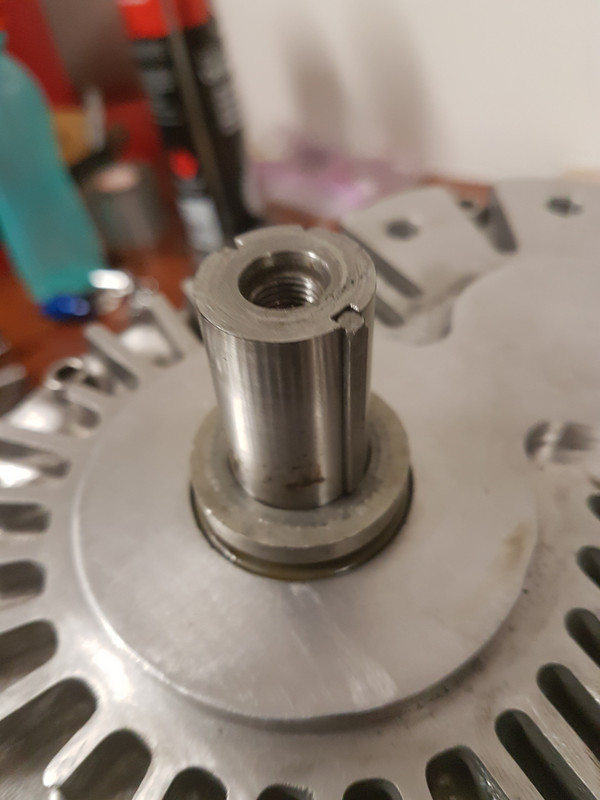
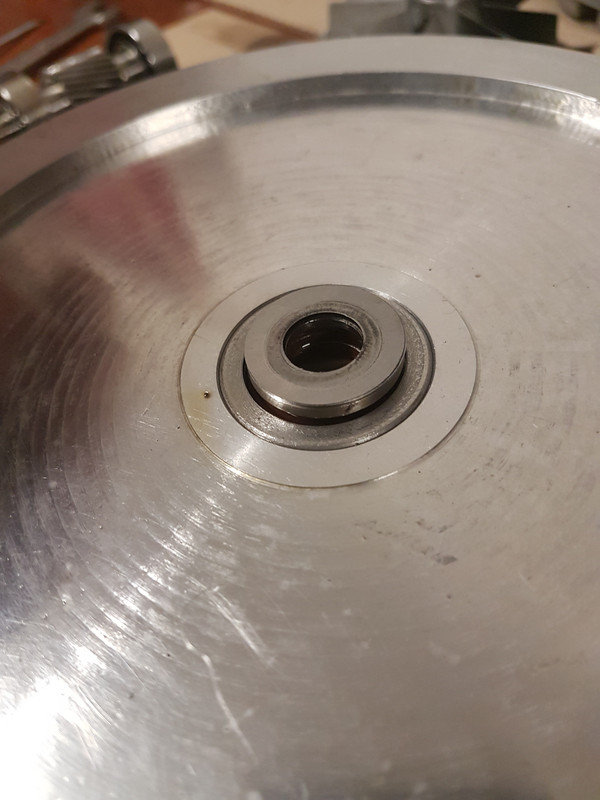
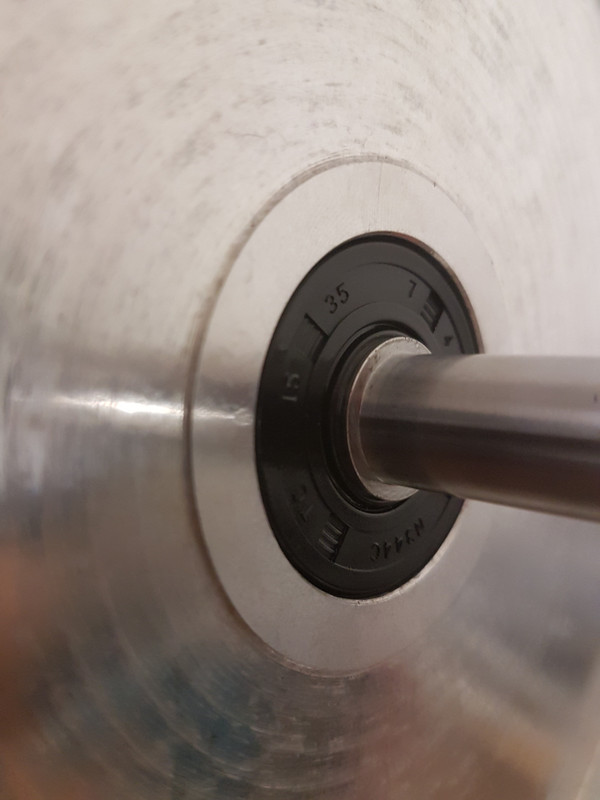
I wiped it clean one time at night, and in the morning there was oil back out on the volute. This led me to believe that it could be the rear seal.

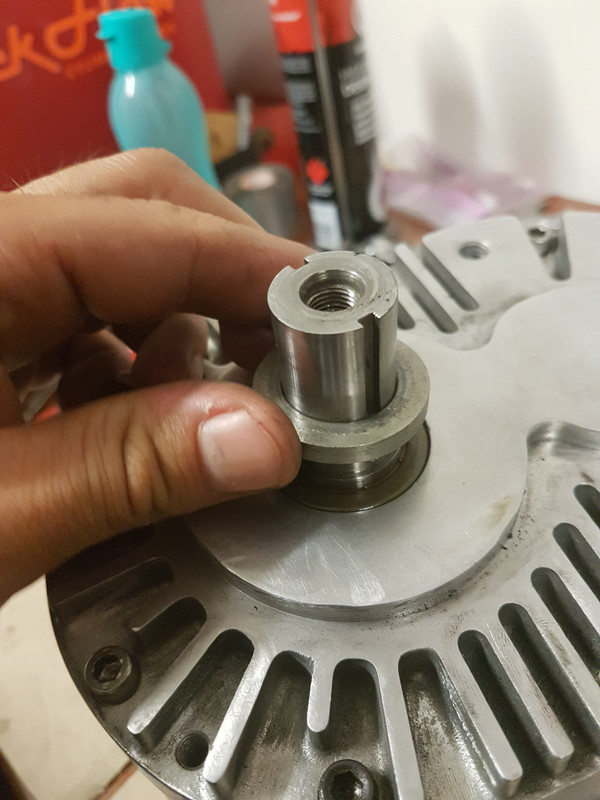
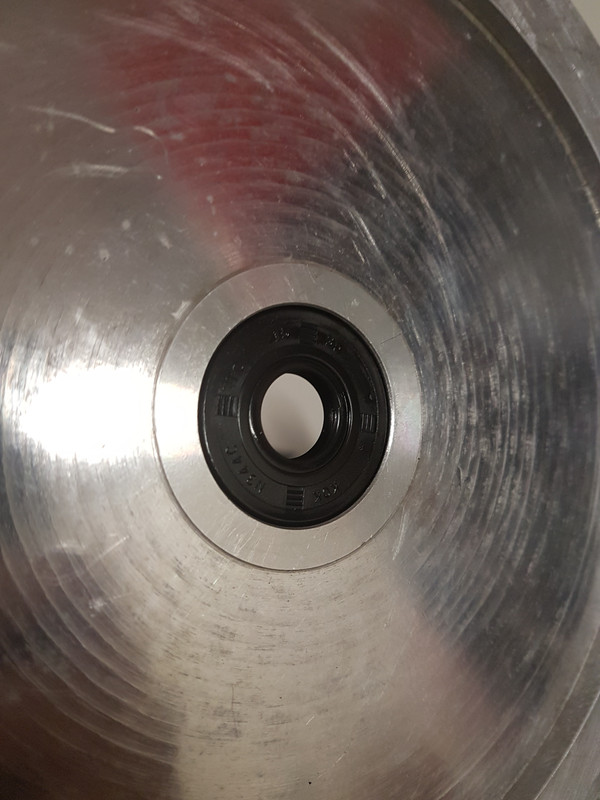
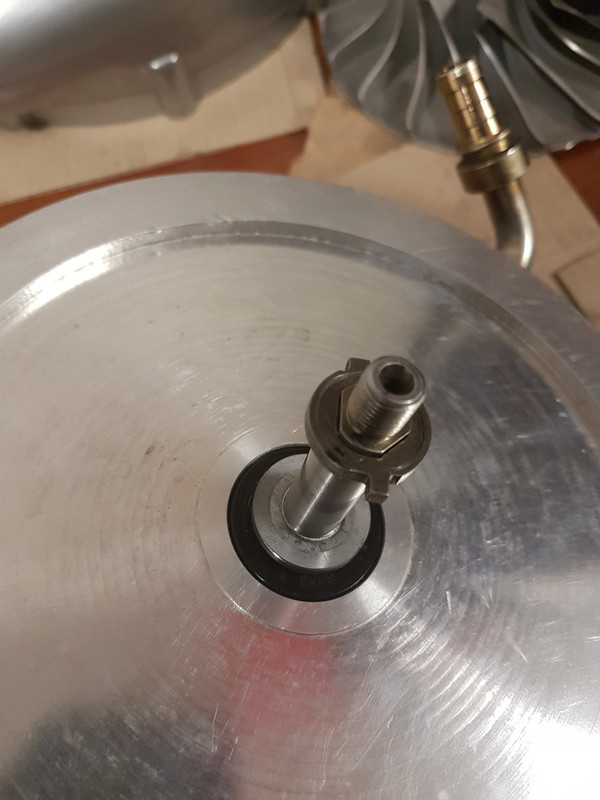
So I bit the bullet and tore it apart again this morning. I bought a replacement seal from cbc. It was a nitrile rubber seal, unlike the viton seals that are now sold aftermarket and the one that was one there. However stock they were nitrile, so can't be that bad. Cost me about $7. Thanks to George for getting the part number on that one. This is a single lip seal. CBC did have twin lip, but they had to order them in. The second lip on the seal is to keep dirt out. Seeing as though this is under the hood in a fairly clean environment, I just went with the single lip this time.

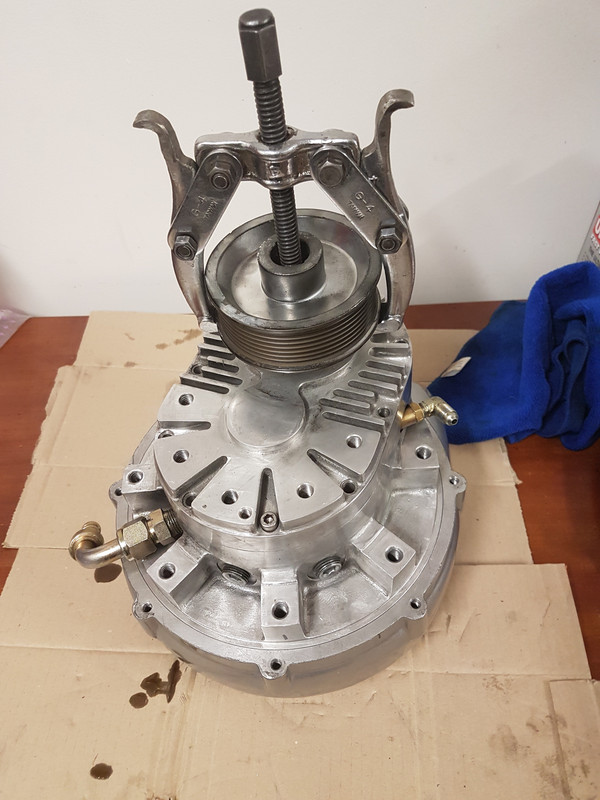
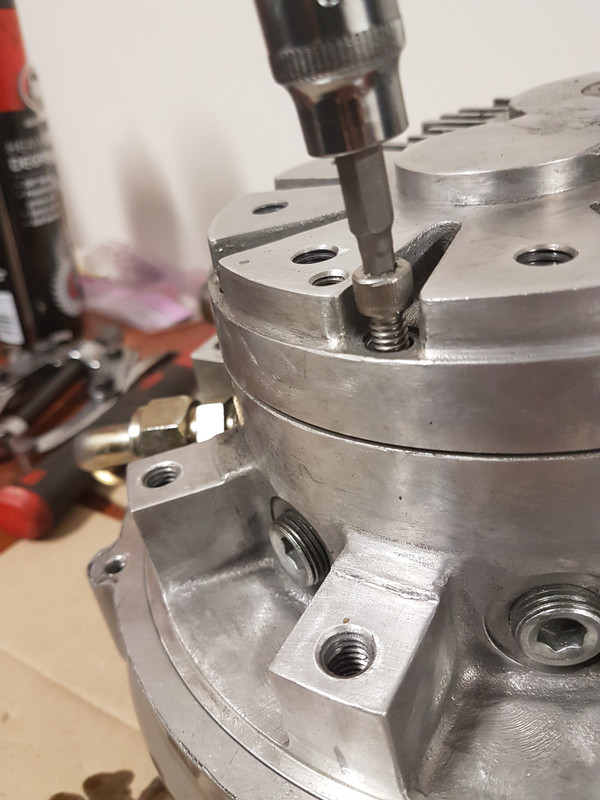
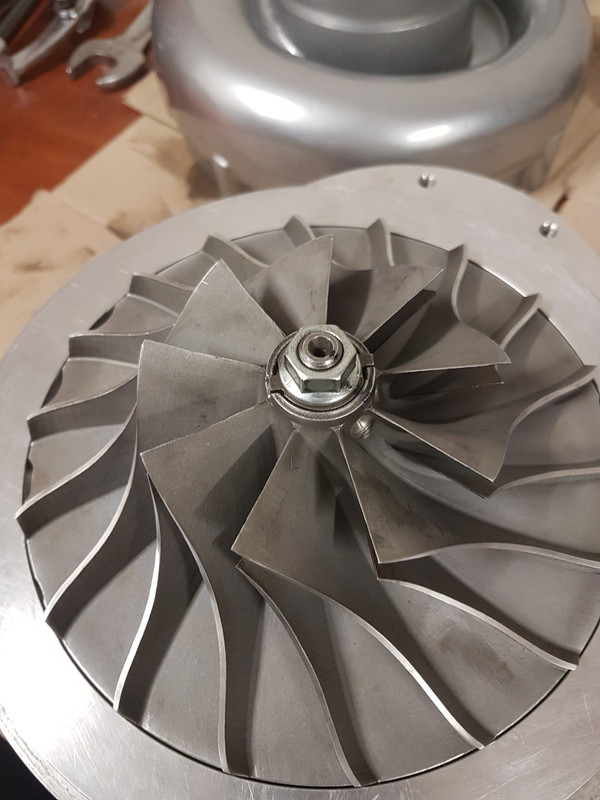
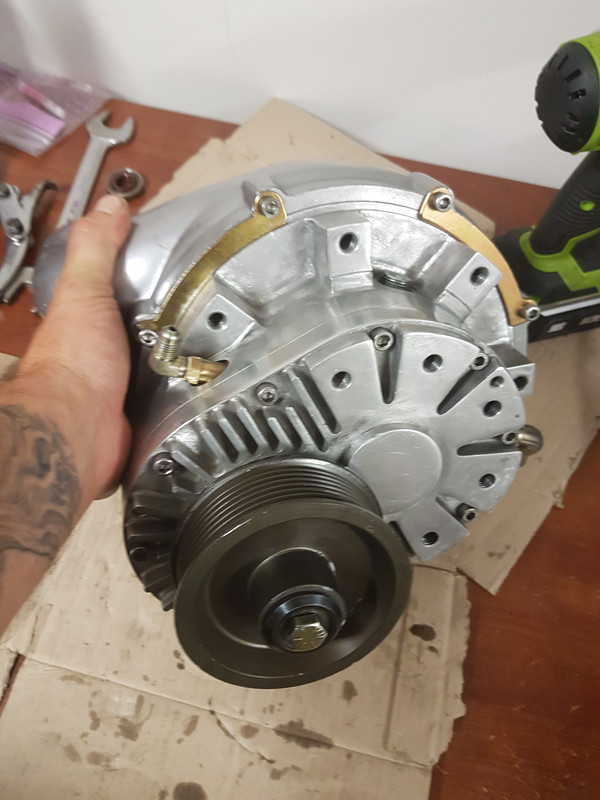
So i thought I'd take some photos. This IS NOT a how to guide. I am not a mechanic or a supercharger guru, very far from it. I am posting this as the pictures may help someone for whatever reason in the near future or 50 years from now. Again, i may have done this completely wrong, so this IS NOT a how to guide. I have worded it accordingly. :cheers:

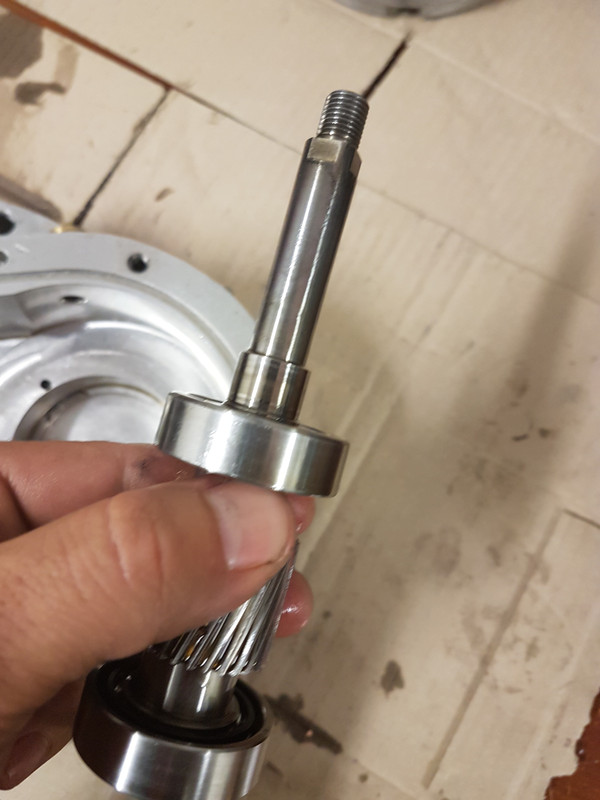
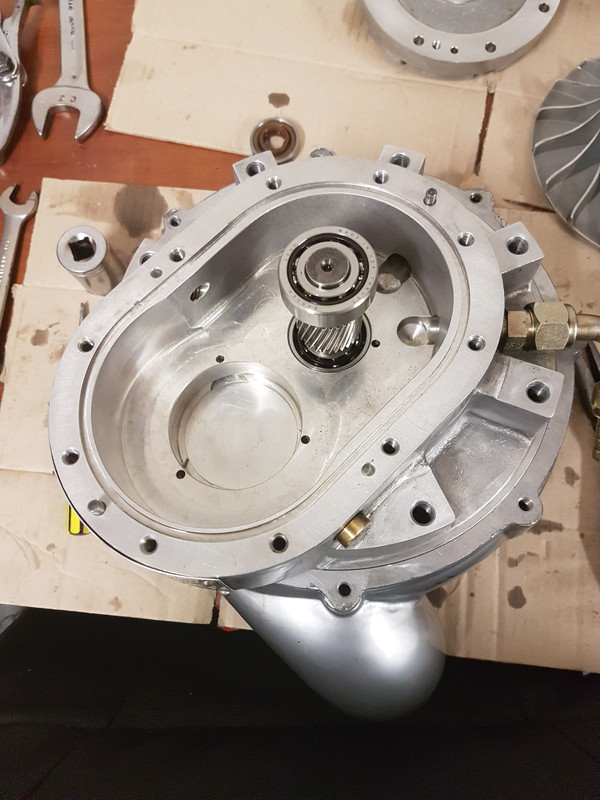
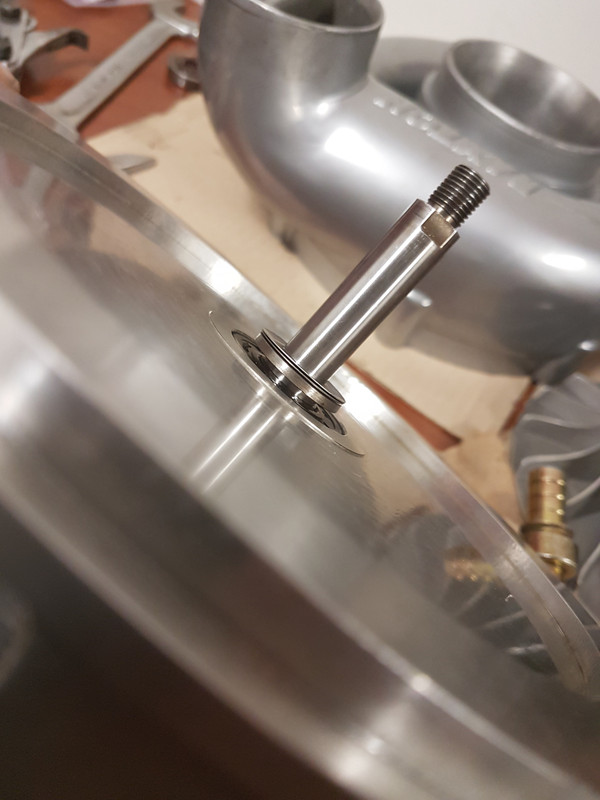
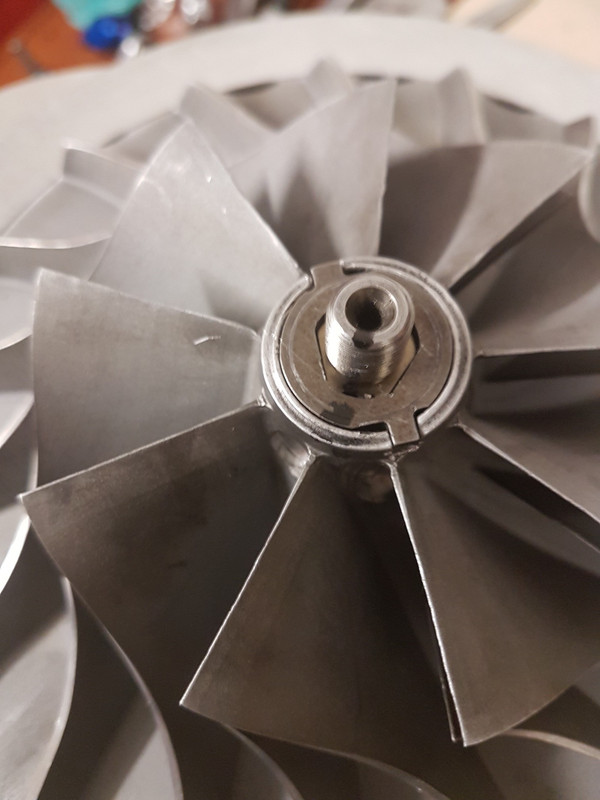
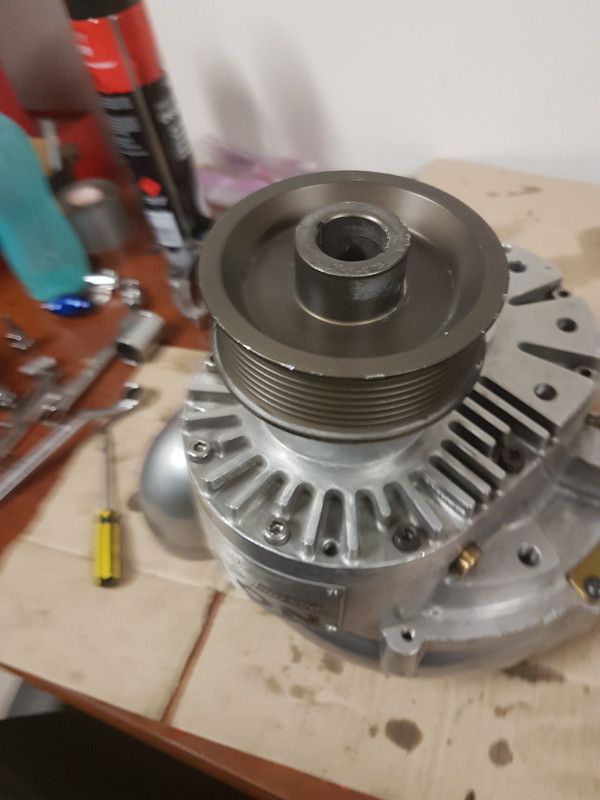
This is a novi 2000 gen 1. The gen 2 has a different rear seal, where it uses a mechanical seal. So when it comes to putting the impeller on, it will be different. You'll see later on. Apart from that I believe the gen 1 and gen 2 are very similar.

Some of the pics weren't taken in order as I forgot to take a couple, so just go with it.
Last edited by Husky65 on Sun Mar 18, 2018 8:50 am, edited 6 times in total.
Husky65
Mustang Star
Mustang Star
Posts: 955
Joined: Sun Jun 21, 2015 11:53 pm

Re: Supercharger seal replacement

Post by Husky65 »

After removing the novi, which in my case is very easy thank god, I removed the drain hose and let it drain as much as I could.
I then removed the pulley bolt with an impact gun, and the locating spacer underneath it. I then removed the pulley with a pulley puller.
Image

Once I removed the pulley, I removed the two keys that are on the side of the shaft. They are not pressed on, but were tight, so I just used a blunt flat head and gave them a shimmy, and they popped off. From there I removed the spacer that sits at the bottom of the pulley shaft.

Image

Image

After that I removed the allen key bolts that go all round the gear cover. I had to be careful as they can strip very easily. From factory they were tight, and I almost stripped on the first time with an ill fitting hex socket.

Image
Last edited by Husky65 on Sun Mar 18, 2018 8:48 am, edited 1 time in total.
Husky65
Mustang Star
Mustang Star
Posts: 955
Joined: Sun Jun 21, 2015 11:53 pm

Re: Supercharger seal replacement

Post by Husky65 »

Once the all the allen key bolts are removed, I gave the cover a light tap with a rubber mallet, and it lifted straight off. There are two holes that can be used to screw a bolt into which will then raise the cover off, however I had no need to come to that. I didn't want to use a screw driver to lever it off, as there is a reuseable rubber seal under the cover, and I could ruin it very easily.

Once the cover is removed, there are some washers and a wave washer sitting on the impeller bearing. I removed these and noted how they sat.

Image

Image

Image

I then removed the rubber seal from around the case. There is a small machined hole under the seal, where I fit a small blunt flat head and carefully removed the seal.

Image

After that, I removed the pulley gear and bearing assembly. With a slight wiggle it comes straight out. Didn't have to use any force what so ever.
Image

Underneath the pulley assembly, there is a large split washer. I removed that and kept it with the pulley assembly.

Image

Image
Last edited by Husky65 on Sun Mar 18, 2018 8:16 am, edited 1 time in total.
gbx78
Mustang King
Mustang King
Posts: 2973
Joined: Wed Jun 29, 2011 10:31 pm
Contact:

Re: Supercharger seal replacement

Post by gbx78 »

' Welcome mate. This should be in the tech section. Great writeup. The ever sooo secret of seals has now been resolved. I refused to pay $120aud for 2 seals that are standard off shelf part at CBC!.. the Huskey and Gbx novi seal packages are now available in the store lol.. come one come all..
'You can never test fire too many times.' - Hybrid

'You can never have too many gauges' -
Boofhead
Husky65
Mustang Star
Mustang Star
Posts: 955
Joined: Sun Jun 21, 2015 11:53 pm

Re: Supercharger seal replacement

Post by Husky65 »

From here, I removed the volute by removing the volute fasteners. There are 3 clamps and 6 allen key bolts. Again, these strip very easily. Once they were removed, I could remove the volute easy peasy

Image

Now I could see the impeller. I marked the position of the nut and shaft with a black marker, and then removed the nut with an impact gun.
There is a key on the end of the shaft, this I removed using a small flat head screwdriver. It was tight the first time, but easy once it has been taken off the second time around.


Image

Image

Image

Image
Husky65
Mustang Star
Mustang Star
Posts: 955
Joined: Sun Jun 21, 2015 11:53 pm

Re: Supercharger seal replacement

Post by Husky65 »

The first time I did this, I heated up the impeller with a blow torch, as various forums had advised that this would allow the impeller to expand and slide off the shaft. It never worked for me. I could never get it to the stage where I could remove it by hand. And it was getting bloody hot. Not wanting to ruin the impeller, I went to the press.

So this time around, straight to the press. I have a cheap small 10t press, which works fine for what I use it for. I pressed the shaft down until it was level with the impeller, and then used a small long socket that would fit inside the impeller shaft bore, and pressed the shaft off. I made sure to hold the imbeller bearing assembly with my hand under the case, as once the shaft assembly is pressed out of the impeller, it would fall onto the ground if you weren't holding it(and probably send bearing throughout the garage).

Image

This is the backside of the impeller. Marking are from factory, maybe balancing remarks??
Image

Underneath the impeller, there is a spacer and some washers. I noted how they were set, and then removed them, cable tying them to the impeller as not to lose them.

Image

Image

Image

This is the impeller gear/bearing assembly

Image
Last edited by Husky65 on Sun Mar 18, 2018 8:35 am, edited 2 times in total.
Husky65
Mustang Star
Mustang Star
Posts: 955
Joined: Sun Jun 21, 2015 11:53 pm

Re: Supercharger seal replacement

Post by Husky65 »

My pretty new seal had a fair bit of oil on the outside. Didn't look damaged, but definitely didn't seem like it was sealing as it should.
So using a mallet and a socket I just punched that out. The new seal from CBC, I was able to put in by using a socket and a mallet gently. The last seal I had to use a press.(I probably didn't have to but it was a bit tighter).

Image

Time for re-assembly. I didn't replace the front seal, as I had done that previously. It is easy as piss. All I did was tap it out with a socket/mallet, and then the same to install it.
As I mentioned in my build thread, I initially had dramas getting the shaft through the seal without damaging the lip. The impeller shaft is the harder one, as you can't manipulate the shaft by hand, as the bearing starts to seat before the thick part of the shaft goes through the seal.
So I used part of a clamp, that I put in the seal, and then expanded it with needle nose pliers. This then allowed the shaft to get through the lip of the seal, and then push the clamp out as you seated the bearing assembly. I had to lightly tap with a mallet to seat the impeller assembly fully by tapping on the shaft. Once the shaft is fully seated, I could see the lip of the shaft poking out of the seal.

Image

Image


I then put the case back on the bench and let it rest in the volute.

Image


From there , I put the large split washer in the pulley bearing assembly hole, and then placed the assembly back in. I had to be careful to make sure the gears engage eachother without forcing them. Once they do, it dropped in very easily. No tapping was needed.

Image

Then I put the large o ring seal back in the case. This was easily done by hand. I then put the washers and wave washer back on top of the impeller bearing, and let it rest there.

Image
Last edited by Husky65 on Sun Mar 18, 2018 8:52 am, edited 1 time in total.
Husky65
Mustang Star
Mustang Star
Posts: 955
Joined: Sun Jun 21, 2015 11:53 pm

Re: Supercharger seal replacement

Post by Husky65 »

I then used another torn apart clamp in the pulley seal(larger one), and placed this carefully on, ensuring the washers on the impeller bearing went into their housing. The lid was then pressed on with hand force. Light tapping of a mallet was used, but probably not needed.

Once it was on, I installed all the lid allen key bolts. They were torqued to 'tight but not too tight'.

Image

Image

I then turned it around, and placed the spacer and washers back on the impeller shaft. I made sure these sit on the bevel of the thick part of the shaft that passes through the seal, and not on the seal. I believe the gen 2's and other vortechs use a mechanical seal, and pressure is actually put on the seal, unlike this one.

Image

Image
Husky65
Mustang Star
Mustang Star
Posts: 955
Joined: Sun Jun 21, 2015 11:53 pm

Re: Supercharger seal replacement

Post by Husky65 »

Now comes the fun part. Much easier second time around I will add.
The impeller shaft key that was removed only fits the shaft one way, and also the impeller one way. However the impeller can physically go on the shaft any way you want. So if I put the impeller on, and then the key doesn't fit, I would have to remove the impeller by fully taking apart the SC again. Hell No!

So all I did was place the key on the shaft, and mark the key and the shaft in a straight line with a marker. I then placed the key in the impeller, placed it over the shaft, and looking through the impeller bore, lined up the mark on the key with the line on the shaft. I tapped the impeller lightly with a mallet so it mates with the shaft and doesn't move.


Image

Image

Image

Image

Image
Last edited by Husky65 on Sun Mar 18, 2018 8:33 am, edited 2 times in total.
Husky65
Mustang Star
Mustang Star
Posts: 955
Joined: Sun Jun 21, 2015 11:53 pm

Re: Supercharger seal replacement

Post by Husky65 »

Once I tapped the impeller on, I took it over to the press and pressed it on. I pressed it on all the way until it hit the washers/spacers, as it physically can't go any further down than that.
Then I put the key on and breathed a sigh of relief as everything lined up.
Image

Image

I then used an impact wrench to tighten the impeller nut so that the mark I put on it earlier lined up with how it was previously. I then dry fit the volute, spun the shaft and made sure the impeller wasn't hitting anything it shouldn't. All good!

Image
Husky65
Mustang Star
Mustang Star
Posts: 955
Joined: Sun Jun 21, 2015 11:53 pm

Re: Supercharger seal replacement

Post by Husky65 »

I then installed the three volute clamps and the six allen key bolts.
Image


After that installed the pulley, which was a reverse of the removal. The washer went on. Then the two keys were put in the shaft. The pulley was then tapped home with a rubber mallet. Only need light tapping. I could have used a pulley installer, but I didn't think it was necessary as it wasn't that tight.
The bolt was then installed with an impact gun.


Image

Image

Image
Last edited by Husky65 on Sun Mar 18, 2018 8:36 am, edited 3 times in total.
Husky65
Mustang Star
Mustang Star
Posts: 955
Joined: Sun Jun 21, 2015 11:53 pm

Re: Supercharger seal replacement

Post by Husky65 »

And there it is. Now we will see how bad of a job I did once I take it for a drive tomorrow!


Not including pulling it off the car, which takes about 30min, it took about 1 hour to do this the second time. Easy stuff!
Image

Image
Husky65
Mustang Star
Mustang Star
Posts: 955
Joined: Sun Jun 21, 2015 11:53 pm

Re: Supercharger seal replacement

Post by Husky65 »

gbx78 wrote:' Welcome mate. This should be in the tech section. Great writeup. The ever sooo secret of seals has now been resolved. I refused to pay $120aud for 2 seals that are standard off shelf part at CBC!.. the Huskey and Gbx novi seal packages are now available in the store lol.. come one come all..
It can be our retirement fund!

I'd prefer this not to be a tech article, as this is not a how to guide, just pictures of how I boobed around handling random tools I don't know how to use properly. I would hate for someone to follow my lead and ruin their SC or even worse their motor.
gbx78
Mustang King
Mustang King
Posts: 2973
Joined: Wed Jun 29, 2011 10:31 pm
Contact:

Re: Supercharger seal replacement

Post by gbx78 »

Well its a bloody good writeup.. all the bits that are missing from other articles you have shown quite clearly. . Filled in the gaps :badabing:

Are you saying i cant book mine in with you? lol ill run through your article but may need some help if i get stuck.. i really should do mine.. aftet easter break seems like a good time to start..
'You can never test fire too many times.' - Hybrid

'You can never have too many gauges' -
Boofhead
Husky65
Mustang Star
Mustang Star
Posts: 955
Joined: Sun Jun 21, 2015 11:53 pm

Re: Supercharger seal replacement

Post by Husky65 »

Happy to help mate! I'd leak to see the mechanical rear seal setup on yours.

Another thing to add.

I ran the supercharger this arvo before putting the intake tubing back on, to make sure there was no catastrophic dramas before I re-installed everything. The amount of air this SC pushes out at idle is huge. I was blown away(not literally) by how much air was coming out of the discharge at idle. The bypass valve I have is no way venting most of it. I would say maybe half of it, and it's not a small bypass.
I am thinking of either adding a second bypass, or using a larger one, like the Procharger big red versions. If it can't vent a large majority at idle, I'd hate to see what's happening when you come off throttle high up in the rev range.
Last edited by Husky65 on Sun Mar 18, 2018 8:56 am, edited 1 time in total.
Post Reply